Enterprise Connect for Office 365 and Exchange (EWS)
Read as MarkdownFollow the steps in this process to create an account with the correct permissions to connect your calendar service to the software provider. This connection process is hosted by Cronofy and it allows the Cronofy calendar sync engine to access to your calendar service and, in turn broker that access out to your software provider.
The following diagram describes the system boundaries.

The Service Account is used to control access over Boundary B.
Step 1: Create a Service Account #
Firstly, create a new Service Account to use with Enterprise Connect. Help on how to do that, can be found in our guide to creating a Service Account. The Service Account will be used to impersonate rooms or users when managing events.
Step 2: Configure the Service Account #
There are three levels of access to an end-user’s Mailbox that can be applied to a Service Account.
- Full
- Restricted
- Free/Busy
Note: The Service Account must have an Office 365 E3 license or higher to sync users. In order to list resources, the Service Account must also have an active mailbox associated with it.
Full #
Full access is configured by granting the ApplicationImpersonation role to the Service Account created in Step 1. This role allows the account to access a subset of users and/or the entire organization as desired. Help on how to do that, can be found in our guide on configuring ApplicationImpersonation.
Restricted #
This still requires the Service Account be granted the ApplicationImpersonation role but that access is limited to specified folders in an end-user’s Mailbox.
Typically with Cronofy, this would be limited to Calendar folders only, thus explicitly preventing access to email data.
Whilst Cronofy doesn’t access any folders other than Calendar folders in a Mailbox, this gives confidence that Cronofy can’t access any other folders.
More information in our guide to controlling Mailbox permissions.
Free/Busy #
Granting the Service Account AvailabilityOnly -AccessRights permission on Mailboxes will ensure that only Free/Busy data is available to Cronofy across Boundary B.
Using this level of access will prevent the Integrator’s application from creating events directly into end-user’s calendars. You should check with the Integrator that their application is able to operate with this level of access before configuring in this way.
More information in our guide to Free/Busy Only Access.
Step 3: Test your credentials #
Next, we’d recommend you test your Service Account using the Microsoft Remote Connectivity Analyzer. You’ll need the credentials for the Service Account created in Step 1, as well as the email address of a user or resource mailbox configured for impersonation. If you don’t have Autodiscover configured for your domain then you will also need the public Exchange Server URL.
More details can be found about testing in our help article Testing Enterprise Connect configuration for Office 365 and Exchange
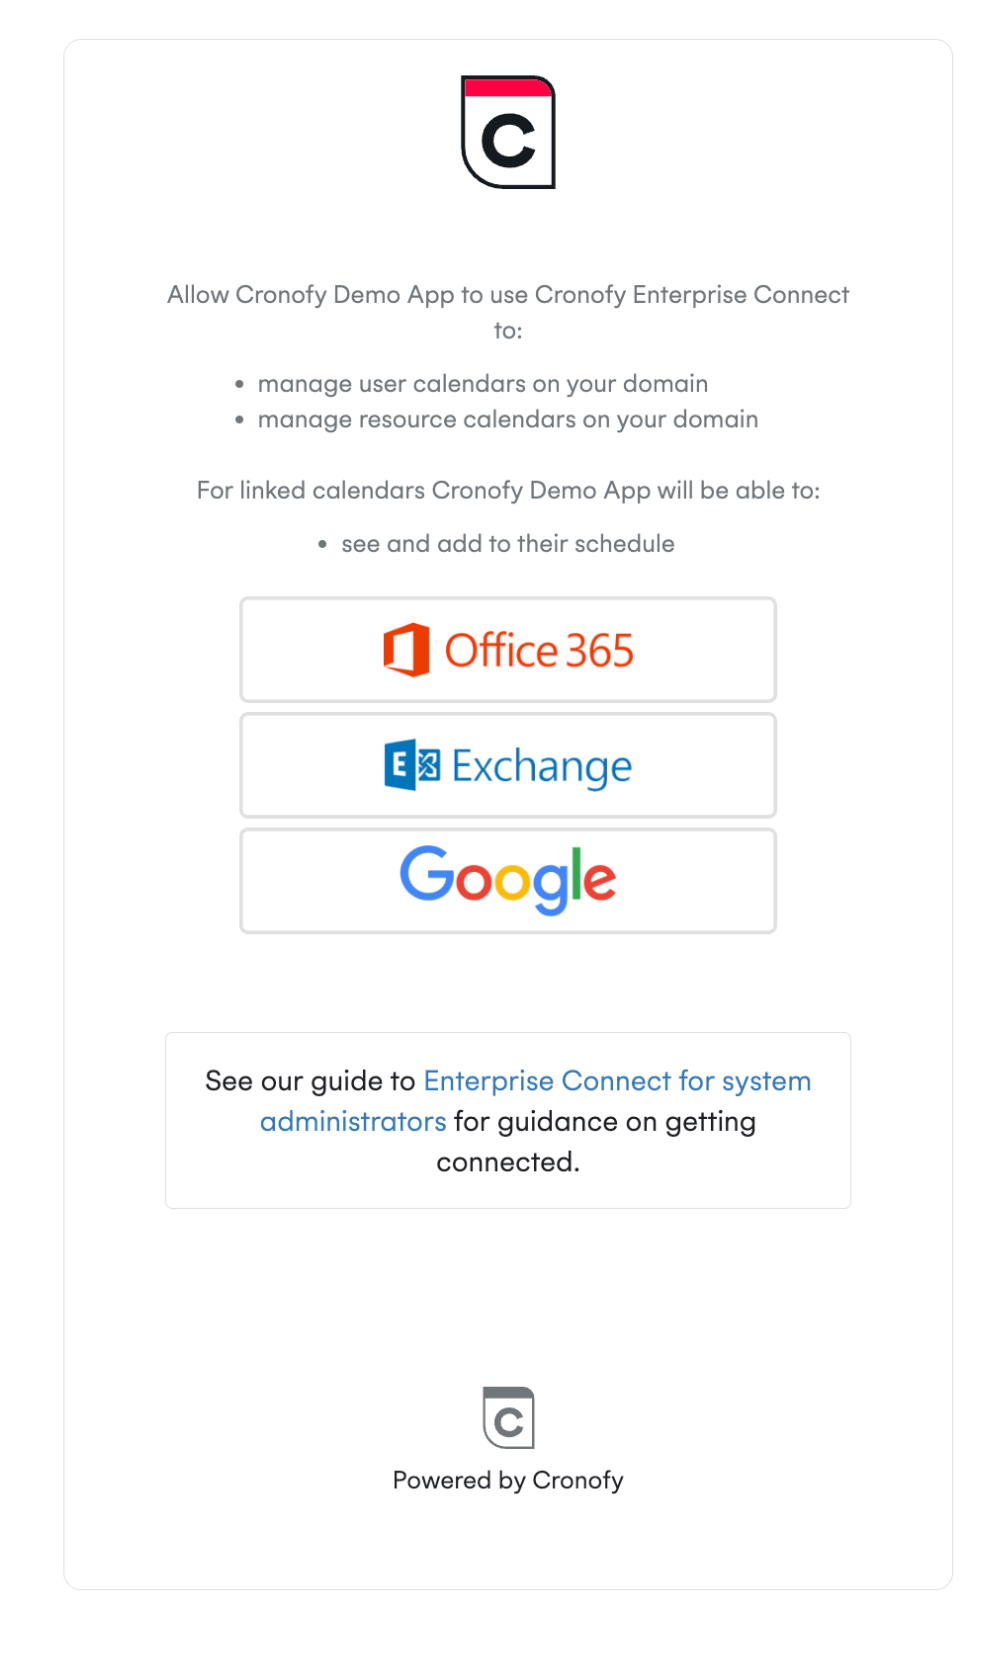
Step 4: Authorizing access #
This corresponds to Boundary A in the above diagram.
Your software provider will provide you with a button or link to follow to connect your calendars with their service.
After selecting Exchange you will see a screen similar to this.
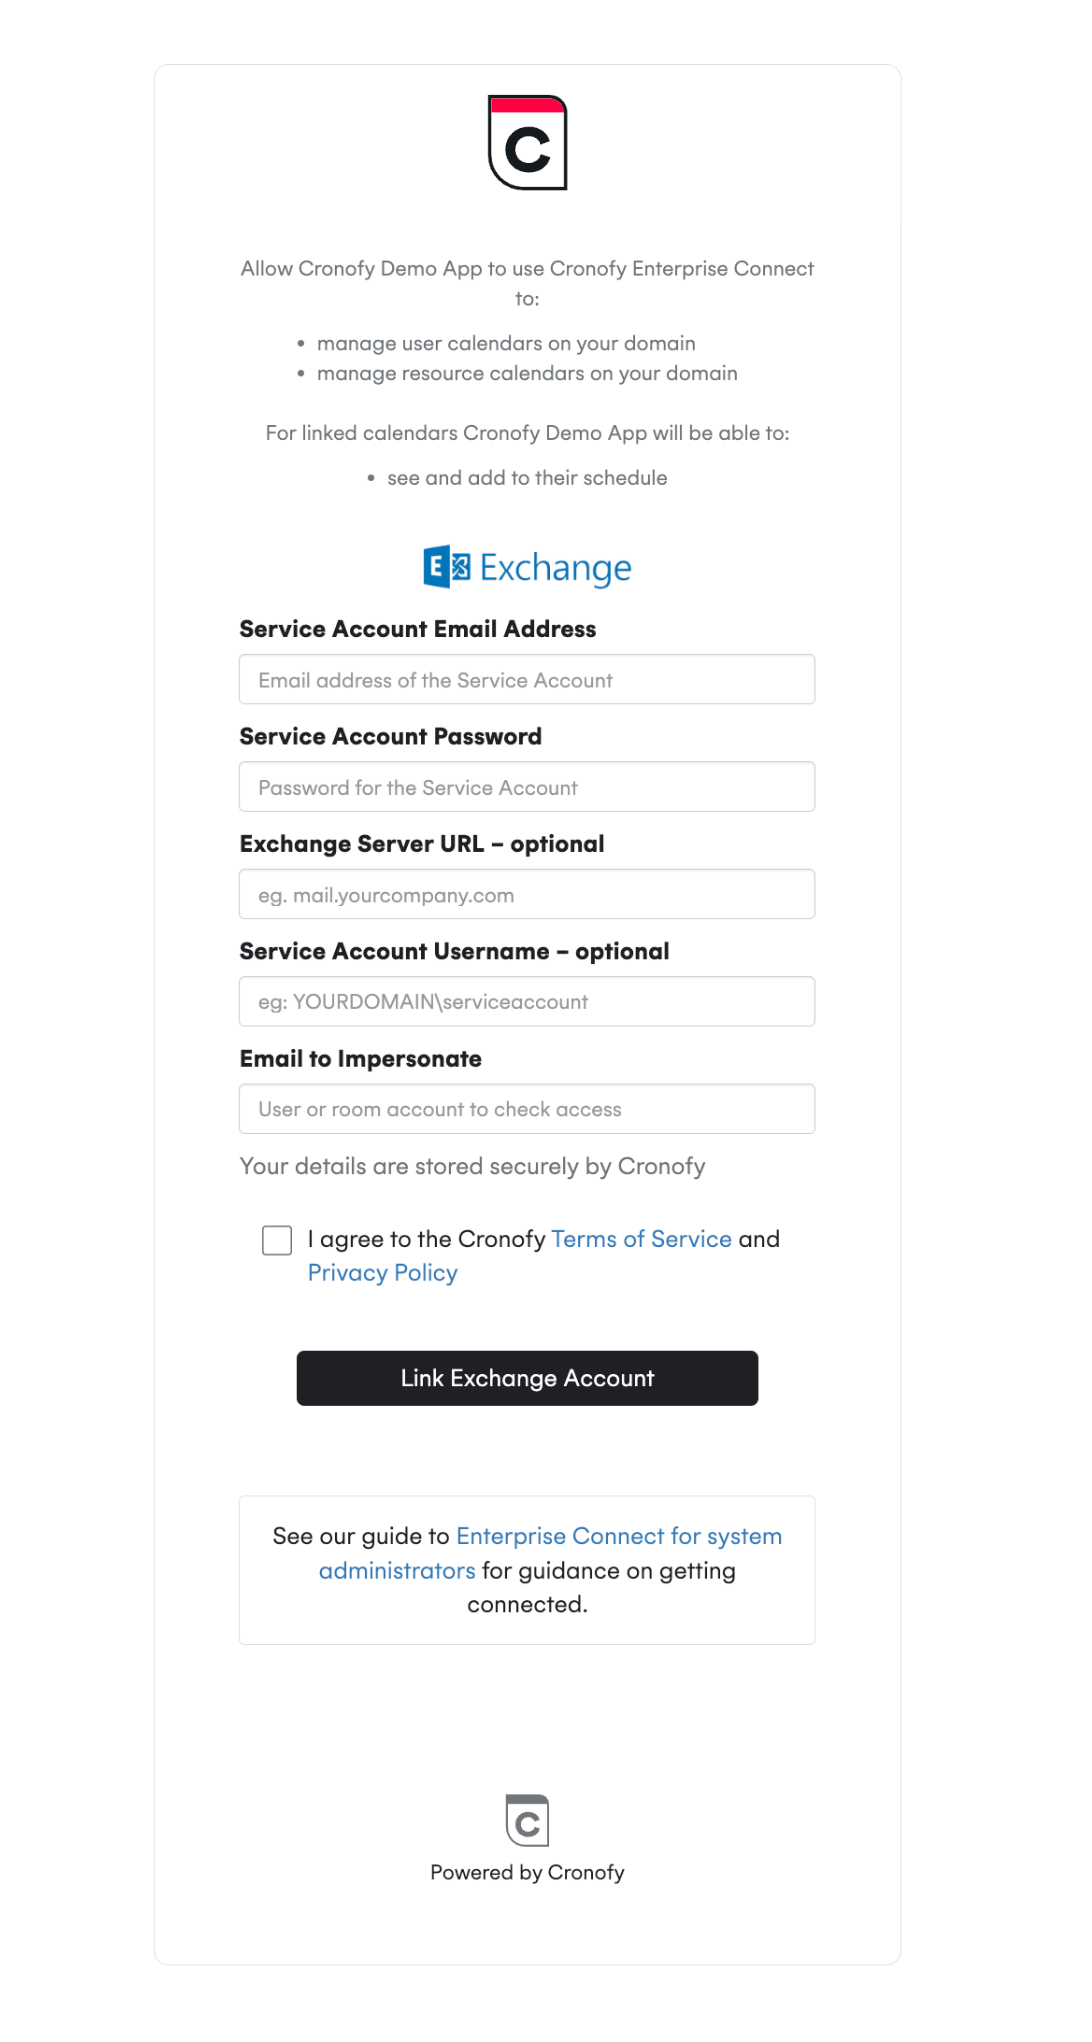
This will verify the Service Account credentials and use them to impersonate the user associated with the Impersonation email. Once complete you will be redirected back to your software vendor’s application and they will be able to synchronize your user/resource calendars.
In This Section
- Configuring a Service account A guide explaining how Exchange should be set up, before you integrate with Cronofy
- Setting up Application Impersonation A guide explaining how to configure the `ApplicationImpersonation` role on Service Accounts in Exchange
- Restricting access to just Calendar folders A guide to providing access to specific mailbox folders to provide stricter access contols to ensure email folders are not accessible.
- Configuring free/busy only access Limiting access to corporate calendars to just free/busy information with Enterprise Connect.
- Controlling Impersonation access with Distribution Groups Follow this documentation to restrict members that a Service Account can impersonate, using Distribution Groups.
- Resources and Room Lists How to configure room lists to allow resources to be accessed.
- Which EWS operations does Cronofy utilize? This document explains which of the functionality EWS provides, Cronofy uses in order to provide Scheduling services.
- How to configure Mailbox Auditing Configuring Office 365 mailbox auditing.
- Testing the Configuration The Microsoft Remote Connectivity Analyzer provides a set of tools to test connectivity setup for a range of Microsoft servers and services. This includes the tests to confirm that the credentials and connectivity required for Enterprise Connect are correct and available.