Limit Cronofy's access by Role-Based Access Control (RBAC)
Read as MarkdownRole-Based Access Control (RBAC) is not compatible with the Free/Busy Calendar Access Mode (the “Cronofy Enterprise for Office 365 - Free/Busy” application). Free/Busy connections use the delegated permissions of the administrator who authorized the service account, rather than application permissions. RBAC only restricts application permissions, so a role assignment applied to other accounts has no effect on a Free/Busy connection.
Setting up Role Based Access Control #
The purpose of configuring Role Based Access Control is to limit the Calendars.ReadWrite scope of the Cronofy Entra application to a specific set of users.
The process of setting up Role Based Access Control will involve the following steps:
- Creating a Service Principal - This is a representation of the Entra application within your tenant that you wish to limit the access of.
- Creating a Management Scope - This is used to define the set of users you wish to limit the application to based on the properties of these objects.
- Creating a Management Role Assignment - This ties together a principal, role, and custom resource scope of access. This assignment acts as the permissions assignment for a service principal performing a role across a scope.
You can set up Role Based Access Control and limit the scope of Cronofy’s application permissions by following the below steps:
Connect to Exchange Online PowerShell. For details, see Connect to Exchange Online PowerShell
Identify the Cronofy application’s Object ID and Application ID:
10bb7e5b-b80b-4e6e-a209-f78581dbc79e. You may confirm this by visiting the Azure Active Directory Enterprise application portal as seen below.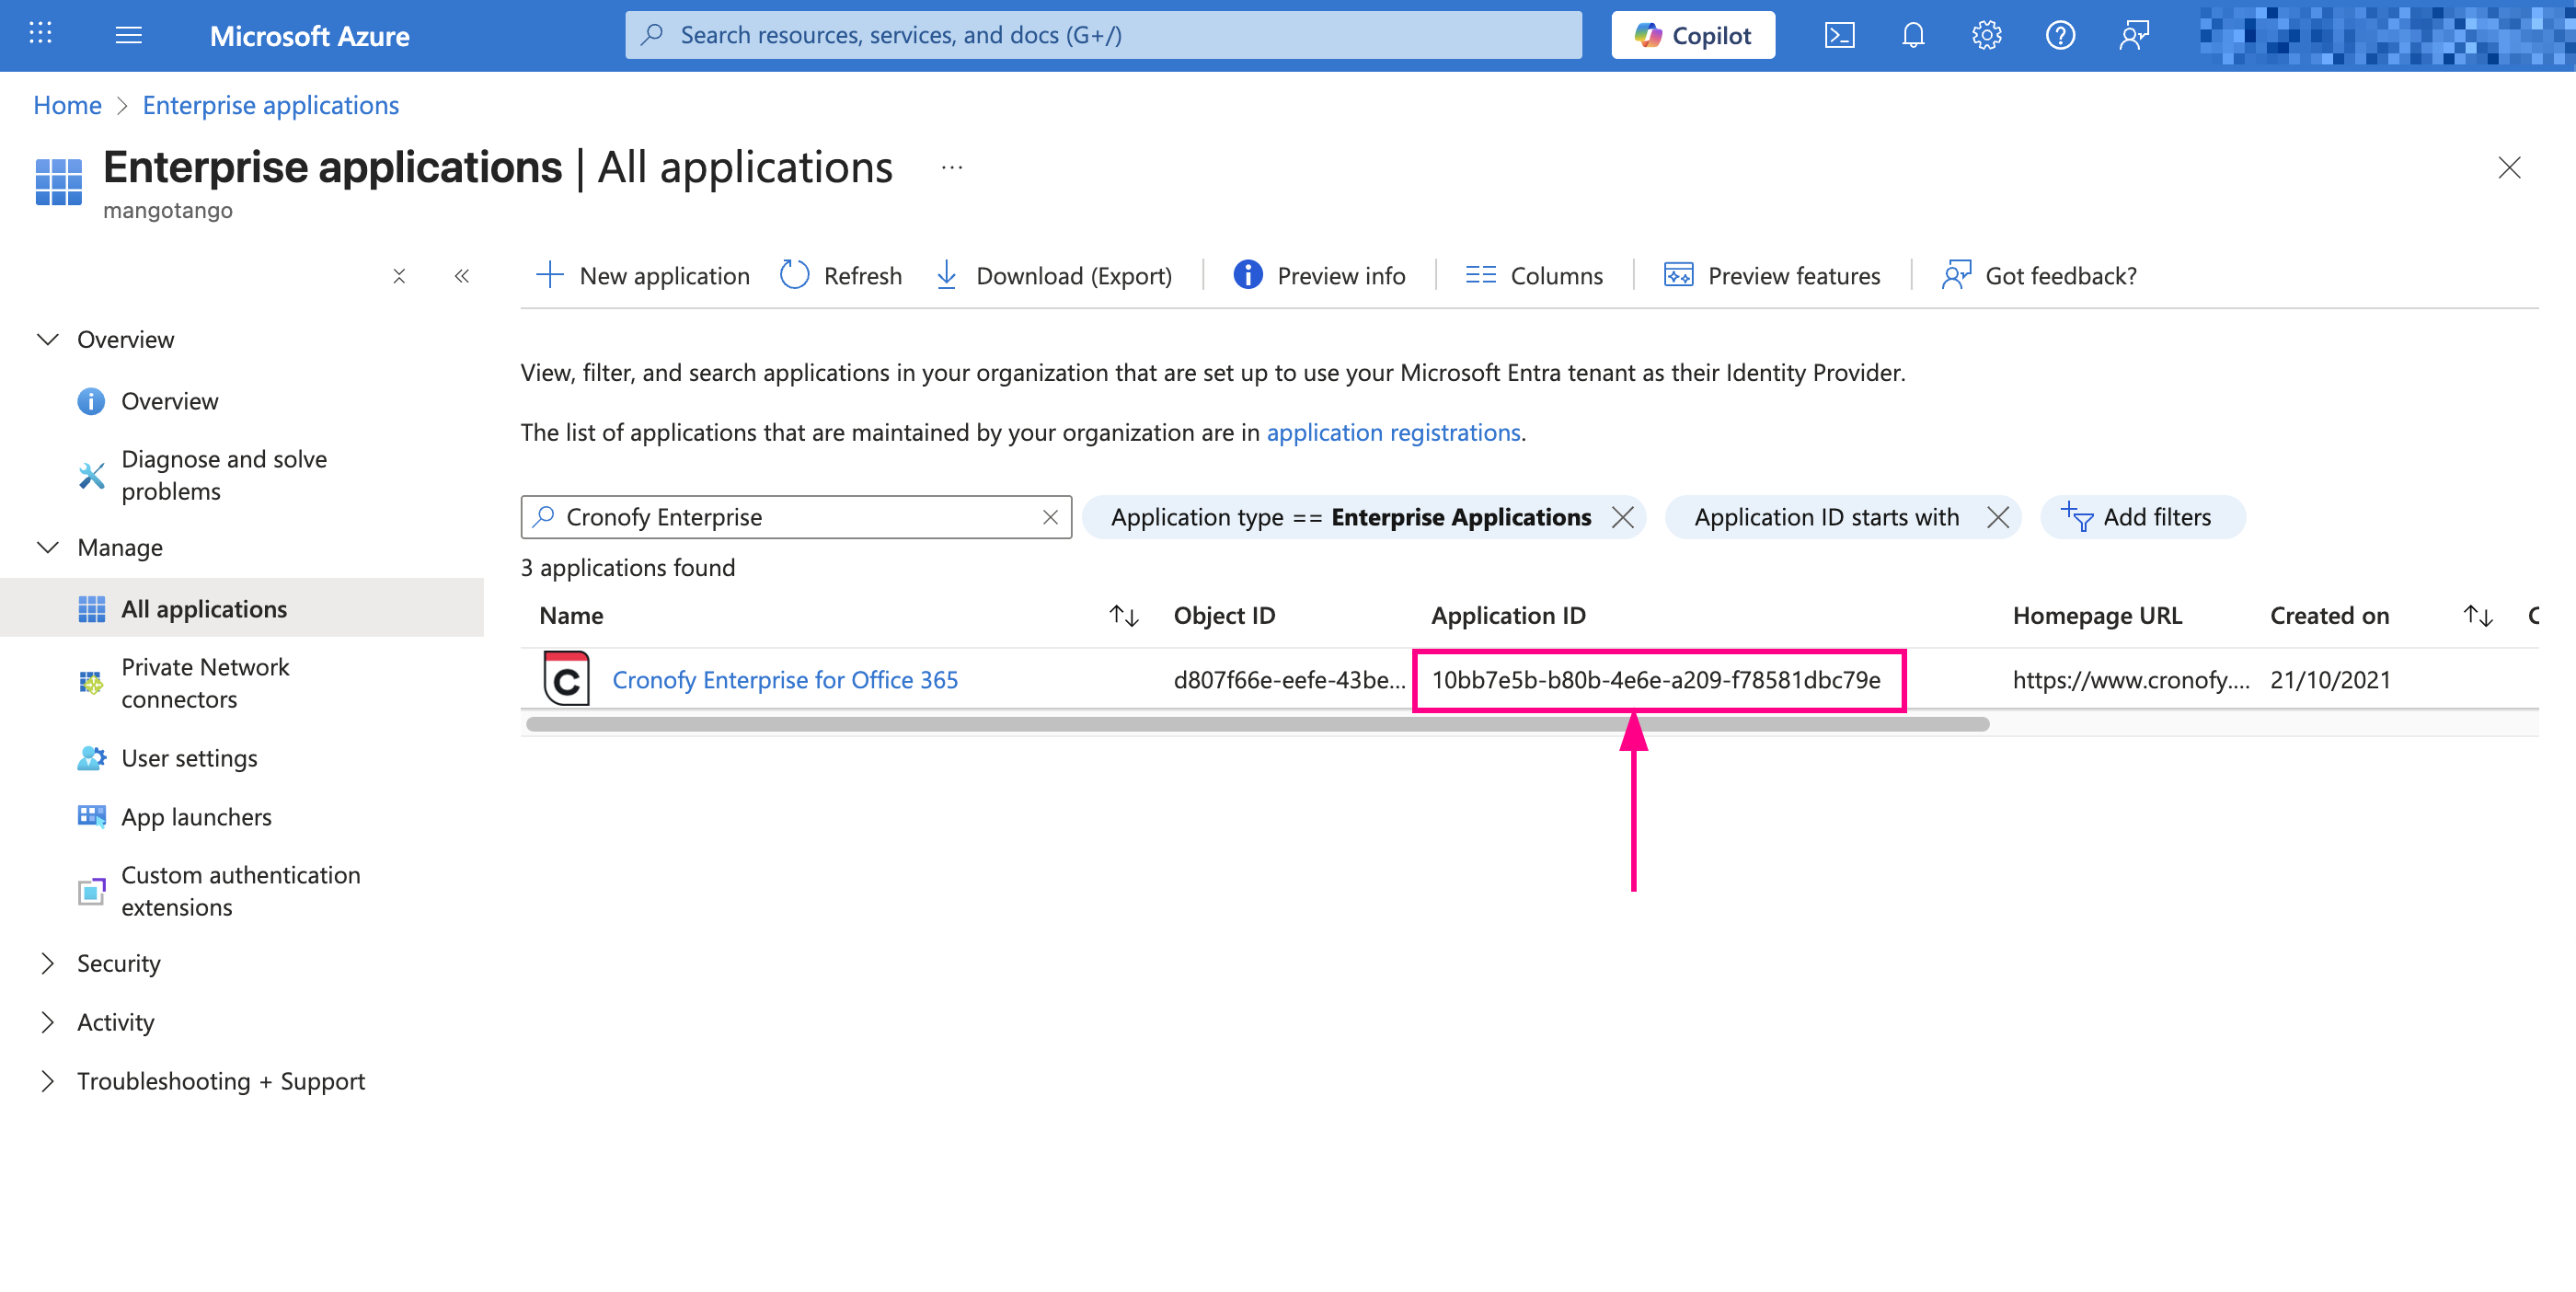
Create a Service Principal. Run the below command, replacing the arguments for ObjectID and DisplayName:
New-ServicePrincipal -AppId 10bb7e5b-b80b-4e6e-a209-f78581dbc79e -ObjectId CRONOFY_APP_OBJECT_ID -DisplayName "Cronofy Service Principal"Create a mail-enabled security group or use an existing one.
4.1 In our example, we created a mail-enabled security group with the name ‘Application Security Group’. You will need the DistinguishedName of the security group you have created in order to create the new Management Scope in the following step. You can get this by running the following command, replacing the argument for Identity:
Get-DistributionGroup -Identity "Application Security Group" | Format-List DistinguishedName4.2 Once you have the DistinguishedName you can then create a new Management Scope by running the following command, replacing the argument for Name and MemberOfGroup:
New-ManagementScope -Name "ApplicationCalendarScope" -RecipientRestrictionFilter {MemberOfGroup -eq 'DISTINGUISHEDNAME'}
Create a New Management Role Assignment for the role ‘Application Calendars.ReadWrite’ associated with the previously created Resource Scope, replacing the argument for CustomResourceScope:
New-ManagementRoleAssignment -App 10bb7e5b-b80b-4e6e-a209-f78581dbc79e -Role "Application Calendars.ReadWrite" -CustomResourceScope "ApplicationCalendarScope"In order for this limitation to take effect you will need to ensure that you’ve removed the tenant-wide unscoped permissions you assigned in Microsoft Entra ID. This is because the permissions assigned using RBAC act in addition to grants you make in Microsoft Entra ID. It is mentioned in the FAQ section of Microsoft RBAC page. You can do this via the below steps:
6.1 Navigate to the Azure Active Directory Enterprise application portal.
6.2 Click on the Application “Cronofy Enterprise for Office 365” and under the Security heading on the left hand side click on Permissions.
6.3 Under the heading Admin consent click on the three dots to the right of the Claim value “Calendars.ReadWrite” and select Revoke Permission. Then click ‘Yes, revoke’.
You can test the authorisation to see whether specific users show as being part of the scope you have just defined by running the below command, replacing the argument for Resource:
Test-ServicePrincipalAuthorization -Identity 10bb7e5b-b80b-4e6e-a209-f78581dbc79e -Resource "EMAIL ADDRESS"The result will include the parameter
InScopewhich will return either True or False, where True indicates Cronofy has access to their calendar data.