Create Integration Trigger
Read as MarkdownThis guide describes how to setup an Integration Services Trigger to notify Cronofy when a Job Application Status changes.
From the Integration Center for your Success Factors instance, choose Create to create new Integration Trigger.
Select the following options:
- Trigger Type: Intelligent Services
- Source Type: SuccessFactors
- Destination Type: REST
- Format: JSON
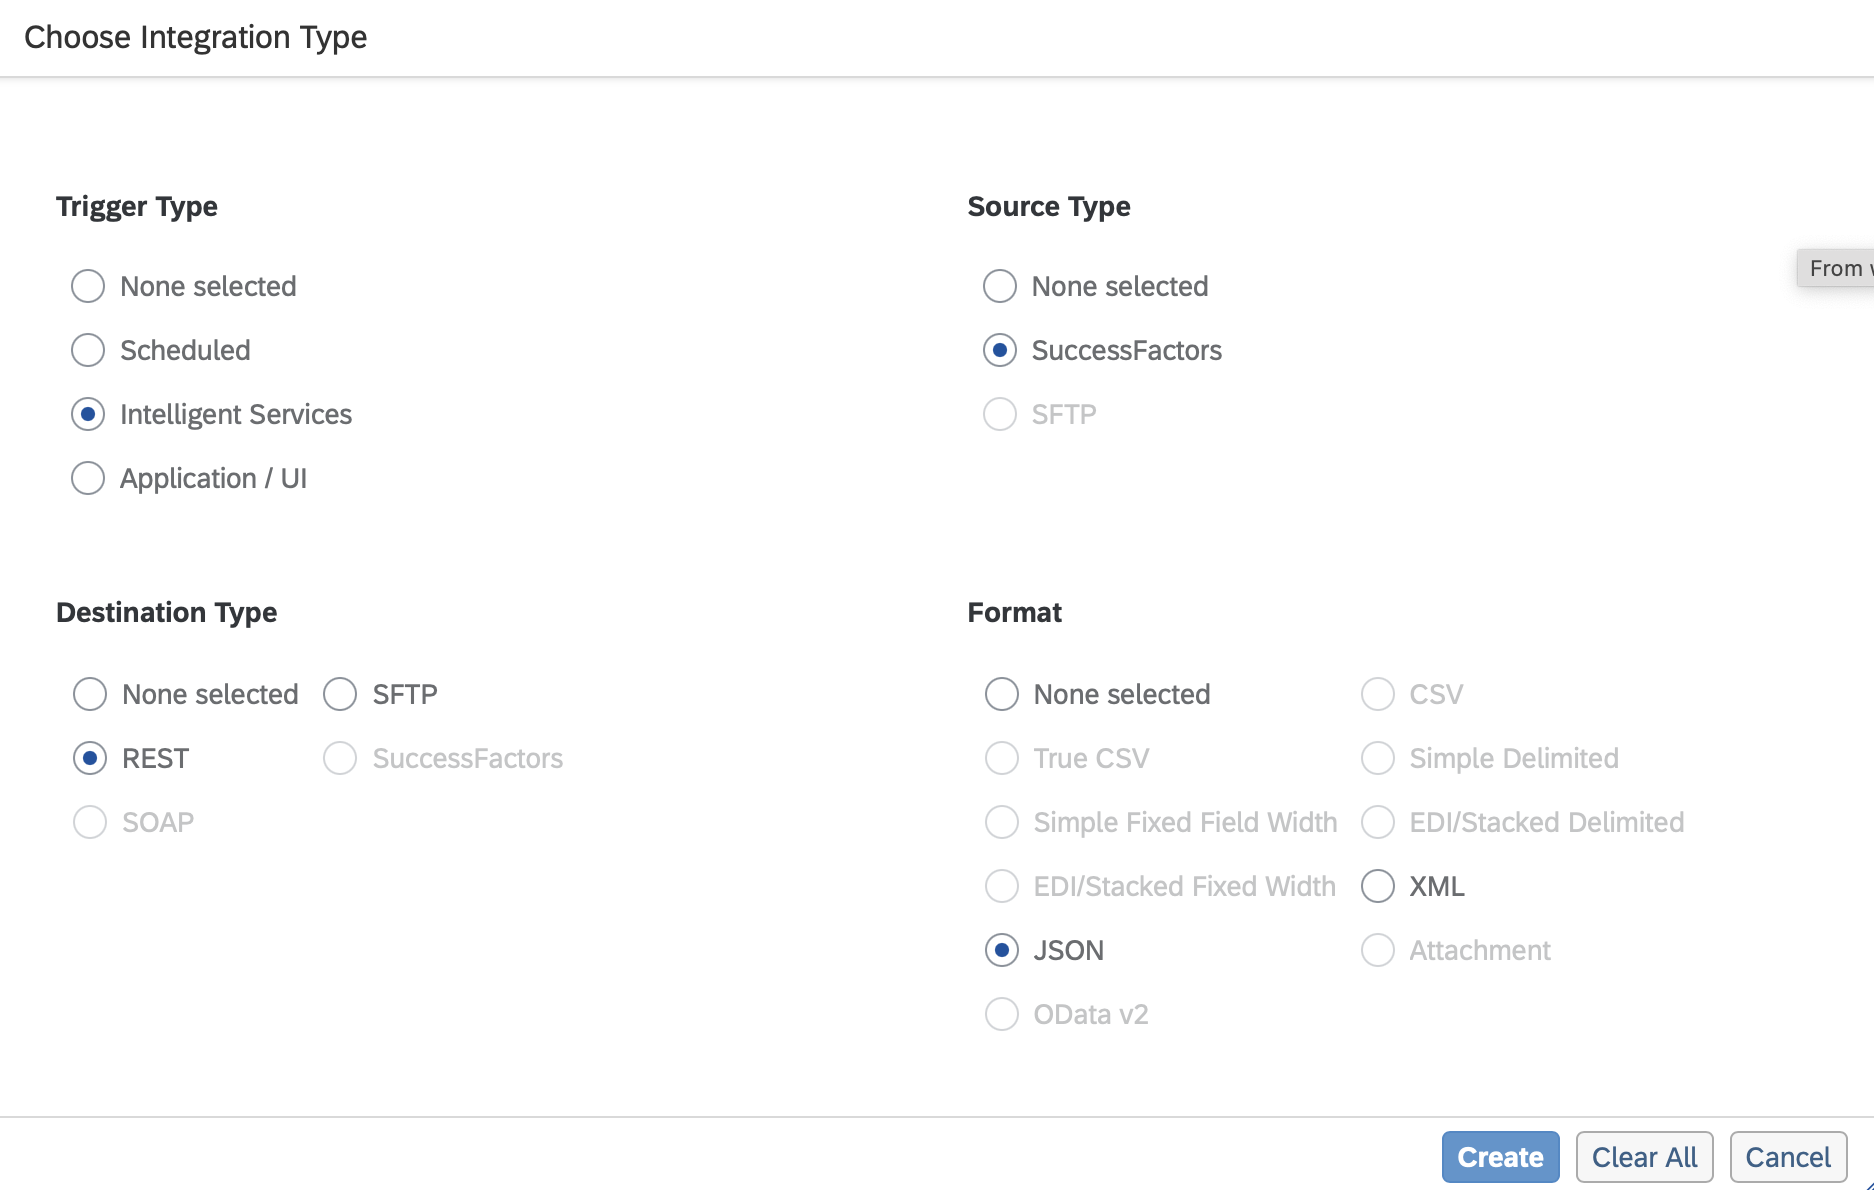
Click Create.
Search for and select Update of Job Application Status and then click Select.
You’ll then be presented with a page that looks similar to the below image and you need to configure the fields as outlined in the next steps.
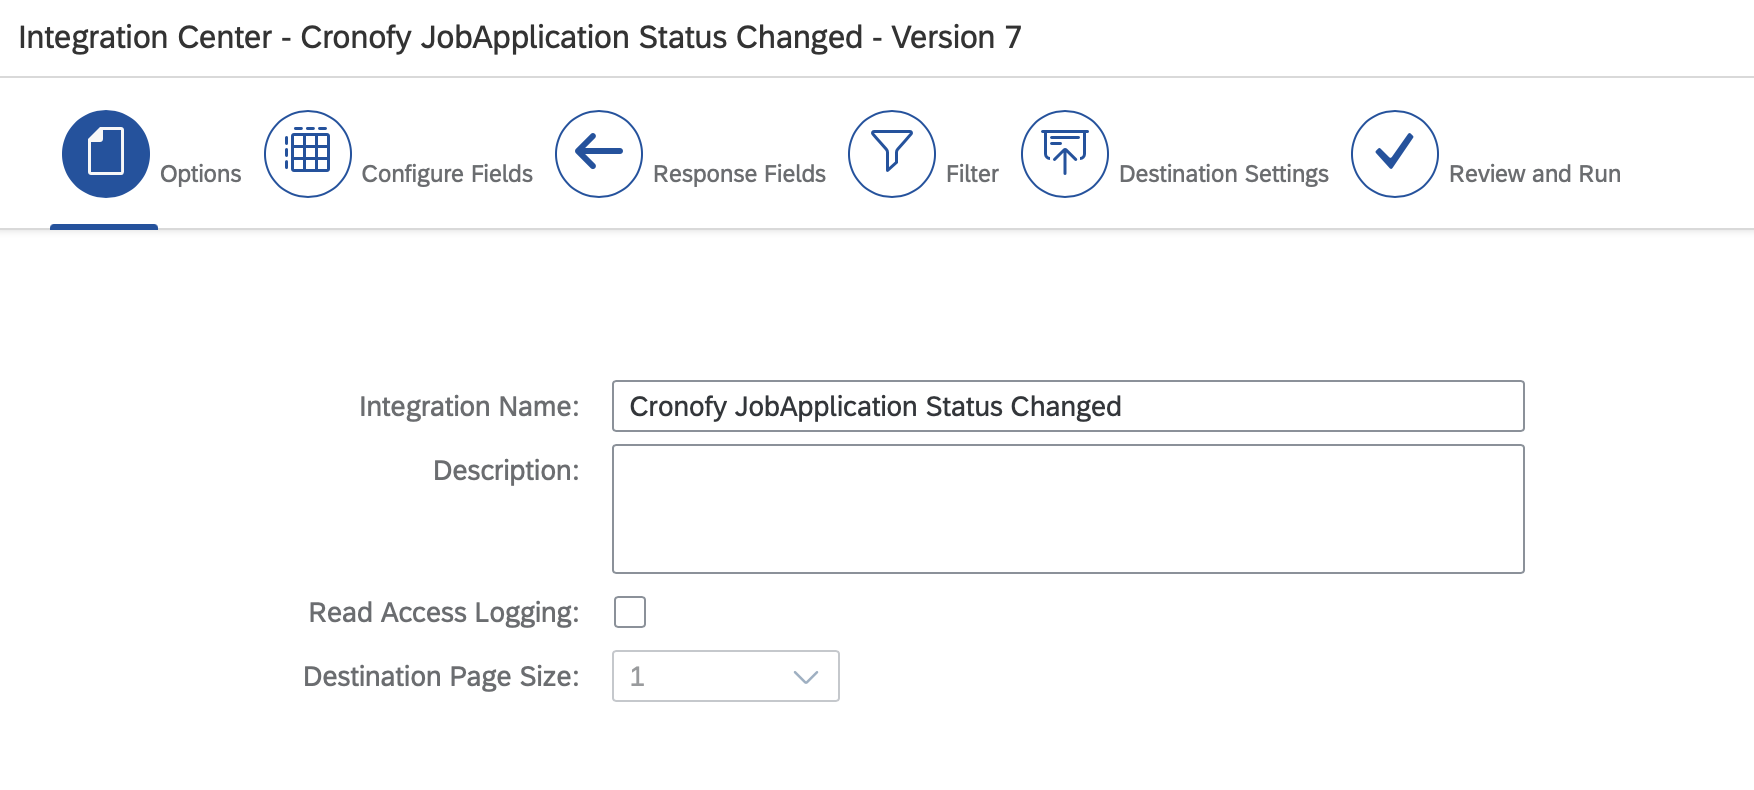
Configure Fields #
Use the field selector to create an object that looks like the following:
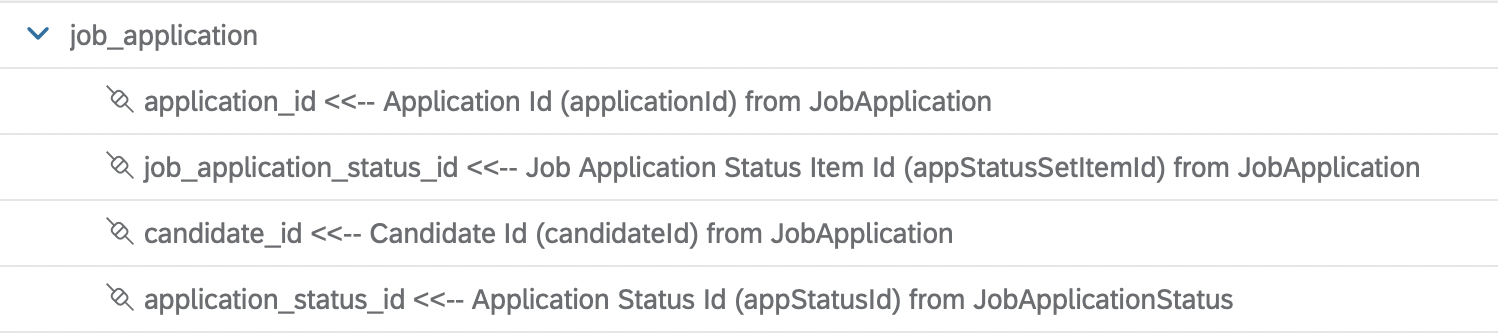
The sample data should look similar to the following:
{
  "job_application": {
    "application_id": 4541,
    "job_application_status_id": 352,
    "candidate_id": 4148,
    "application_status_id": 10
  }
}application_id, job_application_status_id and candidate_id are all available directly on the JobApplication entity. application_status_id is on JobApplicationStatus, so you have to navigate to it.
Searching for a field by name can return Navigation Not Found. If that happens, expand Entity Tree View and choose the field from the tree instead of the search results.
Response Fields #
No data is returned to Success Factors for processing so this can be skipped.
Filter #
Use the filter options to restrict the notifications to Cronofy to only trigger when candidates are moved into the appropriate state. Typically this will be based on the Job Application Status.
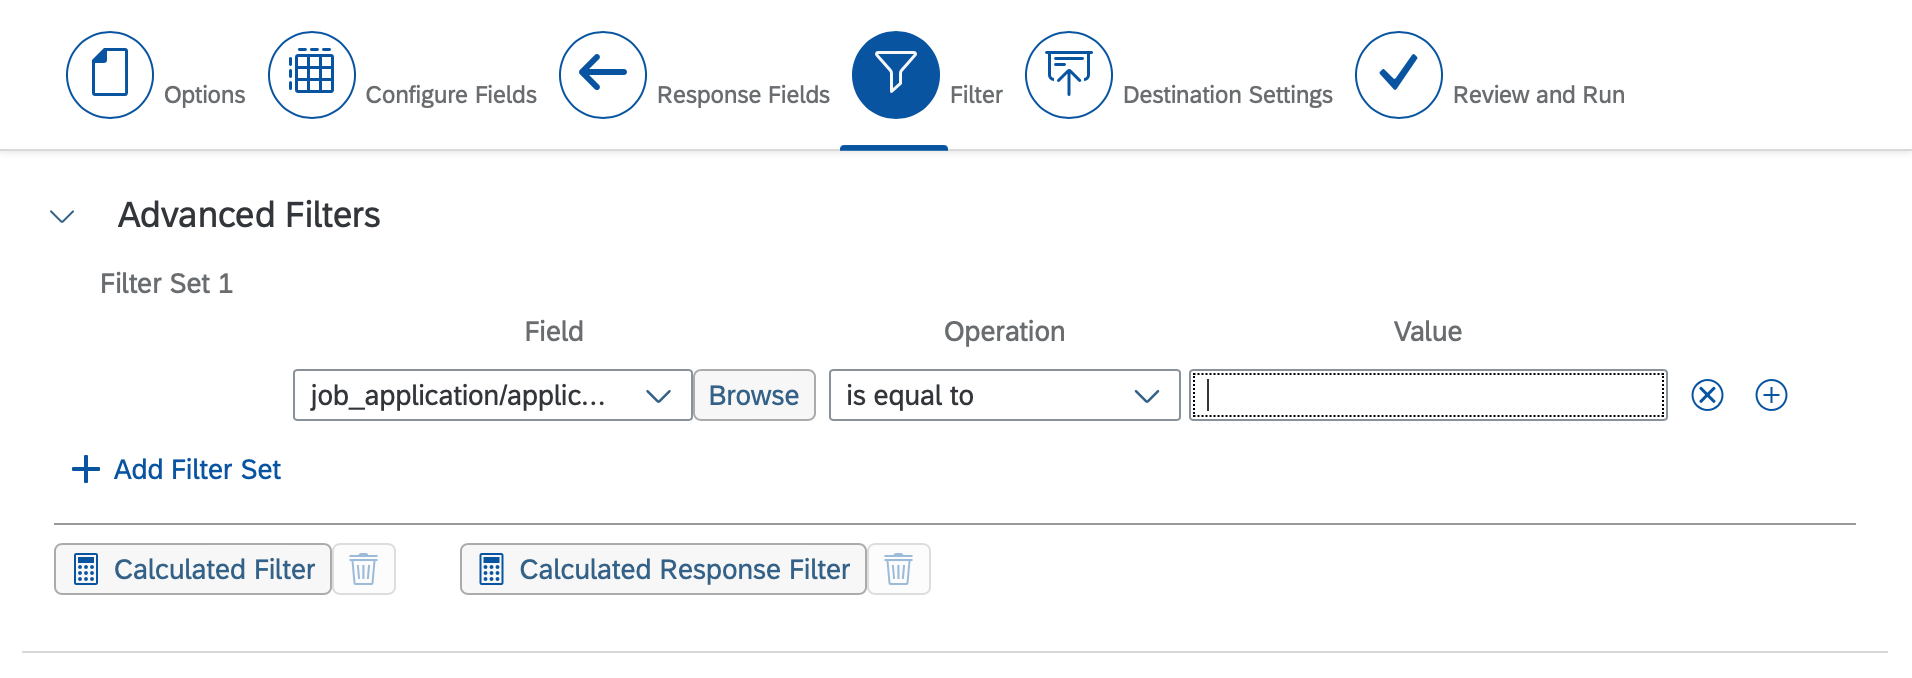
Set the filter to:
- Field:
job_application/application_status_id - Operation: is equal to, or is contained in if more than one status should trigger scheduling
- Value: the Status ID of the status that candidates are moved into
To find the Status ID, go to Admin Center and open Edit Applicant Status Configuration. Open the status set used by your job requisitions and read the Status ID column for the status you want.
Destination Settings #
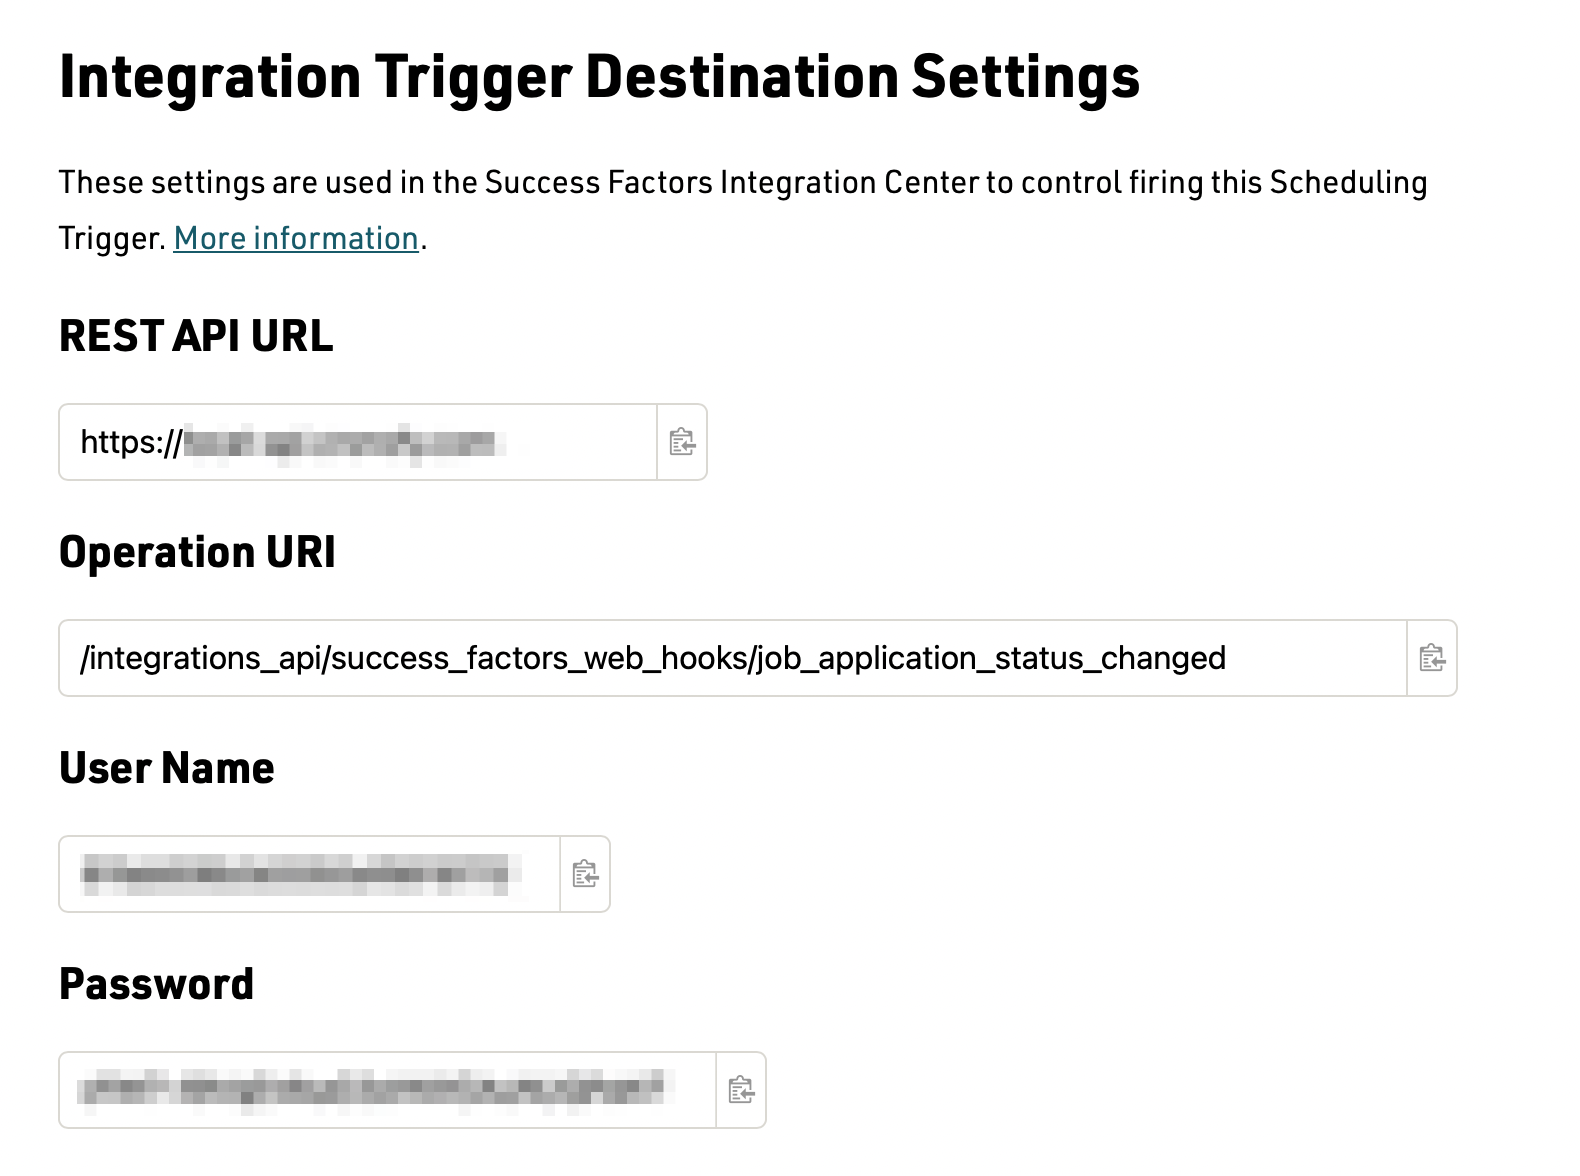
This is the section that is used to configure the Cronofy endpoint that is called when the Integration is triggered.
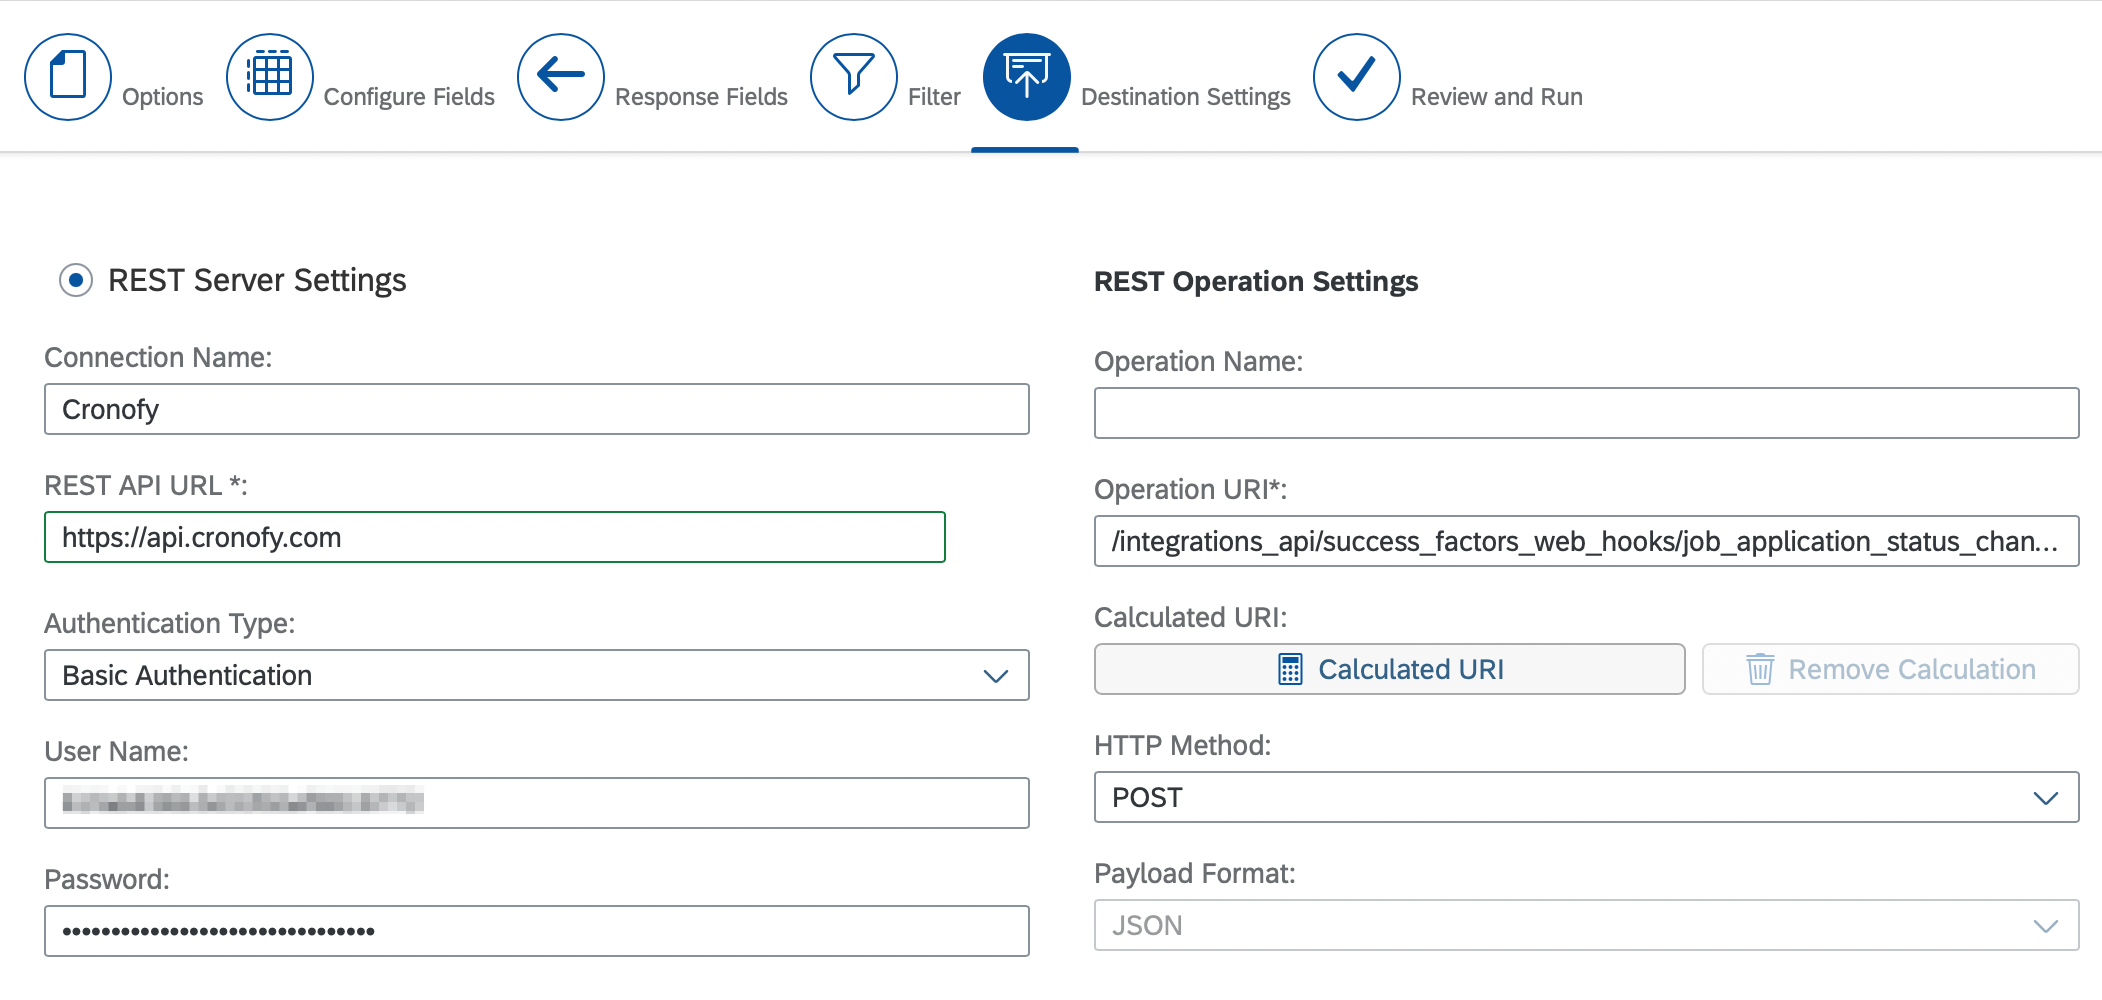
You can find these details in the Cronofy Scheduling Trigger UI.
Publish to Intelligent Services #
An Intelligent Services integration does not run on its own, and Run Now will not trigger it. It runs when the event it is attached to is published, so the last step is to attach it to that event.
Save the integration in the Integration Center.
From Admin Center, open the Intelligent Services Center.
Search for and select Recruiting: Update of Job Application Status.
Open the flow and add your integration to it as an Integration activity, using the Activities panel on the right.

- Click Save, then click Publish.
The integration trigger is now set up. To test it, move a candidate into the status you set in the filter.