# Install and Embed
[Watch on YouTube](https://www.youtube.com/watch?v=sGmVH4ZH0Ys)
Setting up the Embed involves the following steps, all covered on this page:
```mermaid
flowchart TD
A[Enable & generate Cronofy Embed secrets] -- Add to your server --> B
B[Use secrets to generate tokens] -- Pass to your front-end --> C[Use tokens to authenticate the Embed]
D[Install the Embed JS] -- Add to your front-end --> C```
## Copy the Embed Secrets to your server application
> **WARNING:** Never share the Embed Secret with anyone or expose it directly through your front-end code.
It is a secret value which would allow anyone to create embedded scheduling
components for your application.
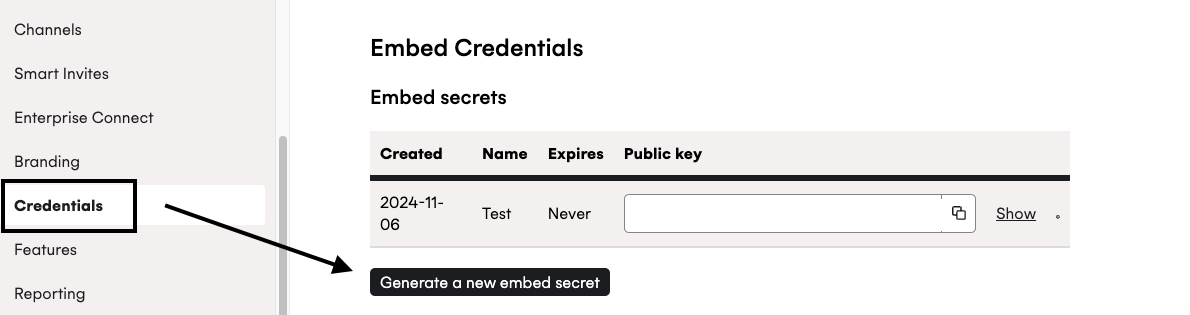
- In your Cronofy Developer Dashboard, go to the "Credentials" section of your application.
- Under "Embedded Scheduler Credentials", click the "Generate a new embed secret" button.
- Store the public key and embed secret in your applications secrets so they can be passed to the function for generating a Embed Tokens when rendering the page.
## Use secrets to generate Embed Tokens
The Embed Token that is used in your pages is a [JWT (JSON Web Token)](https://jwt.io) signed with your embed secret key.
Embed tokens should be hashed with the **HS256** algorithm and signed with your **Embed Secret**, which begins `ESK_`
### Example token generation code
```ruby
# Using the 'jwt' gem: https://github.com/jwt/ruby-jwt
# Set the Embed public and secret keys from the Cronofy dashboard
embed_public_key = ENV.fetch("CRONOFY_SCHEDULER_EMBED_PUBLIC_KEY") # Value starting "EMB_"
embed_secret = ENV.fetch("CRONOFY_SCHEDULER_EMBED_SECRET") # Value starting "ESK_"
jwt_payload = {
iss: embed_public_key,
iat: Time.now.to_i,
exp: Time.now.to_i + (60 * 60 * 4),
aud: "scheduler_embed",
jti: SecureRandom.uuid,
}
embed_token = JWT.encode(jwt_payload, embed_secret, 'HS256')
```
```php
// Use the firebase JWT library: https://github.com/firebase/php-jwt
use Firebase\JWT\JWT;
// Set the Embed public and secret keys from the Cronofy dashboard
$embed_public_key = $_ENV["CRONOFY_SCHEDULER_EMBED_PUBLIC_KEY"]; // Value starting "EMB_"
$embed_secret = $_ENV["CRONOFY_SCHEDULER_EMBED_SECRET"]; // Value starting "ESK_"
$jwt_payload = [
"iss" => $embed_public_key,
"iat" => time(),
"exp" => time() + (60 * 60 * 4),
"aud" => "scheduler_embed",
"jti" => uniqid(),
// optional onboarding parameters: https://docs.cronofy.com/developers/embedded-scheduler/onboarding-users/#enhanced-embedded-onboarding-flow
"tenant_id" => "your-customer-id",
"tenant_name" => "Evenitron",
];
$embed_token = JWT::encode($jwt_payload, $embed_secret, "HS256");
```
```javascript
// NOTE: this must be done on the *server* to prevent the Embed secret being visible by clients.
// Use the auth0 JWT library: https://github.com/auth0/node-jsonwebtoken
const jwt = require("jsonwebtoken");
const crypto = require("crypto");
// Set the Embed public and secret keys from the Cronofy dashboard
const embed_public_key = process.env["CRONOFY_SCHEDULER_EMBED_PUBLIC_KEY"]; // Value starting "EMB_"
const embed_secret = process.env["CRONOFY_SCHEDULER_EMBED_SECRET"]; // Value starting "ESK_"
const timestamp = Date.now() / 1000;
const embed_token = jwt.sign(
{
iss: embed_public_key,
iat: timestamp,
exp: timestamp + (60 * 60 * 4),
aud: "scheduler_embed",
jti: crypto.randomUUID(),
// optional onboarding parameters: https://docs.cronofy.com/developers/embedded-scheduler/onboarding-users/#enhanced-embedded-onboarding-flow
tenant_id: "your-customer-id",
tenant_name: "Evenitron"
},
embed_secret,
{
algorithm: "HS256"
}
);
```
```csharp
using System;
// dotnet add package System.IdentityModel.Tokens.Jwt
using System.IdentityModel.Tokens.Jwt;
using System.Security.Claims;
using Microsoft.IdentityModel.Tokens;
// Set the Embed public and secret keys from the Cronofy dashboard
var embedPublicKey = "EMB_...";
var embedSecret = "ESK_...";
var claims = new Claim[] {
new Claim("iat", DateTimeOffset.UtcNow.ToUnixTimeSeconds().ToString(), ClaimValueTypes.Integer32),
new Claim("jti", Guid.NewGuid().ToString()),
// optional onboarding parameters: https://docs.cronofy.com/developers/embedded-scheduler/onboarding-users/#enhanced-embedded-onboarding-flow
new Claim("tenant_id", "your-customer-id"),
new Claim("tenant_name", "Evenitron")
};
var key = new SymmetricSecurityKey(System.Text.Encoding.UTF8.GetBytes(embedSecret));
var signingCredentials = new SigningCredentials(key, "HS256");
JwtSecurityToken jwt = new JwtSecurityToken(
issuer: embedPublicKey,
audience: "scheduler_embed",
claims: claims,
expires: DateTime.UtcNow.AddHours(4),
signingCredentials: signingCredentials
);
var signedJwt = new JwtSecurityTokenHandler().WriteToken(jwt);
```
```java
// Using the Auth0 JWT library: https://github.com/auth0/java-jwt
// Takes in the Embed public and secret keys from the Cronofy dashboard
import java.time.Instant;
import java.util.UUID;
import com.auth0.jwt.JWT;
import com.auth0.jwt.algorithms.*;
import com.auth0.jwt.exceptions.*;
/* Inside a class preparing data for your front end, call this and pass the value to your page */
public String generateJWT(String embedPublicKey, String embedSecretKey) {
Algorithm algorithm = Algorithm.HMAC256(embedSecretKey);
String token = JWT.create()
.withIssuer(embedPublicKey)
.withIssuedAt(Instant.now())
.withExpiresAt(Instant.now().plusSeconds(60 * 60 * 4))
.withAudience("scheduler_embed")
.withJWTId(UUID.randomUUID().toString())
// optional onboarding parameters: https://docs.cronofy.com/developers/embedded-scheduler/onboarding-users/#enhanced-embedded-onboarding-flow
.withClaim("tenant_id", "your-customer-id")
.withClaim("tenant_name", "Evenitron")
.sign(algorithm);
return token;
}
```
### Payload values
The following claims should be specified in the payload of your JWT:
##### `iss` *(required)*
Your **Embed public key**, the value beginning `EMB_`
##### `iat` *(required)*
The time the JWT was issued at, as an integer of seconds since the epoch (1970/01/01).
The represented time cannot be in the future.
##### `exp` *(required)*
The time the JWT was expires at, as an integer of seconds since epoch (1970/01/01).
The represented time must be in the future.
This can be used to limit the time a button on your page works without needing a page refresh.
The maximum value accepted is **4 hours** after being issued.
##### `aud` *(required)*
The audience of the JWT - this should always be the value `scheduler_embed`
##### `jti` *(required)*
The ID of the JWT - this is a value used to salt the signing of the JWT and prevent replay attacks, and should be unique to each JWT generated.
We recommend using a UUID or GUID.
##### `tenant_id` *(optional)*
Provide this value to give users an improved onboarding experience. [Read more here](/developers/embedded-scheduler/onboarding-users/index.md).
##### `tenant_name` *(optional)*
Provide this value to give users an improved onboarding experience. [Read more here](/developers/embedded-scheduler/onboarding-users/index.md).
##### `sub` *(optional)*
> **WARNING:** This is currently unused.
## Install the Embed JS
The Cronofy embedded scheduler is available from the [cronofy-scheduler-embed NPM package](https://www.npmjs.com/package/cronofy-scheduler-embed). You can install it by running in your terminal:
```
npm i -S cronofy-scheduler-embed```
In your front end JavaScript code you must then import the embedded scheduler library before you can use the embeddable elements and APIs. This can be done by importing the scheduler library module within your JavaScript application:
```
import "cronofy-scheduler-embed";```
## Use tokens to authenticate the Embed
> **WARNING:** Please note that the Embedded Scheduler does not work when the browser limits cookie and local storage access, such as in incognito or private browsing mode.
Once you have [installed the embedded Scheduler library](#installation) you can then include the `cronofy-scheduler-button` element within your pages HTML:
```html
```
The following element attributes are supported to setup and customize the initial state of the Scheduler:
##### `embed-token` *(required)*
The JWT generated for each page view, as described in the "Generating Embed Tokens" section above.
##### `correlation-id` *(required)*
Your ID for the request, which can be used for reconciling future webhooks and API responses.
##### `recipient-email` *(recommended)*
The email address of the recipient of the scheduling request.
This will be the email address of the person selecting the time. This address will be invited to the calendar event created when a time is chosen.
##### `recipient-name` *(optional)*
The name of the recipient.
##### `recipient-organization-name` *(optional)*
The organization the recipient is representing.
##### `event-summary` *(optional)*
The summary of the event, which appears as the name of the event in the calendar.
If this is not provided, the defaults for the user will be used.
##### `event-duration-minutes` *(optional)*
Sets the value for the duration to the number of minutes specified.
### Receiving the request link in your UI
The `cronofy-scheduler-button` element emits events which your application can listen for.
You can register the event listener using `addEventListener`:
```javascript
document
.getElementById("my-scheduler-button")
.addEventListener("cronofyschedulerrequestcreated", function(event) {
console.log("Cronofy Scheduler request created", event);
});
```
The event emitted contains details of the request in the `detail` attribute:
```json
{
"scheduling_request": {
"scheduling_request_id": "srq_52b65401a5d87bb4f0bee44e",
"slot_selection": "pending",
"primary_select_url": "https://app.cronofy.com/r/234ebnd",
"dashboard_url": "https://app.cronofy.com/scheduler/requests/52b65401a5d87bb4f0bee44e",
"summary": "Driving test - Marty & Doc",
"duration": { "minutes": 30 },
"recipient_operations": {
"view_url": "https://app.cronofy.com/rts/VFbnUVCv"
},
"recipients": [
{
"email": "doc@evenitron.com",
"display_name": "Dr Emmet Brown",
"slot_selector": true,
"select_url": "https://app.cronofy.com/r/234ebnd"
}
],
"event": {
"summary": "Driving test - Marty & Doc"
},
"coordinator_sub": "acc_6717a49426e06a0ef69d01dc"
}
}
```
### UI state events
The `cronofy-scheduler-button` element will also emit
the following events for closer UI integration:
- `cronofyschedulerrequestcreated` - When the Scheduling request has been created
- `cronofyschedulerdialogopened` - When Scheduler dialog is opened
- `cronofyschedulerdialogclosed` - When Scheduler dialog is closed
- `cronofyschedulererror` - When the Scheduler encountered an error, such as the users account being disabled or when the auth token is invalid. See a more detailed summary [here.](/developers/embedded-scheduler/error-states/index.md)
You can register the event listener using `addEventListener`:
```javascript
document
.getElementById("my-scheduler-button")
.addEventListener("cronofyschedulerdialogopened", function(event) {
console.log("Cronofy Scheduler dialog opened", event);
});
```
### Element methods and properties
The `SchedulerButtonElement` provides several methods and properties that can be called from JavaScript to inspect the current state of the Scheduler dialog, as well as methods to open and close the popup.
We have kept these close to the HTML spec for the Dialog element.
They can be invoked against the DOM element - for example:
```javascript
document
.getElementById("my-scheduler-button")
.show()
```
##### `open`
A [`Boolean`](/developers/api/data-types/index.md) value indicating whether a dialog is currently open or not.
##### `show()`
Displays the Scheduler dialog as a modal. Note that if the dialog is already open then calling this method does nothing.
##### `close()`
Closes the Scheduler dialog if it is open. Note that if the dialog is already closed then calling this method does nothing.
## Embedding the cancel button in your page
Once you have [installed the embedded Scheduler library](#installation) you can then include the `cronofy-scheduler-cancel-button` element within your pages HTML:
```html
```
The following element attributes are supported to setup and customize the initial state of the Scheduler:
##### `embed-token` *(required)*
The JWT generated for each page view, as described in the "Generating Embed Tokens" section above.
##### `scheduling-request-id` *(required)*
The ID of the scheduling request to be cancelled.
### UI state events
The `cronofy-scheduler-cancel-button` element will also emit
the following events for closer UI integration:
- `cronofyschedulerrequestcancelled` - When the Scheduling request has been cancelled
- `cronofyschedulerdialogopened` - When cancel dialog is opened
- `cronofyschedulerdialogclosed` - When cancel dialog is closed
- `cronofyschedulererror` - When the cancel dialog encountered an error, such as the users account being disabled or when the auth token is invalid. See a more detailed summary [here.](/developers/embedded-scheduler/error-states/index.md)
You can register the event listener using `addEventListener`:
```javascript
document
.getElementById("my-cancel-button")
.addEventListener("cronofyschedulerdialogopened", function(event) {
console.log("Cronofy cancel Scheduling request dialog opened", event);
});
```
### Element methods and properties
The `SchedulerCancelButtonElement` provides functions and properties that can be called from JavaScript to inspect the current state of the dialog, as well as methods to open and close the popup.
We have kept these close to the HTML spec for the Dialog element.
They can be invoked against the DOM element - for example:
```javascript
document
.getElementById("my-cancel-button")
.show()
```
##### `open`
A [`Boolean`](/developers/api/data-types/index.md) value indicating whether a dialog is currently open or not.
##### `show()`
Displays the cancel dialog as a modal. Note that if the dialog is already open then calling this method does nothing.
##### `close()`
Closes the cancel dialog if it is open. Note that if the dialog is already closed then calling this method does nothing.
---
[Read in HTML](/developers/embedded-scheduler/installing-and-embedding/)