` element is only present to help with the pre-built styling of the demo app, and is not essential - the important thing is that there is a DOM node with a unique ID to mount the UI Element on to.
With that script included in your page, the Calendar Sync Element will be rendered inside the "cronofy-calendar-sync" `
`.
### Code redemption
The next step in the Calendar Sync Element setup is to redeem an authorization `code` to find our user's **sub** value. When users initialize the authorization from within the Calendar Sync UI Element, the auth flow ends with the user being returned to the `redirect_uri` with a `code` included as a URL parameter. This `code` is then redeemed, which completes the authorization process.
The **sub** value is the canonical identifier for the connected [Account](/developers/authorization/index.md) in the Cronofy API. We will need a valid **sub** when we come to generate an Element token. In a real application, you can retrieve the subs of connected accounts using [the `userinfo` endpoint](/developers/api/identity/userinfo/index.md) of the API. For this demo, we will retrieve the **sub** from the response to the code redemption.
When loaded without an Element token, the Calendar Sync UI Element will present us with a choice of calendar providers and a message saying "Select a provider to add your first account".
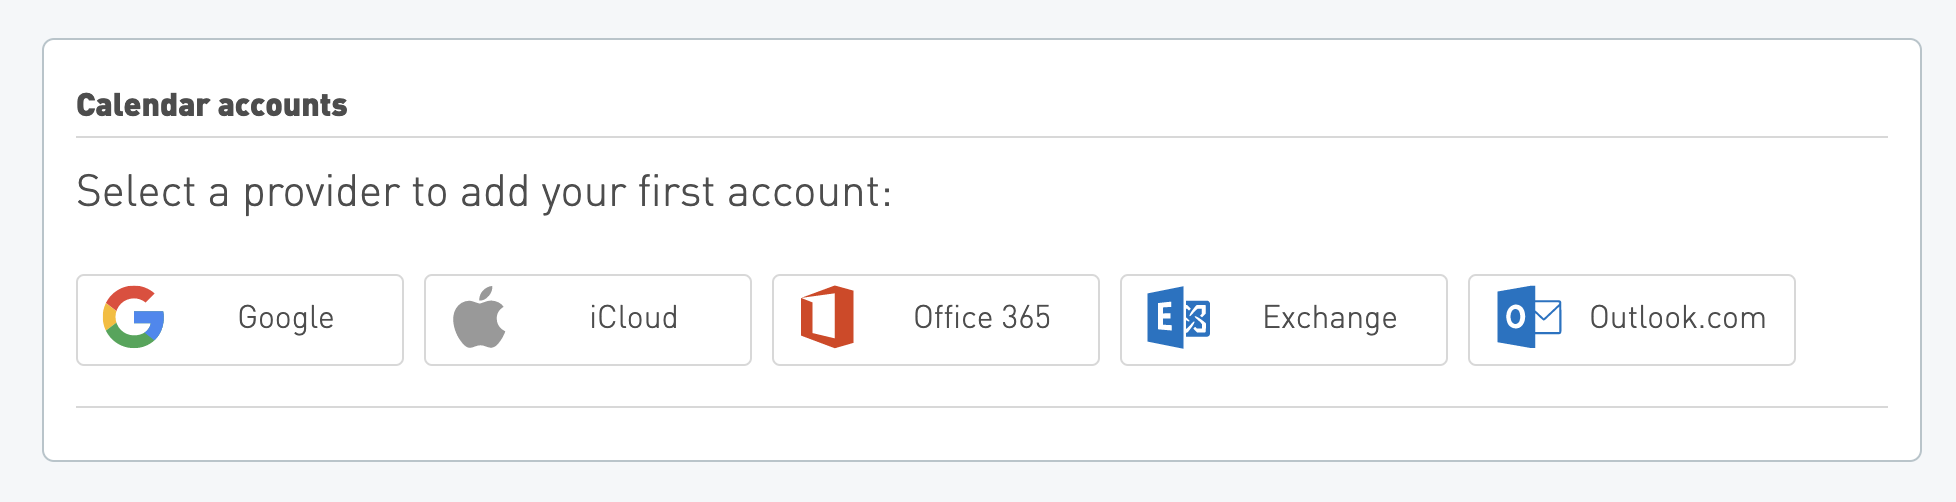
This means we need to connect a calendar profile to our application, and to do that we need to be able to complete the authorization process. Users start the authorization flow by clicking one of the provider links, and when the process is complete the user is returned to the `redirect_uri` with a `code` included as a URL parameter.
To redeem the `code` and complete the addition of the new profile, we use the `code` to request an [access token](/developers/api/authorization/request-token/index.md). The new access token is not required within the Element, but needs to be requested to complete the authorization process. This request requires your Client ID and Client Secret, so must take place server-side.
Add the following to the start of the `"/"` route in `server.js`:
```javascript
app.get("/", async (req, res) => {
// Extract the "code" from the page's query string:
const codeFromQuery = req.query.code;
if (codeFromQuery) {
const codeResponse = await cronofyClient.requestAccessToken({
client_id: process.env.CLIENT_ID,
client_secret: process.env.CLIENT_SECRET,
grant_type: "authorization_code",
code: codeFromQuery,
redirect_uri: "http://localhost:7070"
}).catch((err) => {
console.error(err);
});
console.log(codeResponse);
}
// ...template rendering
});
```
Once that code snippet is added in, you will need to use the UI element in the server to connect to your calendar which will log the resulting `codeResponse` into your terminal. In addition to the new `access_token` the response also contains some details about the account that has just been synchronized, including the **sub** value that we will need when generating an Element token in the next step.
If the below `codeResponse` doesn't appear in your terminal after authorising your calendar, we recommend to stop the server connection and reconnect to the server to try authorising your calendar via the UI element again.
```json
{
"access_token": "THE_ACCESS_TOKEN_WILL_APPEAR_HERE",
"token_type": "bearer",
"expires_in": 1209600,
"refresh_token": "A_REFRESH_TOKEN_WILL_APPEAR_HERE",
"scope": "read_write read_only create_event delete_event list_calendars read_account read_events",
"sub": "THE_SUB_WILL_APPEAR_HERE",
"account_id": "THE_ACCOUNT_ID_WILL_APPEAR_HERE",
"linking_profile": {
"provider_name": "google",
"profile_id": "THE_PROFILE_ID_WILL_APPEAR_HERE",
"profile_name": "example@cronofy.com",
"provider_service": "gsuite"
}
}
```
Copy the **access_token** and **sub** values, and paste them into the `SUB` and `ACCESS_TOKEN` entries in your `.env` file. This means we can now use `process.env.SUB` and `process.env.ACCESS_TOKEN` in our server-side code. We'll be using the **sub** value in the next step when we generate Element tokens, and we'll use the **access_token** in Step 4. when we add an event to our calendar.
> **INFO:** Note that in a real-world application we would want to access users' subs dynamically, but as we have no database in the project we're relying on hardcoded values to keep this example code as simple as possible. In a real application, you can retrieve the subs of connected profiles using the [`userinfo` endpoint of the API](/developers/api/identity/userinfo/index.md).
### Element tokens
Now that we have access to a valid sub, we can move on to generating an Element token for the Calendar Sync UI Element.
UI Elements require an Element-specific token to handle authentication. To generate a token using the Cronofy Node SDK, you can use the `requestElementToken()` method. To generate a valid Element token, you will need to know the **sub** for each profile you want to be able to access.
In the `server.js` file, find the `"/"` route for the app and add the following token-generation snippet and inject the resulting `element_token` into our template:
```javascript
app.get("/", async (req, res) => {
// Add this:
const token = await cronofyClient.requestElementToken({
version: "1",
permissions: ["account_management"],
subs: [process.env.SUB],
origin: "http://localhost:7070"
}).catch((err) => {
console.error(err);
});
// ...code-redemption section remains unchanged
return res.render("home", {
// Add the element_token to our template:
element_token: token.element_token.token,
client_id: process.env.CLIENT_ID,
data_center: process.env.DATA_CENTER
});
});
```
Now when that page loads it generates an Element token (asynchronously) and passes both the **element token** and the **client ID** to the page template `home.ejs`.
> **INFO:** Each Element requires a specific set of permissions. For the Calendar Sync Element, we need **"account_management"**. The [documentation page for each Element](/developers/ui-elements/calendar-sync/index.md) includes details of which permission to use.
You can view the full set of authentication options in the UI Elements' [Authentication documentation](/developers/ui-elements/authentication/index.md).
The final step for adding the Calendar Sync UI Element is to add the `element_token` to the initialization options for the `CronofyElements.CalendarSync()` call:
```jsx
```
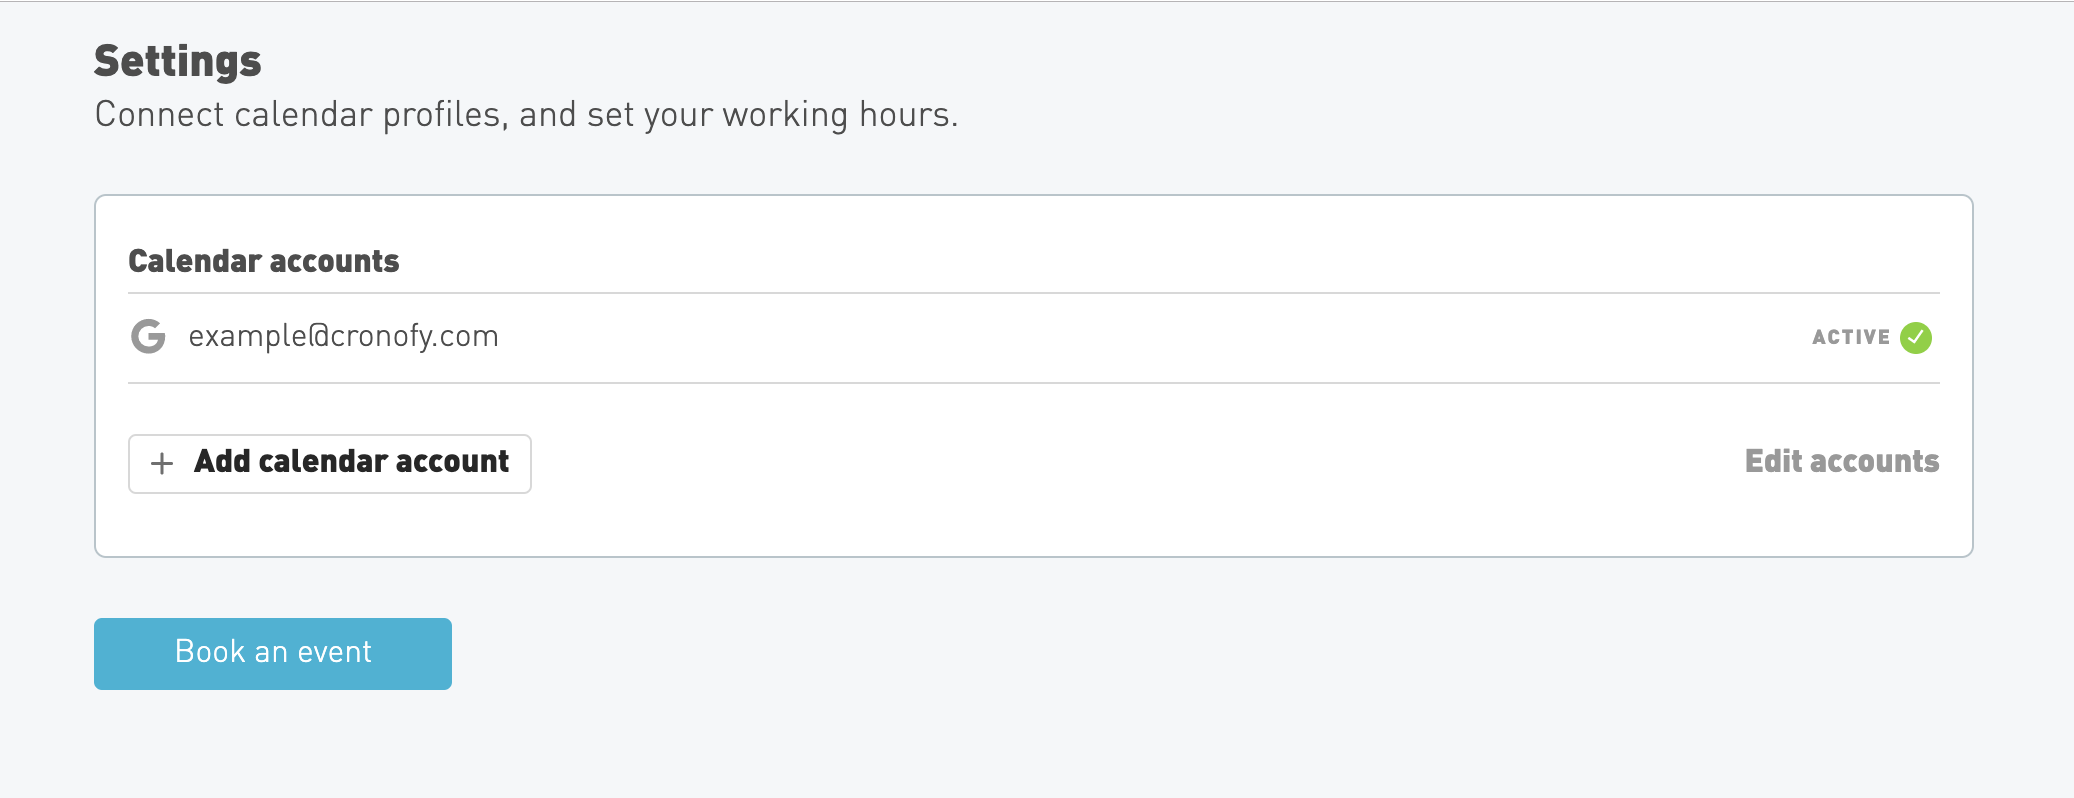
If you reload the page now, the Calendar Sync UI Element will display the account that you sync'ed earlier in the process.
## Step 3. View your availability
For the second page of our application, we want to be able to view our availability for a set period of time, and to be able to select a time slot to create a new event. We can do this with the [Date Time Picker](/developers/ui-elements/date-time-picker/index.md) UI Element.
### Generating a token for the Date Time Picker
As with the Calendar Sync Element, we will need a new `element token` to allow the Date Time Picker to access our availability. This process is almost exactly the same as generating a token for the Calendar Sync Element; the only difference is in the "permissions" we need. For the Calendar Sync Element we needed the `account_management` permission, but for the Date Time Picker we'll need the `availability` permission.
In the `server.js` file, find the `"/availability"` route for the app:
```javascript
app.get("/availability", async (req, res) => {
return res.render("availability", {});
});
```
And replace it with this:
```javascript
app.get("/availability", async (req, res) => {
const token = await cronofyClient.requestElementToken({
version: "1",
permissions: ["availability"],
subs: [process.env.SUB],
origin: "http://localhost:7070"
});
return res.render("availability", {
element_token: token.element_token.token,
sub: process.env.SUB,
data_center: process.env.DATA_CENTER
});
});
```
### Adding the Date Time Picker into the page
As with our home page, look for the empty `
```
Now we need to construct and availability query and our callback.
### Constructing an availability query
In short the `availability_query` is an object that matches a valid Cronofy [Availability request](/developers/api/scheduling/availability/index.md). This query defines three things:
- The participants that we want to query.
- The required duration of the event we want to book.
- An array of periods to check availability in.
For this application, our participants object can be relatively simple. We only want to check our own availability, so we only need to add our own profile (using the `sub` of our account):
```javascript
participants: [
{
required: "all",
members: [
{
sub: "<%= sub %>"
}
]
}
]
```
The `required_duration` is set in minutes, and can be either `15`, `30`, or `60`.
`query_periods` should be an array of objects with a `start` and `end` time. Both should be a valid [`Time`](/developers/api/data-types/index.md) data-type, and must represent a future point in time. The `end` of an available period must also be between 1 minute and 35 days after the earliest `start`. For example:
```javascript
query_periods: [
{
start: "2026-04-17T09:00:00Z",
end: "2026-04-17T10:00:00Z"
},
{
start: "2026-04-17T15:00:00Z",
end: "2026-04-17T17:30:00Z"
}
]
```
> **WARNING:** The start and end time need to be added as UTC strings, so be sure to adjust them for your timezone.
### The Date Time Picker callback
The Date Time Picker callback is a function to be called when a selected slot is "confirmed" by the user. It receives a `notification` object with a `type` of `"slot_selected"`.
> **INFO:** There are several actions that can trigger an Element's callback, so your application should ignore notifications it does not understand.
For our application, we want to check that the notification represents a `"slot_selected"` event, and then navigate the browser to the last page in our app. The last page will be where we add the booked event into our calendar, so we'll need to pass along the selected slot's details when the last page is loaded. We can do this by adding the `slot` as a query string. As well as a `type`, the `notification` object also contains the `slot` information that we need.
```javascript
callback = res => {
// Check if this is a `slot_selected` notification.
// If not, we'll return and do nothing.
if (res.notification.type !== "slot_selected") return;
// Convert the slot info into a URL-safe string.
const slot = JSON.stringify(res.notification.slot);
// Load the last page of our app, with the `slot` in the query string.
window.location.href = `/submit?slot=${slot}`;
};
```
### The full Date Time Picker initialization
Putting together the availability query and the callback, the Date Time Picker initialization should look something like this:
```javascript
const dateTimePickerOptions = {
element_token: "<%= element_token %>",
data_center: "<%= data_center %>",
target_id: "cronofy-date-time-picker",
availability_query: {
participants: [
{
required: "all",
members: [
{ sub: "<%= sub %>" }
]
}
],
required_duration: { minutes: 60 },
available_periods: [
{ start: "2026-04-17T09:00:00Z", end: "2026-04-17T10:00:00Z" },
{ start: "2026-04-17T15:00:00Z", end: "2026-04-17T17:30:00Z" }
]
},
callback: res => {
if (res.notification.type !== "slot_selected") return;
const slot = JSON.stringify(res.notification.slot);
window.location.href = `/submit?slot=${slot}`;
}
};
```
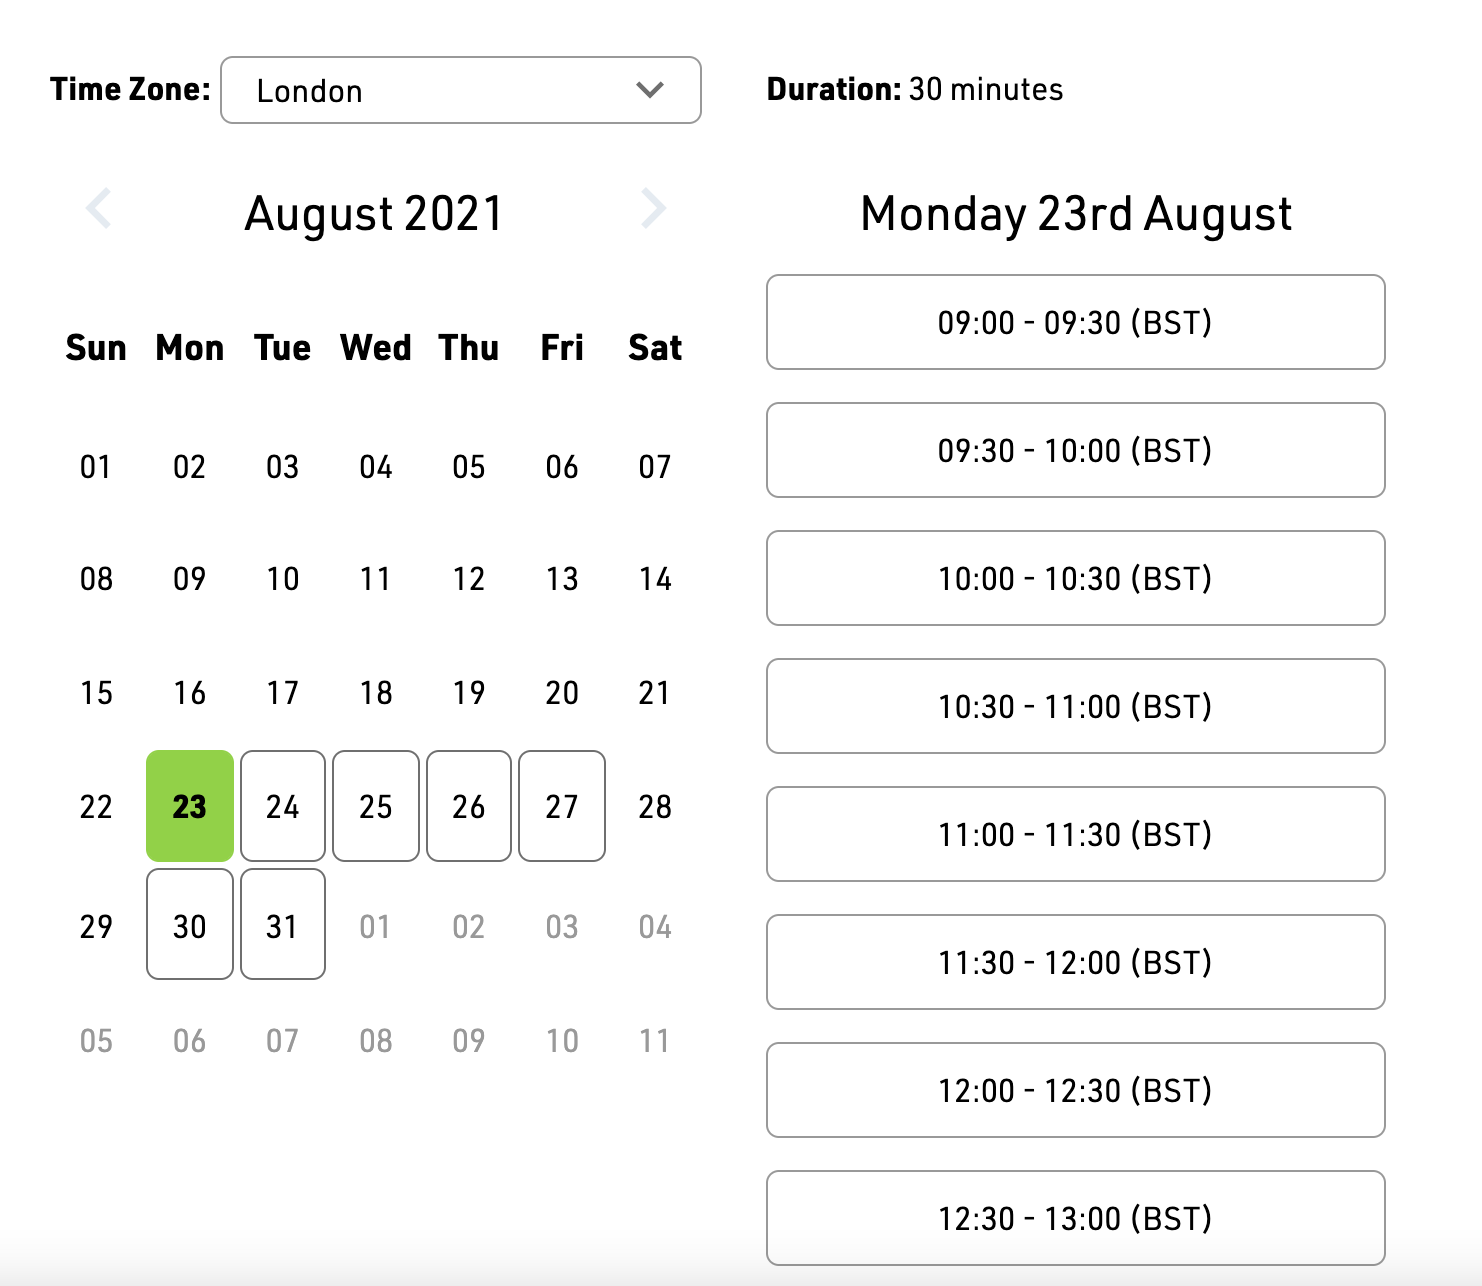
And the page itself should look like this:
## Step 4. Add an event to our calendar
The last page of our app is where we'll actually add an event to our calendar. We're being given the event details in the `slot` query parameter, so we'll need to parse that into an object we can use. Because we're going to be writing to a calendar, we'll need to add an `access_token` to our `cronofyClient`.
```javascript
const cronofyClient = new Cronofy({
client_id: process.env.CLIENT_ID,
client_secret: process.env.CLIENT_SECRET,
data_center: process.env.DATA_CENTER,
access_token: process.env.ACCESS_TOKEN
});
```
> **WARNING:** We retrieved an **access_token** when we [redeemed the authorization code in Step 2.](#code-redemption). Note that access tokens do expire eventually, so you may need to generate a new one. Learn more about access token generation and refreshing in the [Request an Access Token](/developers/api/authorization/request-token/index.md) section of the docs.
### Formatting an event
To add an event to a calendar, we'll need to turn our `slot` into an object that will match the format required by the [Create or Update Event](/developers/api/events/upsert-event/index.md) section of the API.
In addition to the `start` and `end` that were given to us by the Date Time Picker callback, we'll need to add a unique `event_id`, a text `summary` and `description`, and the `calendar_id` of the calendar we want to add the event to.
If you don't know the `calendar_id` for your account, you can use the `userInfo()` method in the SDK, or hit the [User Info](/developers/api/identity/userinfo/index.md) endpoint directly. This will give you all the necessary information about your account.
### Adding the event to the calendar
With a properly formatted event object, all we need to do to add it to the calendar is submit it using the `createEvent()` method in the SDK.
For this process to work, the method requires a `calendar_id`. This is the ID for the specific calendar that the event will be added to. We'll use the `userInfo()` method to retrieve your `calender_id`. You can find more information about access tokens in the [Request an Access Token](/developers/api/authorization/request-token/index.md) section of the API documentation.
In the `server.js` file, find the `"/submit"` route for the app:
```javascript
app.get("/submit", async (req, res) => {
return res.render("submit", {});
});
```
And replace it with this:
```javascript
app.get("/submit", async (req, res) => {
// Get the `slot` data from the query string
const slot = JSON.parse(req.query.slot);
const userInfo = await cronofyClient.userInfo();
const calendarId = userInfo["cronofy.data"].profiles[0].profile_calendars[0].calendar_id;
cronofyClient.createEvent({
calendar_id: calendarId,
event_id: "booking_demo_event",
summary: "Demo meeting",
description: "The Cronofy developer demo has created this event",
start: slot.start,
end: slot.end
});
return res.render("submit", {});
});
```
Find out more detail about [adding an event](/developers/calendars-events/index.md) in the API documentation.
### Display a confirmation message to the user
To complete the application we'll pass the `slot` details through to our page template and display a confirmation screen to show the user that the event has been added.
To easily format our date strings, we'll add [Moment.js](https://momentjs.com/) to our project. To do this we'll run `npm install --save moment` (which will install Moment into our `node_modules` directory) and add `const moment = require("moment");` to the top of our `server.js` file.
With Moment installed, we can format the slot's date into readable strings that we can then pass into our template.
At the bottom of the `"/submit"` route in `server.js`, replace this:
```javascript
return res.render("submit", {});
```
With this:
```javascript
const meetingDate = moment(slot.start).format("DD MMM YYYY");
const start = moment(slot.start).format("LT");
const end = moment(slot.end).format("LT");
return res.render("submit", {
meetingDate,
start,
end
});
```
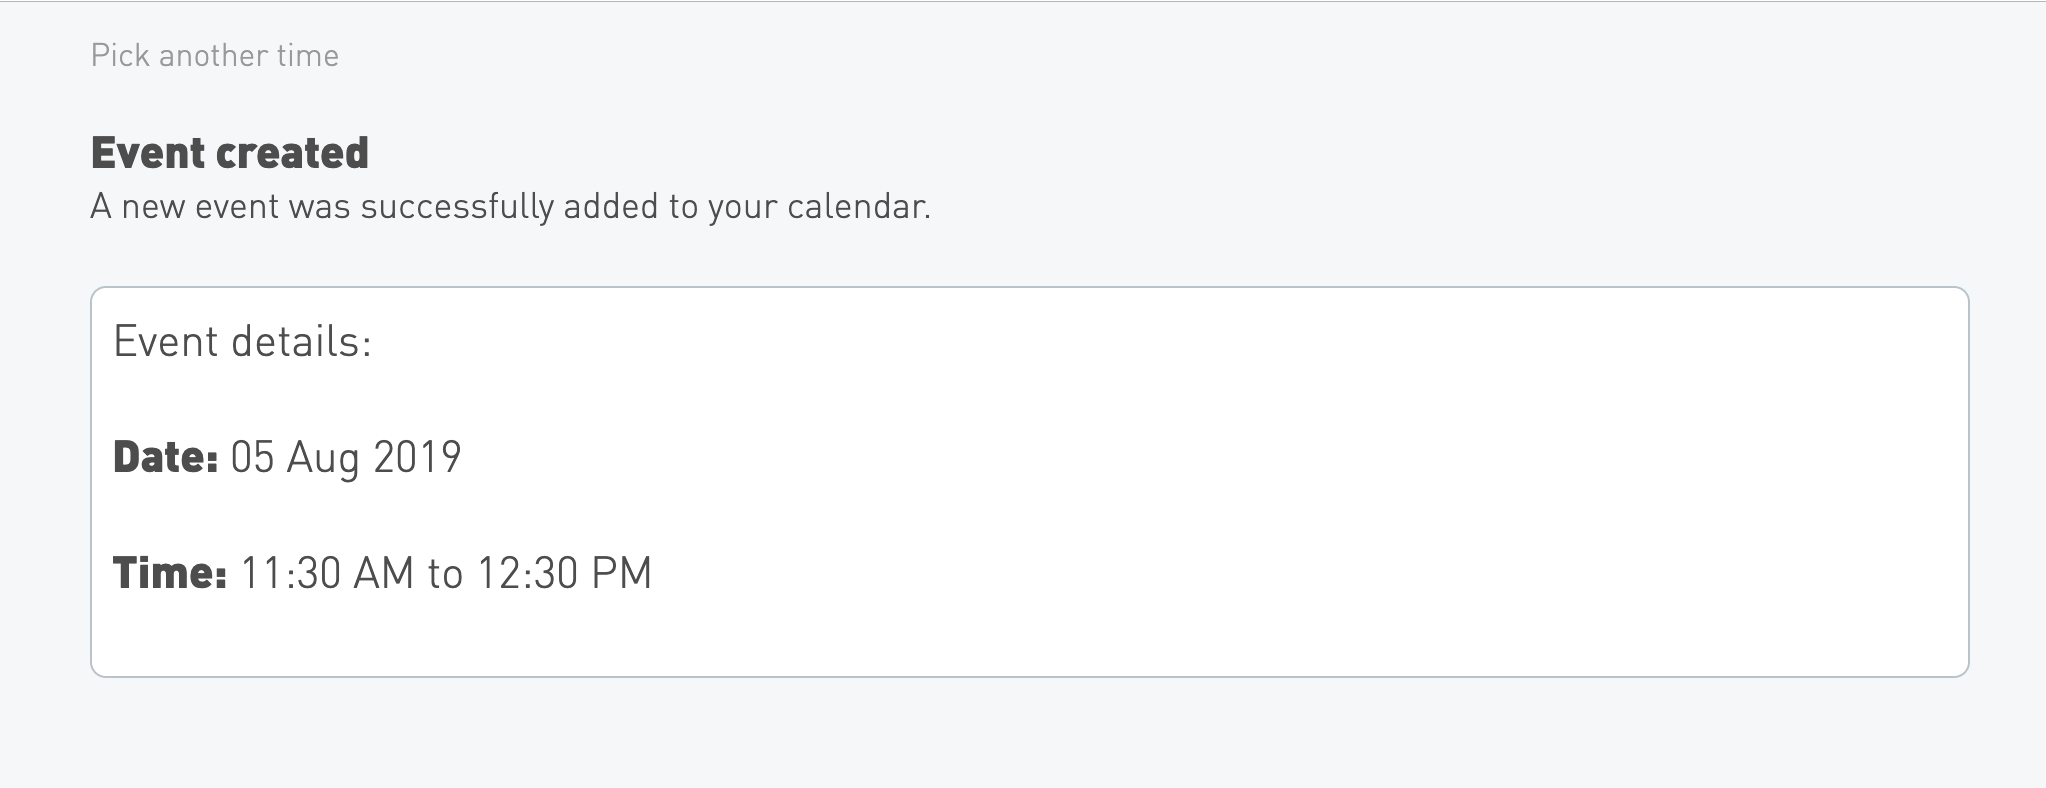
Which will allow us to display the date, start-time, and end-time in our `submit.ejs` template:
```jsx
Event details:
**Date:** <%= meetingDate %>
**Time:** <%= start %> to <%= end %>
```
And the full completed page will look like this:
## Step 5. Optional extras: set your rules and customization
### Availability Rules
If all that wasn't enough to get you excited about using Cronofy to handle scheduling in your application, there's more! It's often useful to define periods of time that you don't want to be available for, but haven't explicitly blocked-off in your calendar. A common version of this is setting "work hours": times in the week that you know you're always unavailable. Cronofy call these [Availability Rules](/developers/api/scheduling/availability-rules/index.md).
### Update the Element token
If we return to our home page (where we currently just have the Calendar Sync Element), we can add in another handy UI Element: the Availability Rules Element.
As with the previous two Elements we've used, the Availability Rules Element requires a specific permission when creating its token: this time it's `managed_availability`. By adding this permission to the existing `requestElementToken` options and keeping `account_management` for the Calendar Sync Element, we can use the same token for both of the Elements on the page.
```javascript
const token = await cronofyClient.requestElementToken({
version: "1",
permissions: ["account_management", "managed_availability"],
subs: [process.env.SUB],
origin: "http://localhost:7070"
});
```
### Add the Availability Rules Element
To add the Availability Rules Element into the page, we'll create another mounting point in the DOM (this time a `
` with an ID of "cronofy-availability-rules").
```jsx
Set your work hours
```
In addition to the mounting-point ID and the `token`, we'll need two extra options: the timezone ID and a unique ID for our rule.
The rule's ID can be anything you like - it's what we'll use to apply the rule to the Date Time Picker's query (in the next step). The timezone ID must be a known time zone identifier from the [IANA Time Zone Database](https://www.iana.org/time-zones). We can use `Intl.DateTimeFormat()` to deduce the timezone directly from the browser.
```javascript
// Sniff the browser's timezone
const timezone = Intl.DateTimeFormat().resolvedOptions().timeZone;
CronofyElements.AvailabilityRules({
element_token: "<%= element_token %>",
data_center: "<%= data_center %>",
target_id: "cronofy-availability-rules",
availability_rule_id: "work_hours",
tzid: timezone
});
```
This will display the Availability Rules Element on the page.
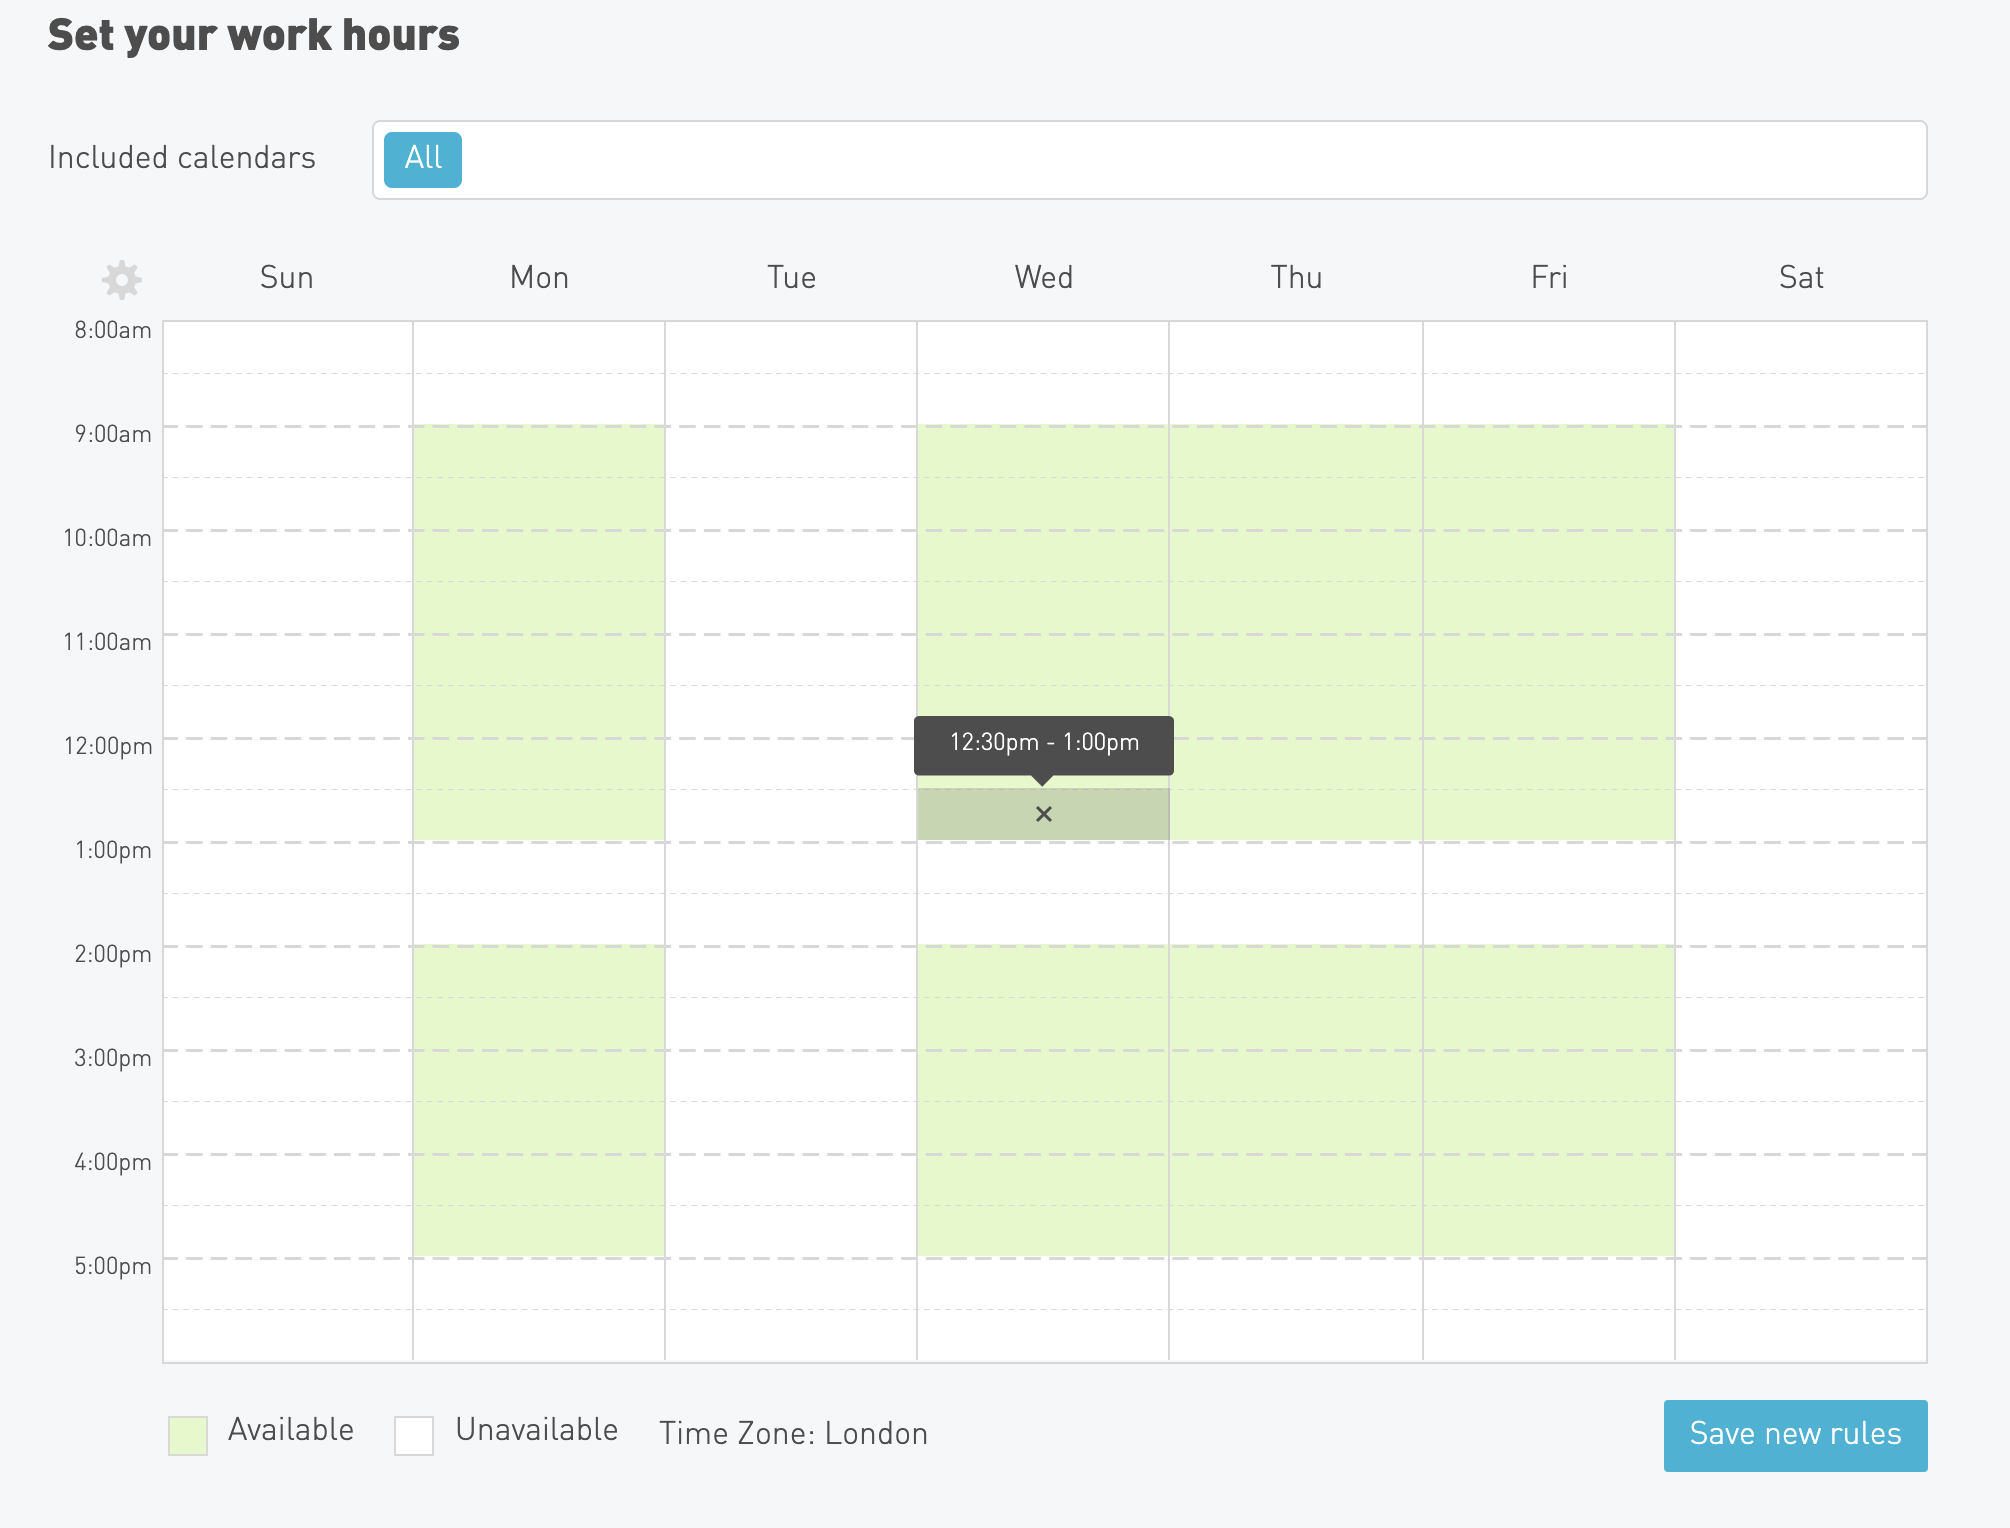
> **WARNING:** The Availability Rules Element will not automatically save changes to your rules. You need to hit the "save new rules" button to save your changes. If the specific rule ID does not match an existing rule, it will create a new rule with that ID *only* when the save button is pressed.
### Apply the rule to our Date Time Picker
Rules are not automatically taken into account by availability queries. If we want the rules to apply, we have to explicitly declare them. This means updating the `participants` portion of the query that we pass into the Date Time Picker initialization.
Specifically, we need to adjust each member that we want to apply rules to. We do this by declaring `managed_availability` as `true`.
```javascript
participants: [
{
required: "all",
members: [
{
sub: "<%= sub %>",
managed_availability: true
}
]
}
]
```
### Customizing UI Elements
Now you have the UI Elements set up, you can customize the style of these elements to match your requirements. You can use the preset layouts of the UI Elements, but if you would like to customize these further, you can refer to our [Customization guide](/developers/ui-elements/customization/index.md) to see the formatting options and how to set these up.
Now that you've experienced the power of the Cronofy API first hand, why not explore further? There's plenty of information in the rest of the documentation site.
## Troubleshooting
If you encounter unexpected errors at any stage, be sure to check the browser's console and the command line output.
A common issue is that the [access token](/developers/api/authorization/request-token/index.md) may have expired, so double check that your access token is fresh. You can do this by clicking 'add calendar account' again and reauthorising the account.
For simplicity this demo app does not handle storing and refreshing of access tokens - we recommend using Postman for exploring our API, and have a [setup guide for Postman here](/developers/getting-started/postman/index.md).
If you face the error message 'No version set for command npm', run the below in the terminal to specify the node js version:
```bash
asdf local nodejs [insert nodejs version]
```
If you have been following along step-by-step in the [`starter`](https://github.com/cronofy/Developer-Demo-Starter/blob/starter/app/server.js) branch of the GitHub repo, try switching to the [`master`](https://github.com/cronofy/Developer-Demo-Starter/blob/master/app/server.js) branch which includes the full working code plus some extra error handling that will provide more detailed information in case of failed authentication or token errors.
## Next steps
- [UI Elements *Learn more about the UI Elements*](/developers/ui-elements/index.md)
- [API Reference *Browser the full API documentation.*](/developers/api/index.md)
- [Getting Started *Read more tutorials and guides*](/developers/getting-started/index.md)
---
[Read in HTML](/developers/getting-started/online-booking-tutorial/)