Configuring a custom organizer email for Google Workplace
Read as Markdown Required plan: EmergingFor customers using Google Workplace we have seen behavior where Google appears to suppress the iMIP messages (eg. accepting, tentatively accepting, and declining any invite) being sent between the invitee and the organizer email address when both are known and have a Google Calendar associated with them.
To ensure these messages are sent, and therefore they can be forwarded and processed by Cronofy, a dedicated account must be set up.
Configuration #
- Create a separate Organizational Unit within your Google Workplace
- You could call this something specific like “Cronofy Smart Invite users”
- You must then disable Google Calendar for this Organizational Unit
- Add a new user for your Google Workplace
making sure to assign it to the Organizational Unit created and configured above
- This should have a generic email like
organizer@example.com
- This should have a generic email like
- Log in as the new user to set up email forwarding to the Cronofy organizer email address for the Cronofy data center you are using
- Follow the steps in Automatically forward Gmail messages to another account
under “Turn automatic forwarding on or off”
- For the step “A verification message will be sent to that address” Cronofy handles this verification email which takes a few seconds, certainly no more than a minute
- If you refresh the page as those instructions describe you will see the forwarding section change to allow you to enable forwarding after we’ve automatically processed the verification email
- You can choose to keep a copy of the forwarded emails in the inbox as part of this configuration, this will be helpful during development and potentially for any later production debugging you may need
Once this setup is complete you can begin using this custom organizer email for Smart Invites and Cronofy should receive all emails that pass through this mailbox.
Troubleshooting #
If you are not receiving the invite status back to your application, please use the below steps to help identify the issue:
- Check that the event accepted/declined emails are being received successfully from the user’s calendar to the custom organizer inbox that has been set up. If they are, you should see emails like this in the organizer account inbox:

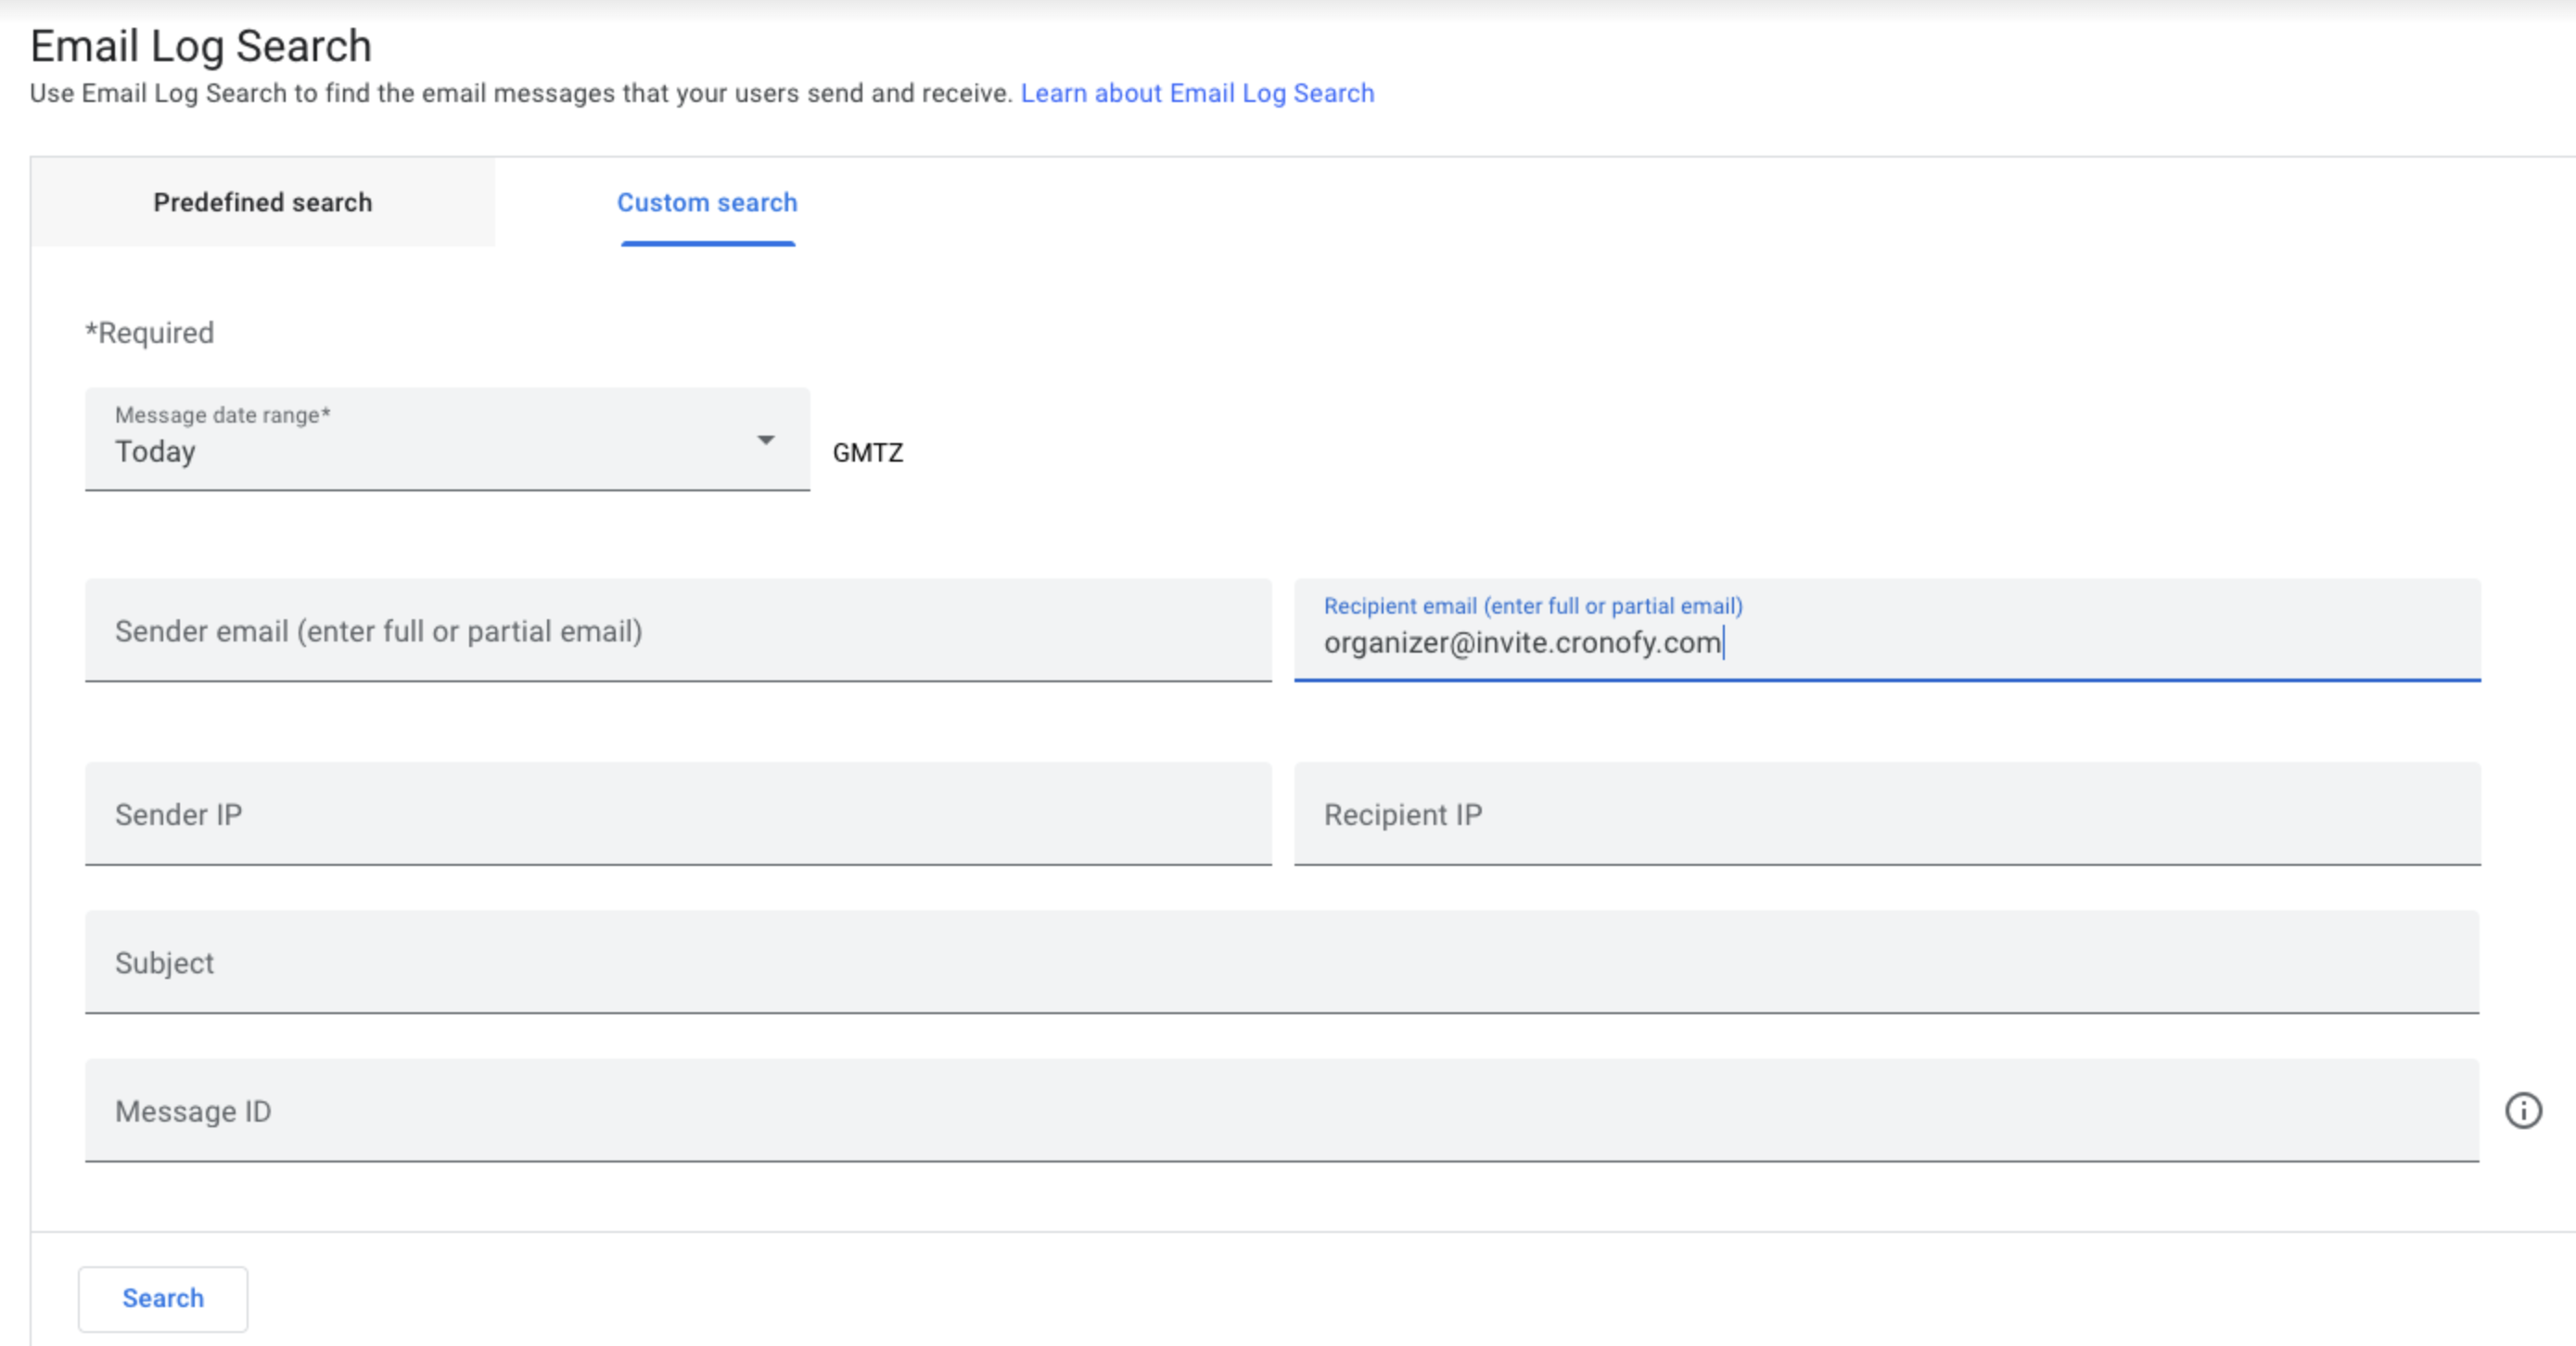
- Check the Google Workspace admin logs to verify that forwarding has happened. You can find this in the “Reporting” section of the Google Workspace dashboard. To locate this:
- Go to email logs and switch to the Custom Search page.
- Search for emails where the recipient was the Cronofy mailbox for your data center: Forwarding addresses
- If you aren’t seeing emails being forwarded, check that email forwarding has not been applied to the organizer account: Turn off automatic forwarding for users
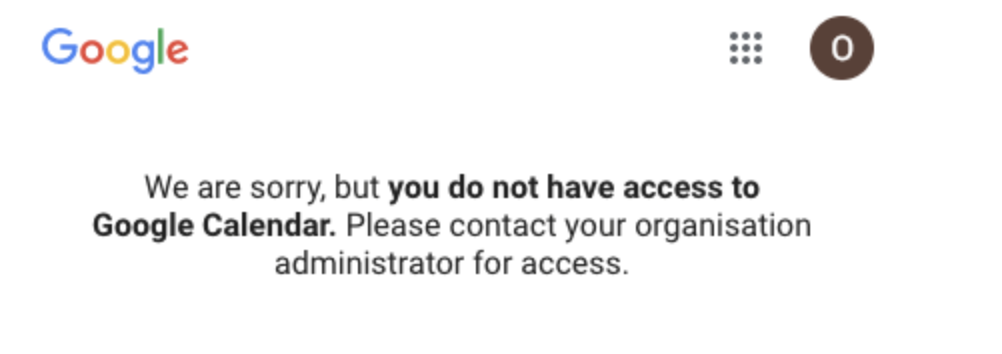
- Check that the forwarding account doesn’t have access to Google Calendar. Having its own calendar causes the account to try and reconcile the invitee emails to events in the calendar of the forwarding account instead of treating them as normal emails. To check that your Organizational Unit & permissions have been applied correctly, log in to the account and then go to
https://calendar.google.com. This should show an error page like this: