Using Cronofy for Office
Where do I find the Cronofy for Office add-in? #
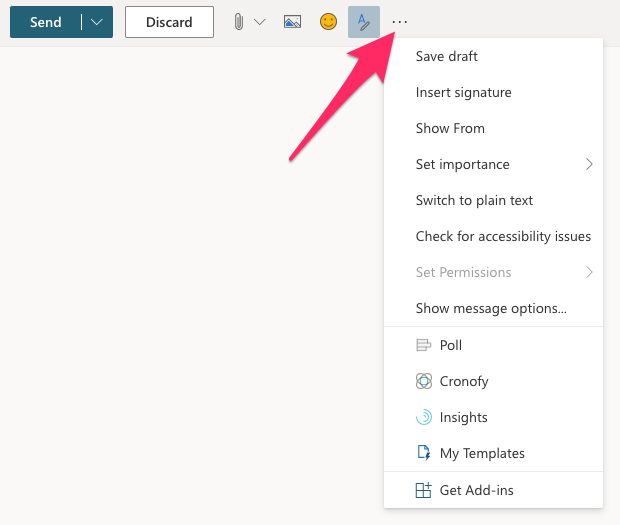
The Cronofy for Office add-in can be found in the toolbar when you are writing an email

Scheduling with Cronofy for Office #
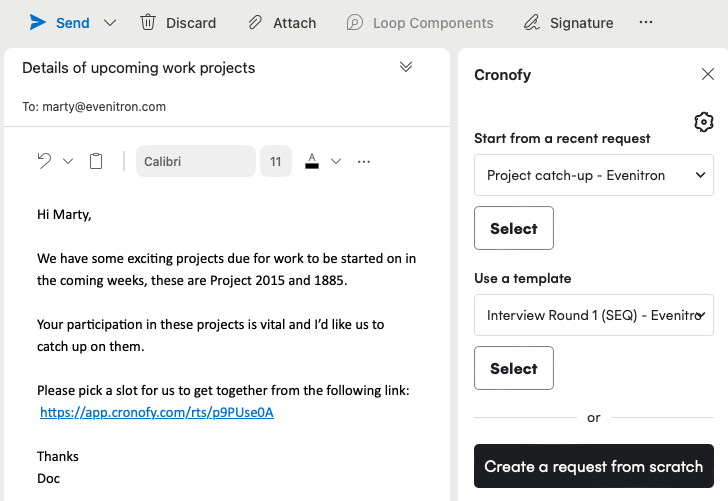
First things first, compose your email to be sent. Cronofy for Office is designed to make scheduling events super easy through the sharing of invitation links. The invitee’s name and email address will automatically populate in Cronofy for Office.

There is a little more information you need to add before you can create the invitation link. Before creating your invitation link place your cursor where you want the link to populate.
Who are you inviting? #
The email address and name of your invitee will already be populated if you’ve start your email already, if not, you can add the information in.

By selecting the cog next to “Who are you inviting?” you will be taken to a page where you can check and update your preferences to suit your needs.
What are you scheduling? #
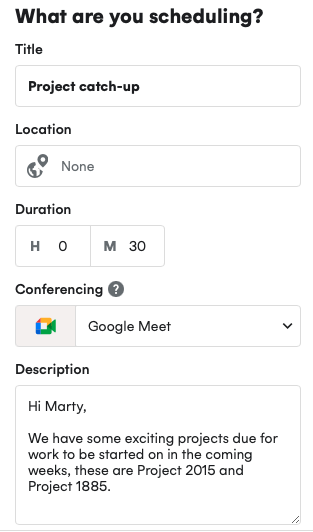
This section relates to some of the finer points of your event, such as, an Event Summary, Location, Duration, add any Conferencing you may need to have a successful event and a description.

When will they be able to choose? #
When selecting when slots are available for your invitee you can choose between either the “Working hours” or “Custom hours”.
Working hours
This option respects the Working hours you selected when setting up your Preferences. It will accurately reflect your availability and grey out times where you are already busy.
From the drop-down you can select the number of days in advance you want your invitee to be able to choose from.

Custom hours
Want more control over the time slots available to your invitee? No problem.
The “Custom hours” option allows you to click and drag to select specific times you’d like your invitee to be able to choose from. Don’t worry, we still check your availability and if you have a busy slot this won’t be presented during slot selection.

When you’re happy with the information you can click “Create invitation link”.

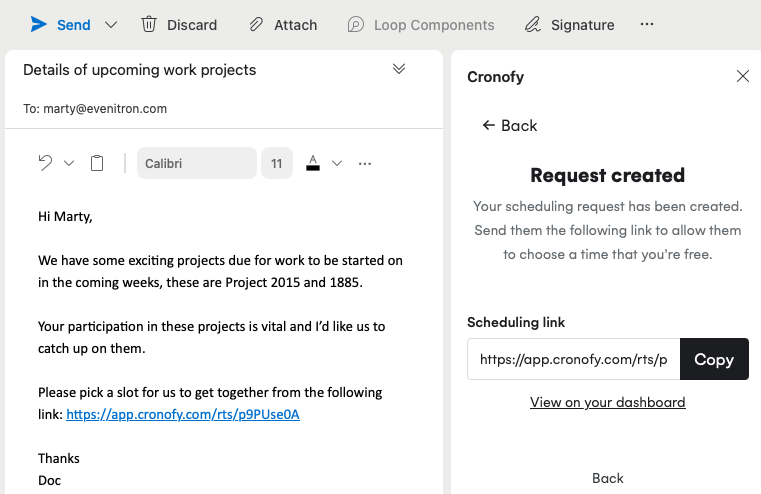
Your invitation link will be created and autopopulate into your email, it will also be displayed to you in the Scheduler.

Now all you have to do is copy the link, add it to your email and hit send!
Your invitee will be able to access your chosen availability and select a time that suits them for your event.
An email will land in your inbox when a time has been selected.