Automate scheduling when you progress a candidate in Greenhouse
Read as MarkdownThe Scheduling Triggers automatically send a scheduler link to the right candidate and interviewers via an email template, when you move a candidate to a different interview stage in Greenhouse.
Create the web hook #
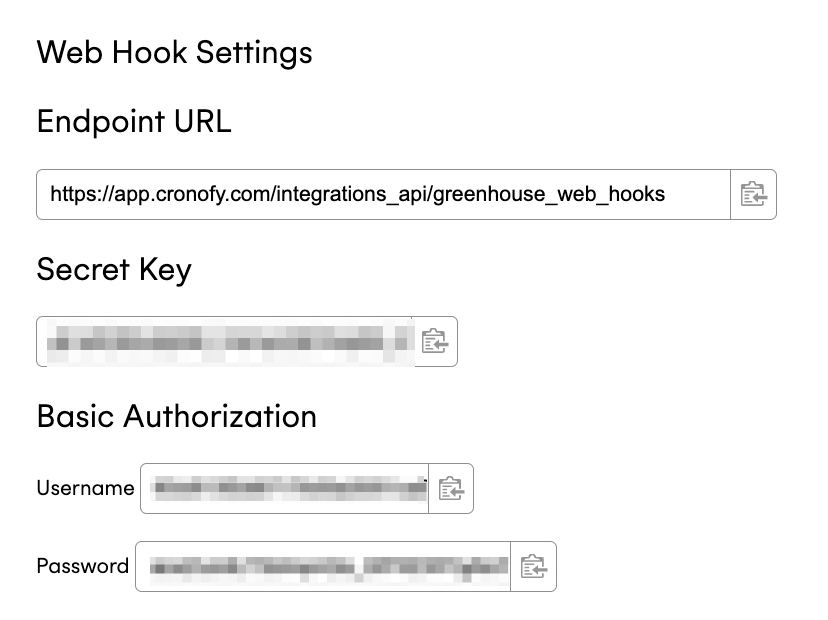
Step 1 - Retrieve the Web Hook Settings in Cronofy.
To enable the Scheduling Triggers, you will need to create a web hook in Greenhouse using the “Web Hook Settings” details in Cronofy.
In Cronofy, go to your Organizational Unit Settings and select Greenhouse in the “Integrations” tab. Then, under “Integration Settings” select Web Hook Settings and copy the Secret Key, Username and Password for later use.
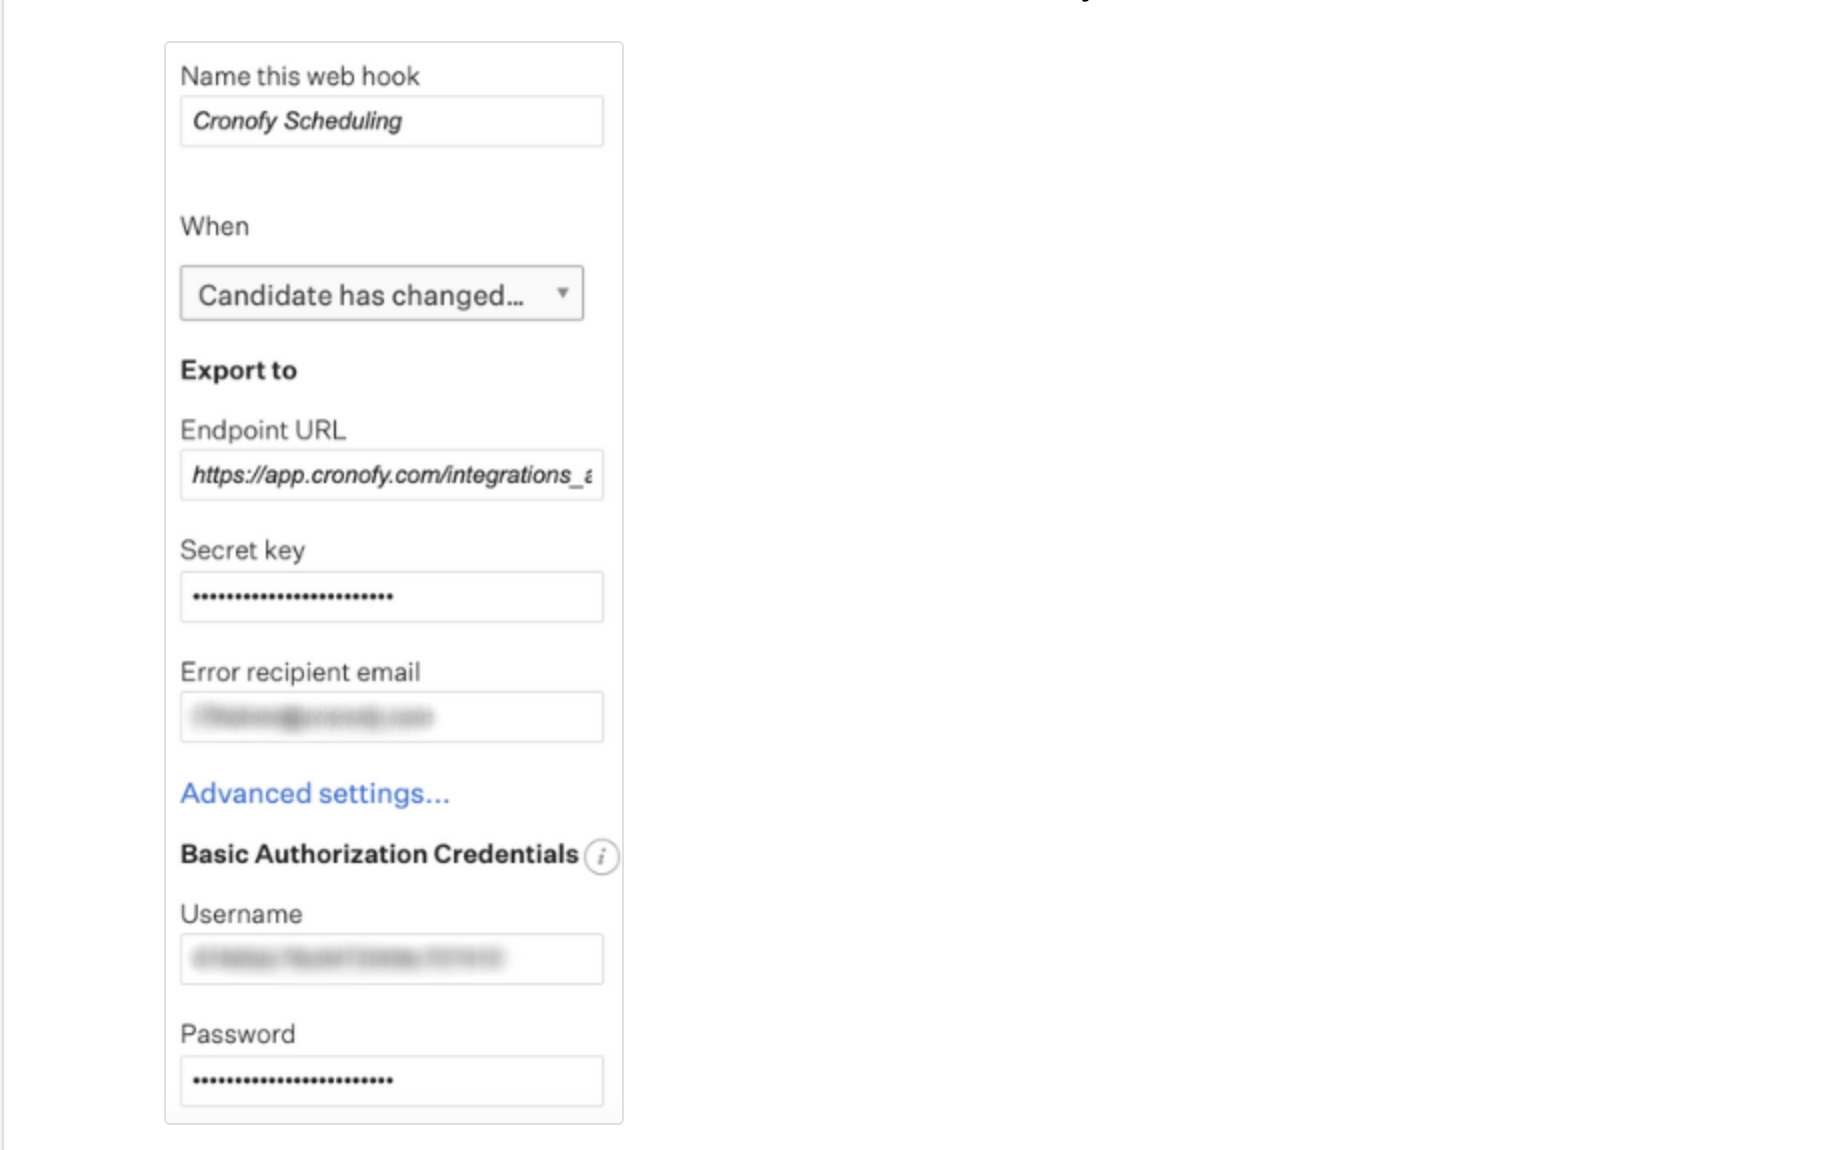
Step 2 - Create the web hook in Greenhouse.
In Greenhouse Dev Centre, select Web Hooks to create a new Web Hook. Please fill out the required details:
- Name: Cronofy Scheduling
- When: Candidate Has Changed Stage
- Endpoint URL: https://app.cronofy.com/integrations_api/greenhouse_web_hooks
- Secret Key: Obtain this from your Cronofy application
- Error Recipient Email: Your IT Admin email address
- Disabled?: No
- Press Advanced Settings
- Enter Username and Password obtained earlier from Cronofy
 9. Press Create Web Hook. If this is unsuccessful check the log output for details.
You have now set up the integration between both systems, so you are ready to create Scheduling Triggers!
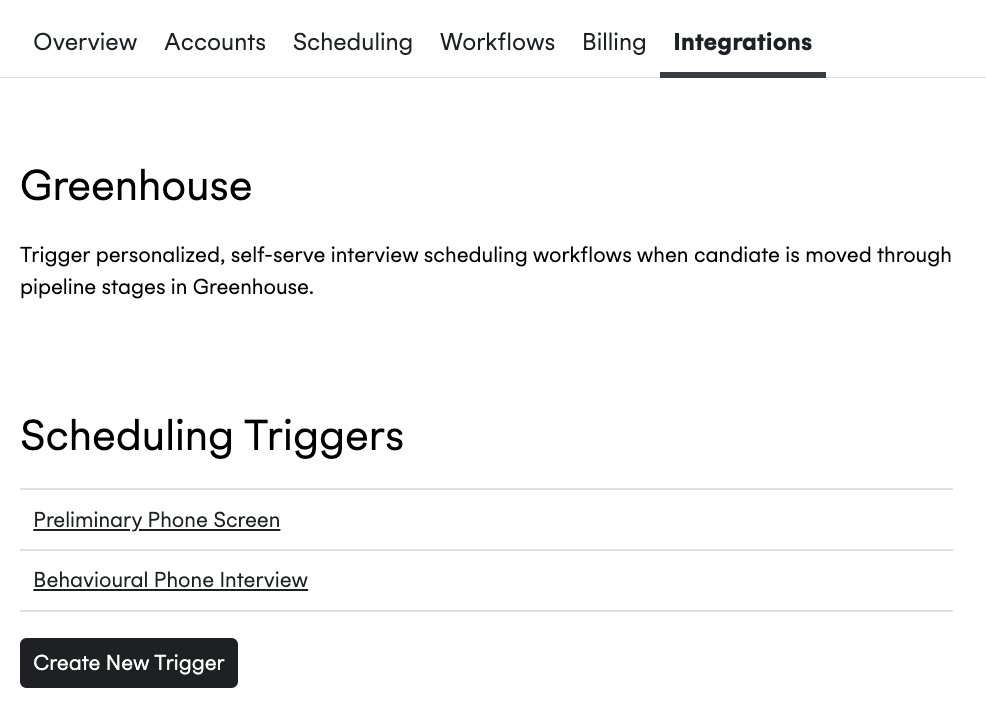
Create Scheduling Triggers #
In Cronofy, head back to your Organizational Unit Settings and select Greenhouse in the “Integrations” tab to click on “Create New Trigger”.
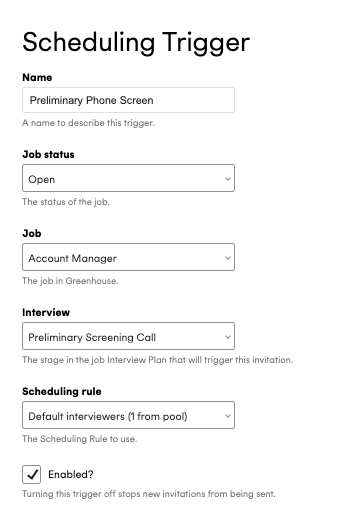
Choose an appropriate name, such as the interview stage you are looking to automate, then press Save.
Fill out the remaining information as required:
- Job Status: The status the job will be in when this trigger is to be used.
- Job: Select the job role you are looking to automate from the dropdown list, pulled from your Greenhouse instance.
- Interview: Select the stage in the job interview plan you are looking to automate with this trigger.
- Scheduling Rule: Select the scheduling rule that will be used for this particular stage.
- Enabled?: Only tick this once you want to start using this trigger to automate new invitations.
You can then customise the Event and Email Templates for your invitation as desired:
Event Template: Create a template for the Event Summary and Description. You can use free text along with all supported template fields (Press Show to see all available fields). Ensure any fields you use are formatted as per the example:
{{ greenhouse.job_name }}. You also have the option to make the events private in the owner’s calendar, should you wish.Email Template: Create a template for the Email Subject line and body. You can use free text along with all supported template fields (Press Show to see all available fields). Ensure any fields you use are formatted as per the example:
{{ greenhouse.job_name }}.
Once you have finished, press Save to finish creating the Trigger.
Contact Us #
If you require assistance with following these steps, please reach out to our support team at support@cronofy.com or click the support widget on this page.