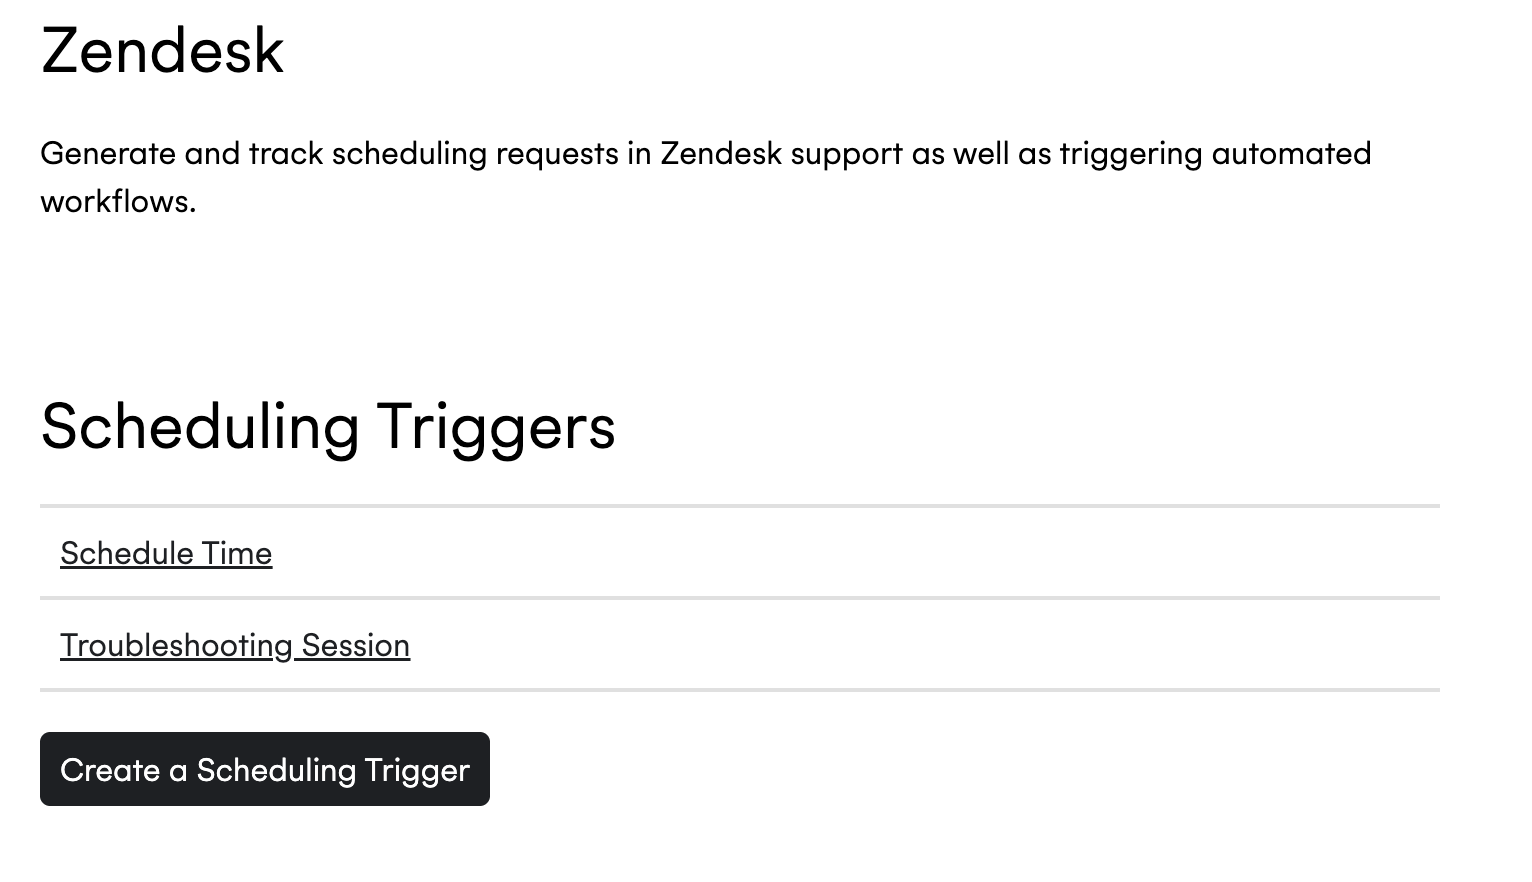
Automations with Triggers
Read as Markdown Required plan: Scheduler EnterpriseCombining Zendesk Triggers and Cronofy Scheduling you can automate scheduling for your team.
A typical example of this would be to setup an automated message to a customer to schedule time with an agent when a particular Tag is added to a Ticket, perhaps with a Zendesk Macro.

This document will walk your through
- Setting up the Cronofy Scheduling Trigger.
- Adding a Web Hook to Zendesk.
- Triggering the Web Hook when a Tag is added to a Ticket in Zendesk.
Setting up the Cronofy Scheduling Trigger #
The first step is to set up the Cronofy Scheduling Trigger that creates the Scheduling Request and adds the Comment to the Zendesk Ticket.
Click on Create a Scheduling Trigger. Provide a Name and you’ll be presented with a screen like this. We’ve chosen to call our Trigger Schedule Time in this example.
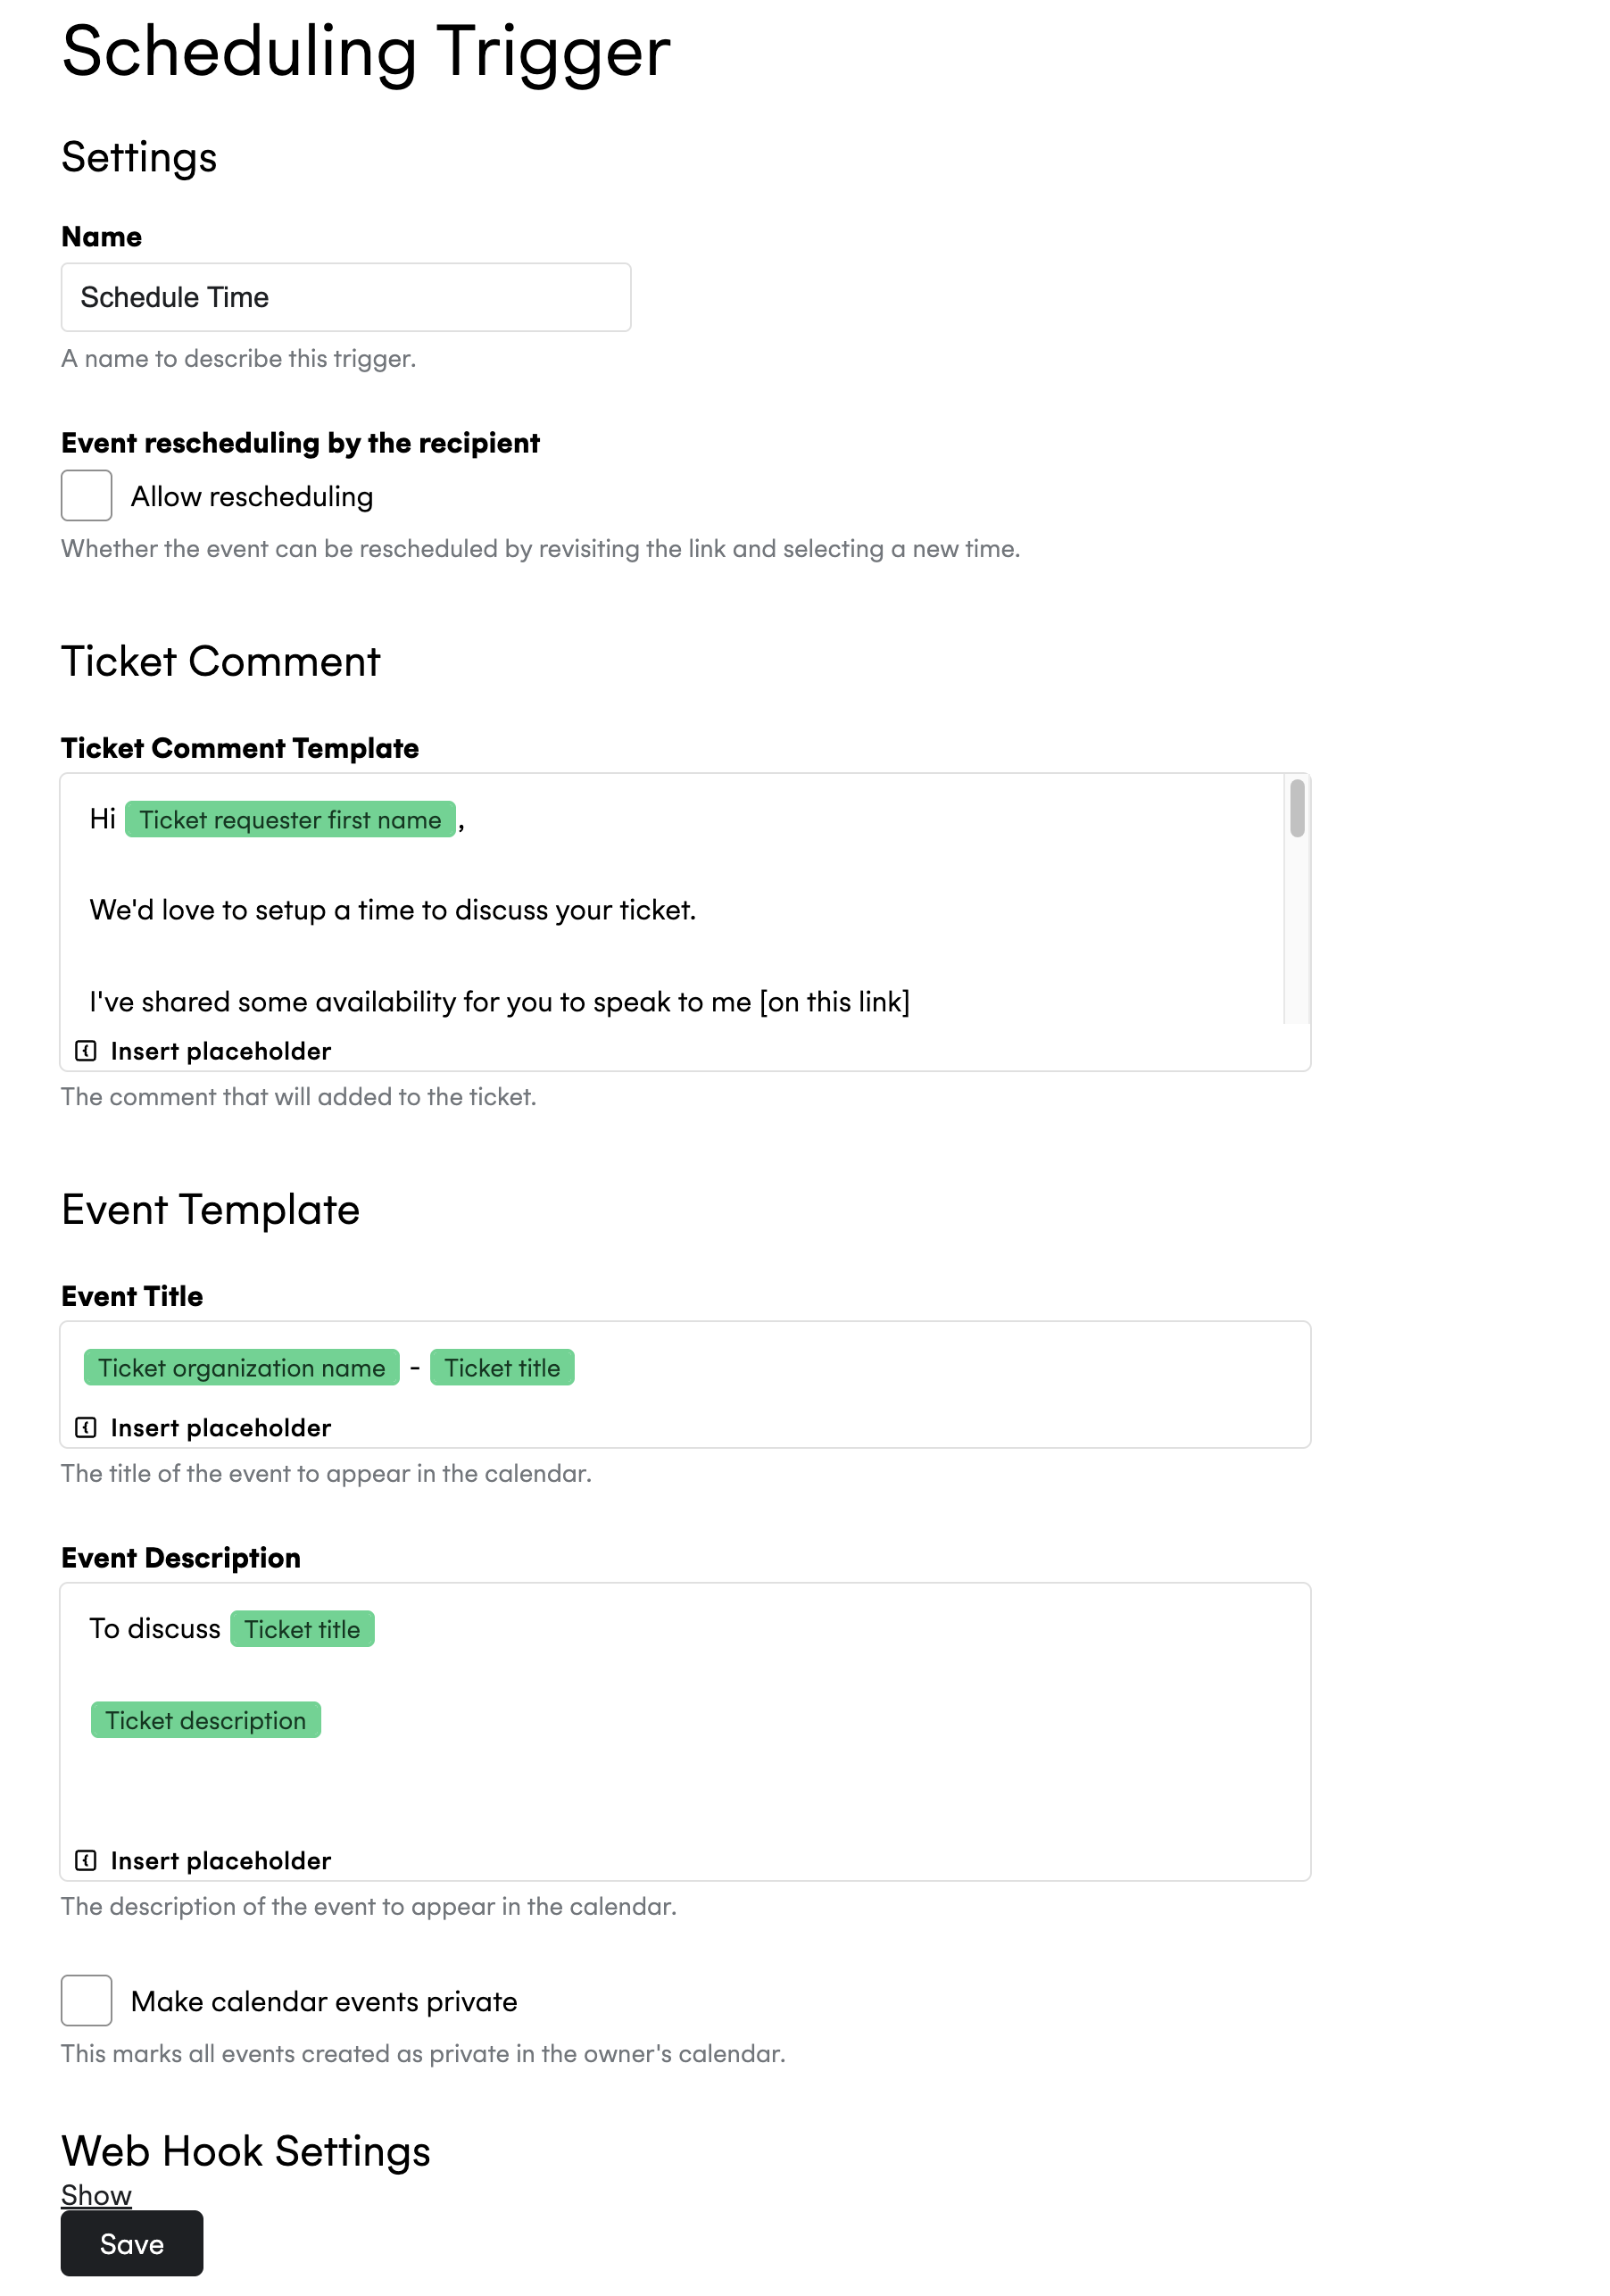
You’ll see that you have fields for the Ticket Comment and the Event Summary and Description that get created when the recipient picks a time. Amend these to support your requirements.
There are several mail-merge style fields you can use, eg {{ zendesk.ticket.requester.first_name }} so you personlize these. If you need other fields added, let our support team know.
Click Save and you’re ready for the next step.
Adding a Web Hook to Zendesk #
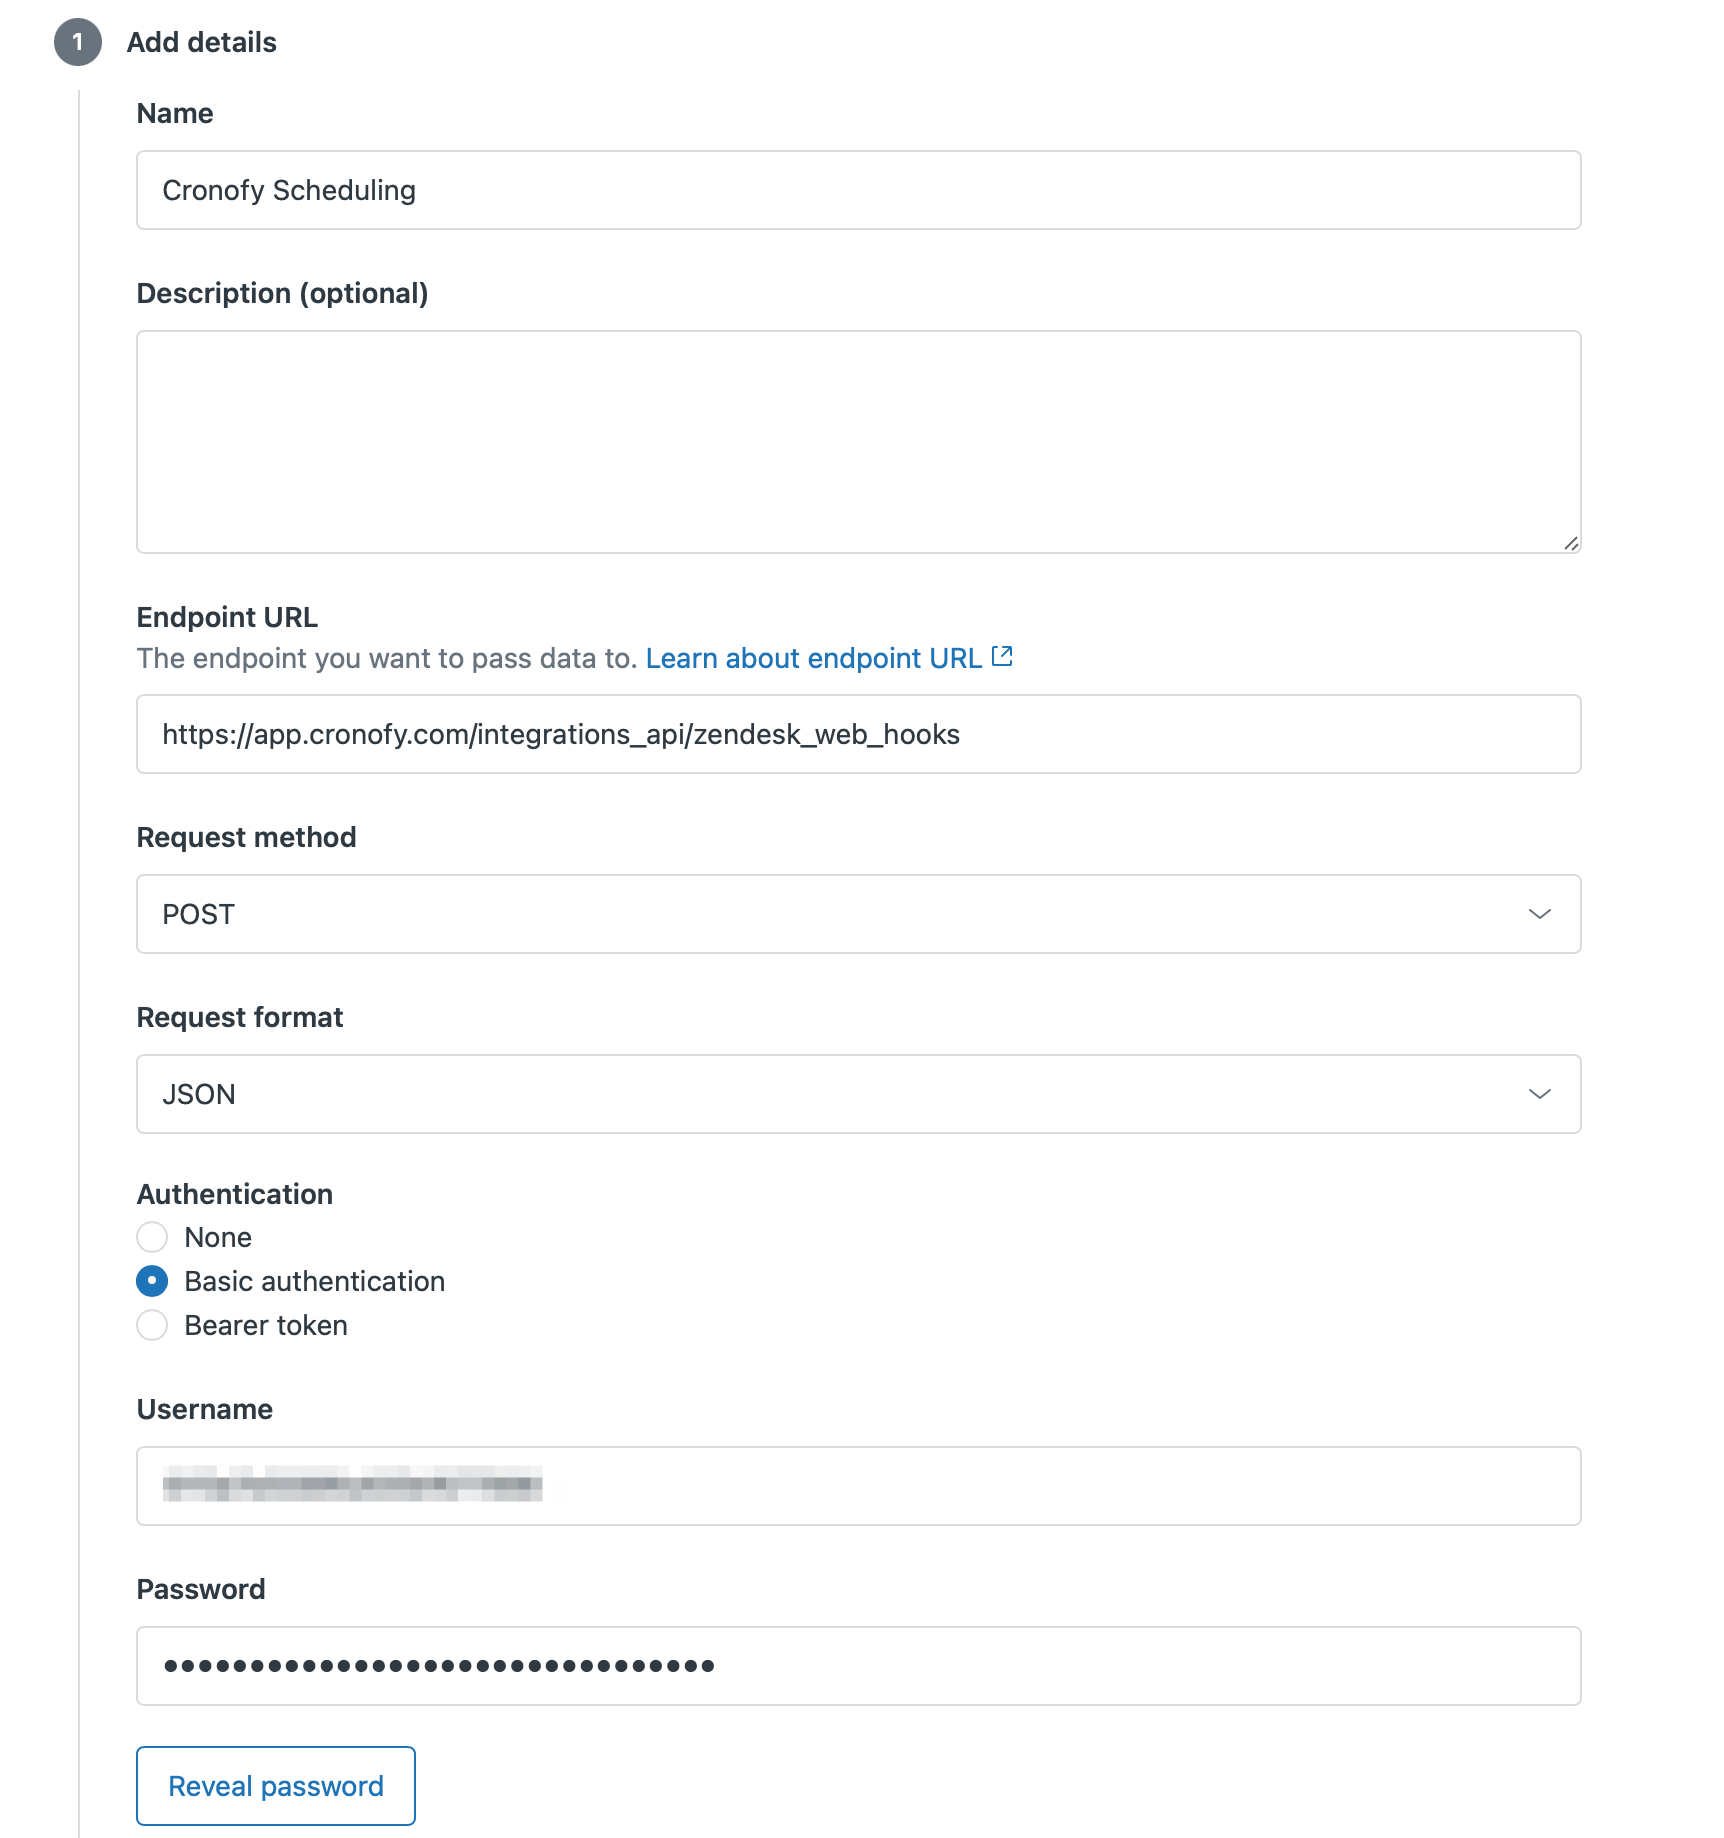
Instructions for registering a Web Hook with Zendesk are covered in Creating webhooks in Admin Center.
You’ll notice at the foot of the Scheduling Trigger page there is a section titled Web Hook Settings. Click Show to reveal these fields.
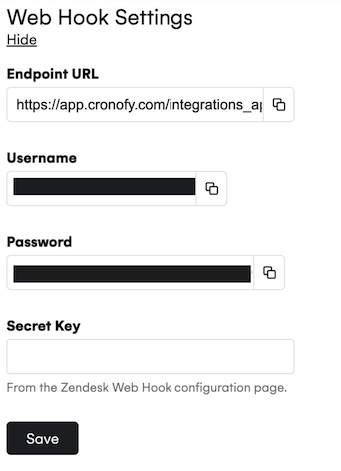
You’ll find the Endpoint URL and the Username and Password for Basic Authentication. Enter those values into the web hook settings. Also:
- Request method:
POST - Request format:
JSON
Save the Web Hook.
You’ll then see the option to reveal the Secret key.
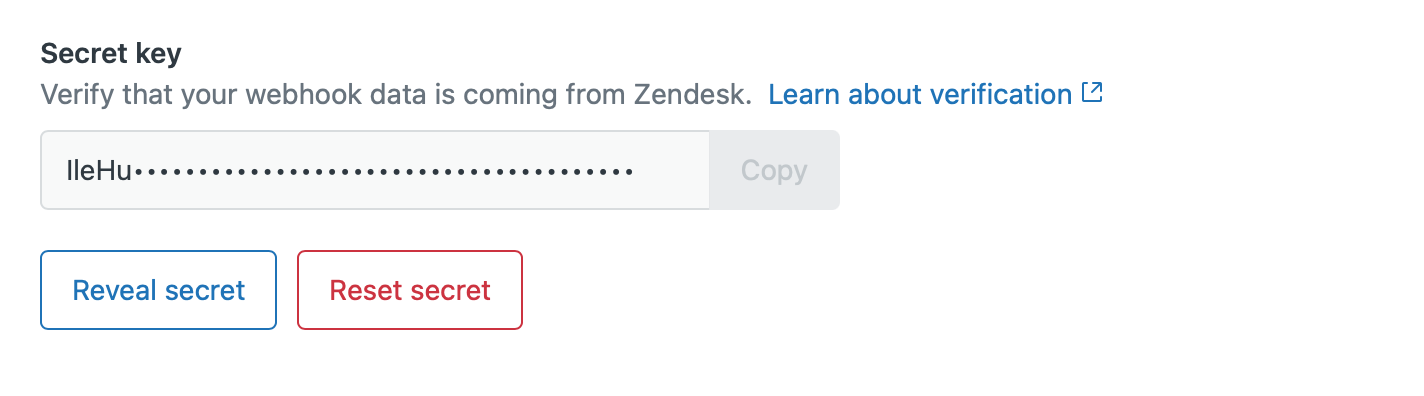
Click Reveal secret and then Copy. Paste that into the Secret Key field on the Cronofy page.
And click Save.
Triggering the Web Hook #
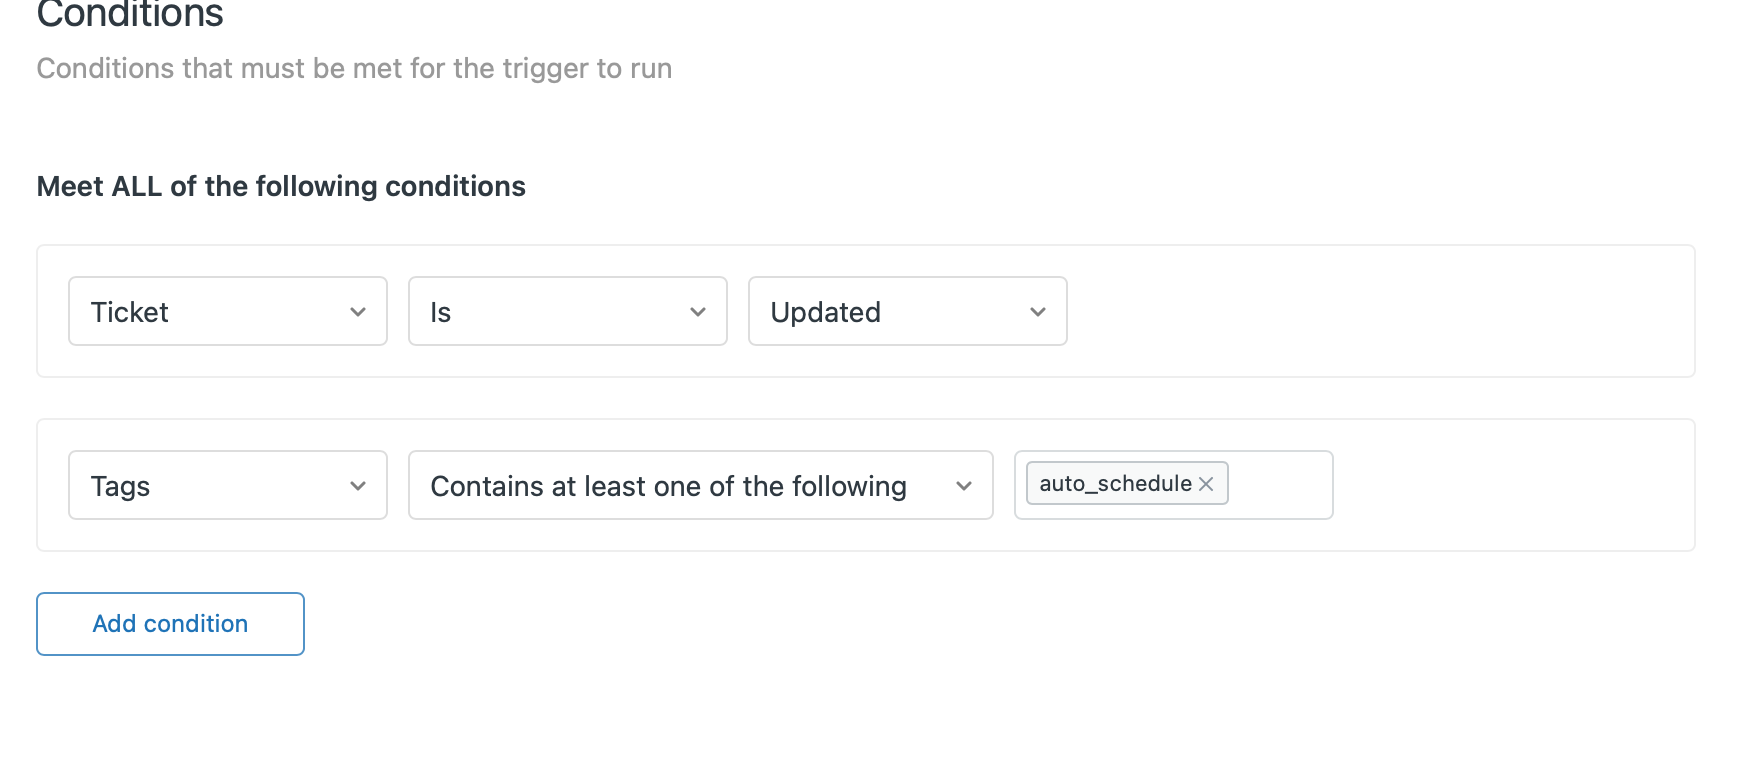
A simple way of triggering the web hook is to do so when a Tag is added to a Ticket. This can be achieved with Zendesk Triggers. If you’re new to Zendesk Triggers or want to a refresher, the Zendesk Trigger Documentation is a great place to start.
The first part is to set up the Conditions for the Trigger. In this example we’re going to run this Trigger when a ticket us updated and the auto_schedule Tag is added. You can use whichever tag values make sense for you.
Then we set up the Actions.
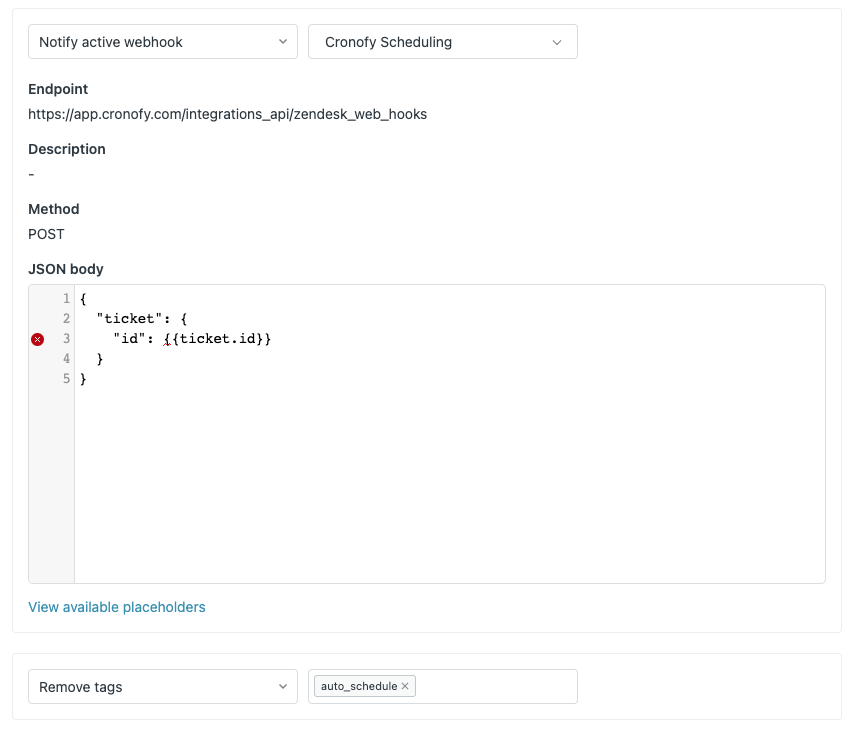
The value of JSON Body can be copy and pasted from here:
{
  "ticket": {
    "id": {{ticket.id}}
  }
}
You must include an action to remove the auto_schedule Tag to ensure we close the loop once the scheduling link has been generated.
All Done! #
That’s it. Now, whenever a Ticket is updated with the auto_schedule Tag a new Scheduling Request will be generated for the assigned Agent and a Comment added to the Ticket with the details for the customer.
We’re adding new capabilities to the Zendesk integration all of the time. So if there are other ways you’d like it to work please get in touch through our support team.