Browser Extension
We want to make scheduling events as simple as possible, to do that we’ve created a browser extension for the Cronofy Scheduler so that you can create an event from any webpage. That means you won’t need to open new tabs or log in to your Cronofy account to create the event.

Schedule whilst writing your email #
The browser extension is smart and if used whilst your penning your event email it will pick up the invitee’s name and email address and auto-populate them into the Scheduler when you open the extension, reducing the need to re-type those details.
We are working on implementing this on all email providers but currently this feature works on:
- Gmail
- Hubspot
- Zendesk
Scheduling your invite #
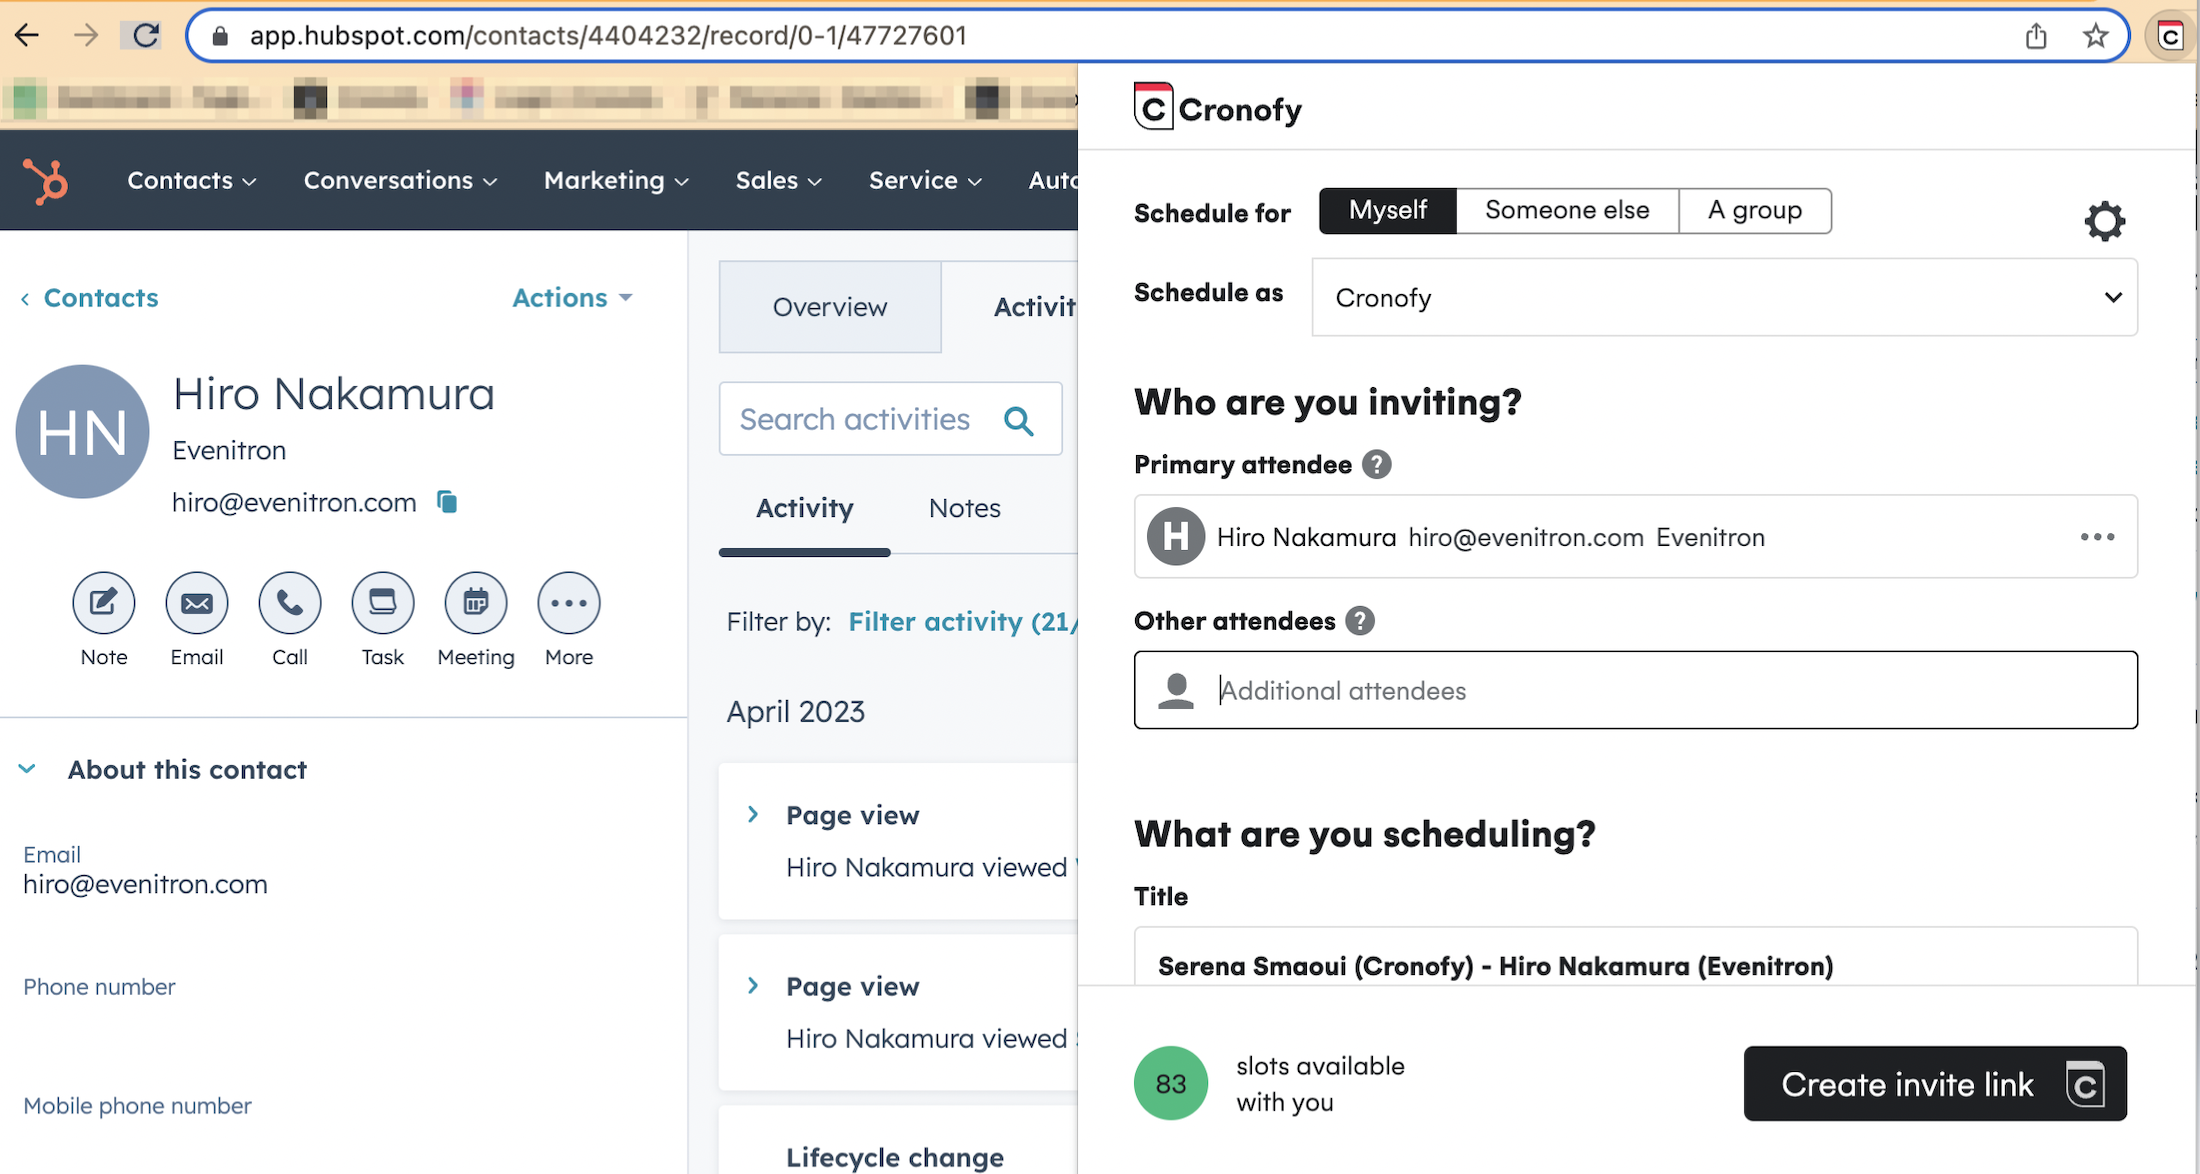
Once you’ve added the Cronofy Scheduler Browser Extension, click the extension icon (if you aren’t logged into or haven’t created a Cronofy account yet you’ll be prompted to do so) and you’re ready to go!
If you’ve already been using the Scheduler on your Cronofy account, then you’ll see the flow is very similar.
To use the Cronofy Scheduler using the Browser Extension all you need to do is fill in the details:
Who are you inviting?
The email address and name of the person you are inviting (remember these can smart fill from Gmail, Zendesk, Salesforce and Hubspot)

This will give you access to all users in your Organizational Unit.
What are you scheduling?
The event details you need for the event to be a success. Give your event a title, location (if needed), duration and select your preferred conferencing.

- Meeting description

When will they be able to choose?
When selecting when what slots are available for your invitee you can choose between either the “Working hours” or “Specific times”.
- Working hours
This option respects the Working hours you selected when setting up your Preferences. It will accurately reflect your availability and grey out times where you are already busy.

You can also select period to share from the drop-down.
This then gives you a snapshot of your availability. Green for available, white for busy.

- Specific times
Want more control over the time slots available to your invitee? No problem.

The “Specific times” option allows you to click and drag to select specific times you’d like your invitee to be able to choose from. Don’t worry, we still check your availability and if you have a busy slot this won’t be presented during slot selection.

Once you’re happy with the details of your event, click “Create invitation link”. A link will then be shown which you can copy and share with your intended invitee, you can share the link across any platform: Email, SMS, Chat features etc.

You can check the status of request at anytime by going to your Cronofy account and selecting “Scheduler”.
Want to make your app work with the Browser Extension? Have a look at our Developers Guide