Connecting Your Office 365 Organization
To connect to an Office 365 organization, Cronofy needs to make two separate connections:
- one to your users’ calendar data.
- one to your directory, so we can list users.
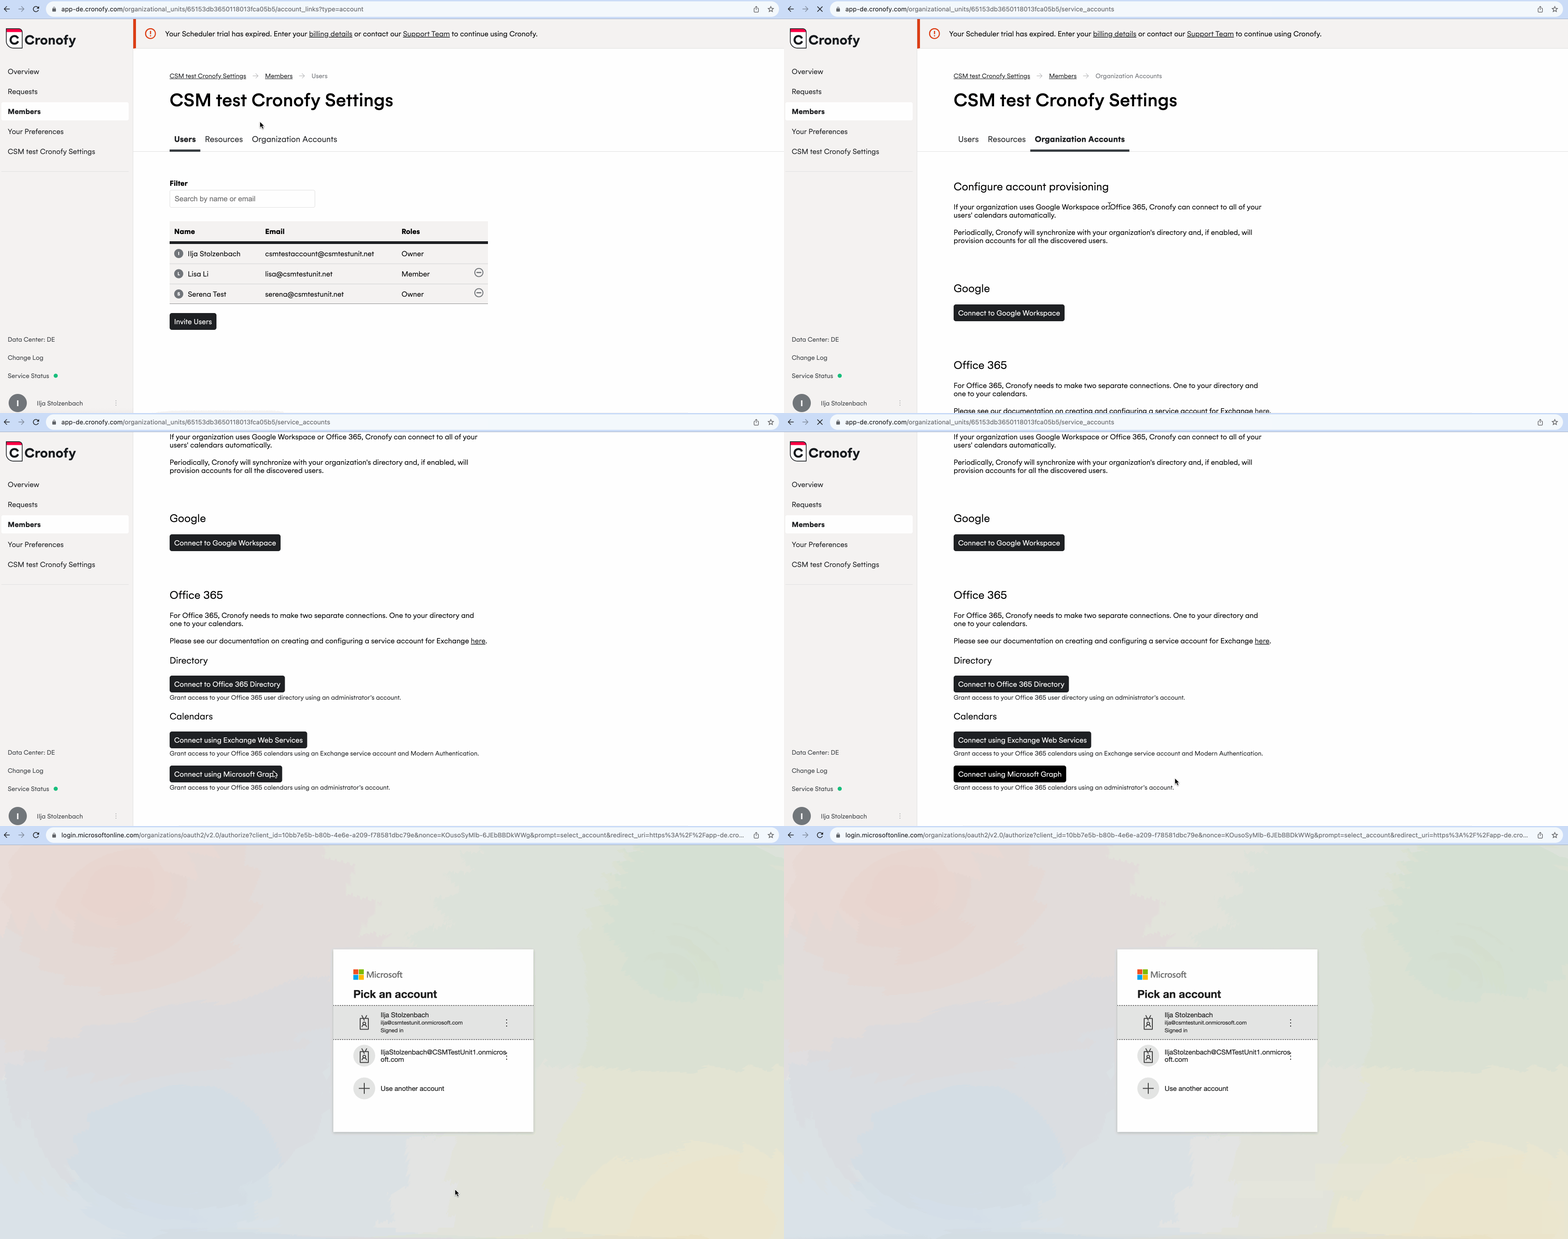
This can be done by heading to your Organizational Unit Settings > “Members” >"Organization Accounts".
Step 1: Connecting your calendars #
Authorize Cronofy with your Microsoft Graph Admin account:

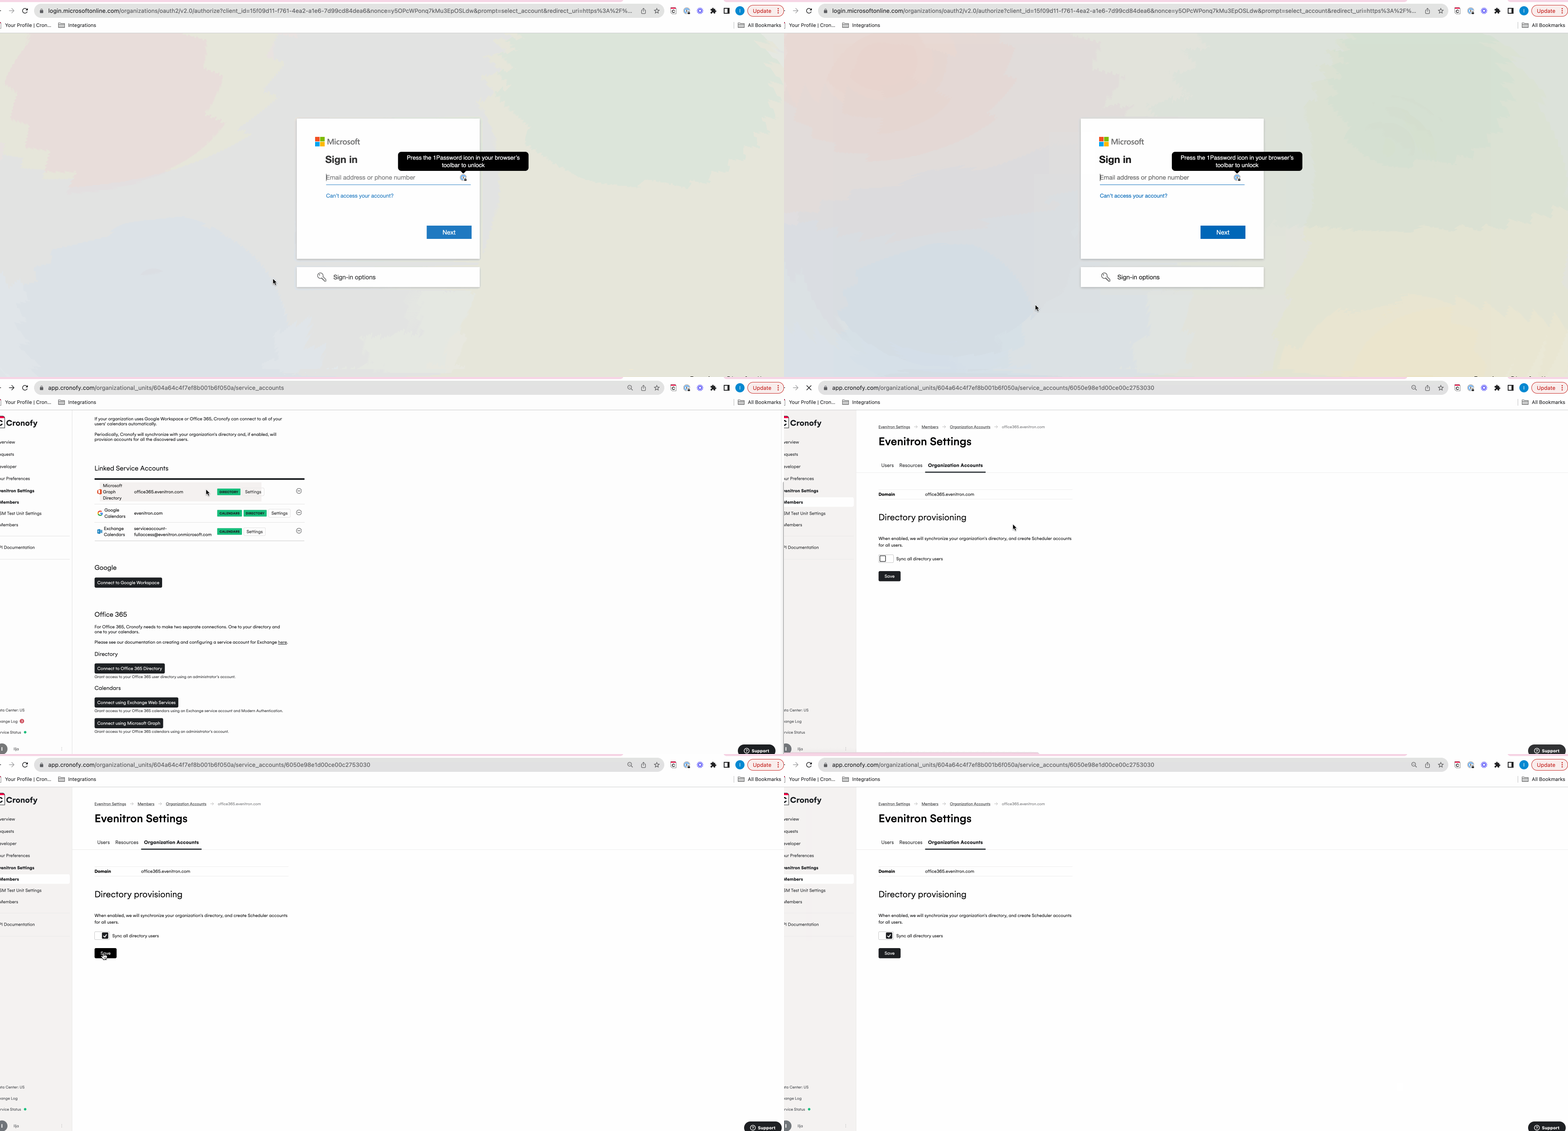
Step 2: Connecting your directory #
Sync your organization’s calendars into Cronofy:
There are two ways of syncing your directory with Cronofy:
You can decide to sync your full directory, to allow any users in Cronofy to schedule for anyone else in the Organizational Unit. This removes the need for user management, as any users on your directory will be automatically added to Cronofy with their availability synced.
Or you can decide to only allow Cronofy access to specific accounts in your directory, by doing a partial sync. This will require some active user management when accounts need to be removed or added.
Partial sync
Please contact support@cronofy.com to help you add the respective users to your account, after you authorized Cronofy (see Step 1 above).
Full sync
Automatically provision Cronofy accounts for everyone in your directory, by turning “Syncing all directory users” on in the “Linked Service Accounts” Settings.

Further details #
Cronofy requests the following Microsoft Graph scopes when connecting to your users’ calendars:
- User.Read.All to read your organization’s users’ profiles
- Organization.Read.All to read organization information
- Places.Read.All to list the rooms & resource calendars available in the organization
- Calendars.ReadWrite to have full access to user calendars
You may limit which users’ data Cronofy is able to access by following this guide.
Next steps #
Now the connections are made, see how to provision accounts for your users.