Distribute events across a team
The main benefit is that it will share the combined availability of a pool of people and let you standardise your invite by setting default scheduling parameters, such as the description of the invite etc.
Selection Rules #
Selection Rules describe a pool of people from your Organizational Unit and how many of those people are required to attend an event. This could be choosing one member from a pool of sales development representatives, or everyone on an interview panel.
Creating a Selection Rule #
Head to your Organizational Unit Settings > select Selection Rules. You will see the following screen:

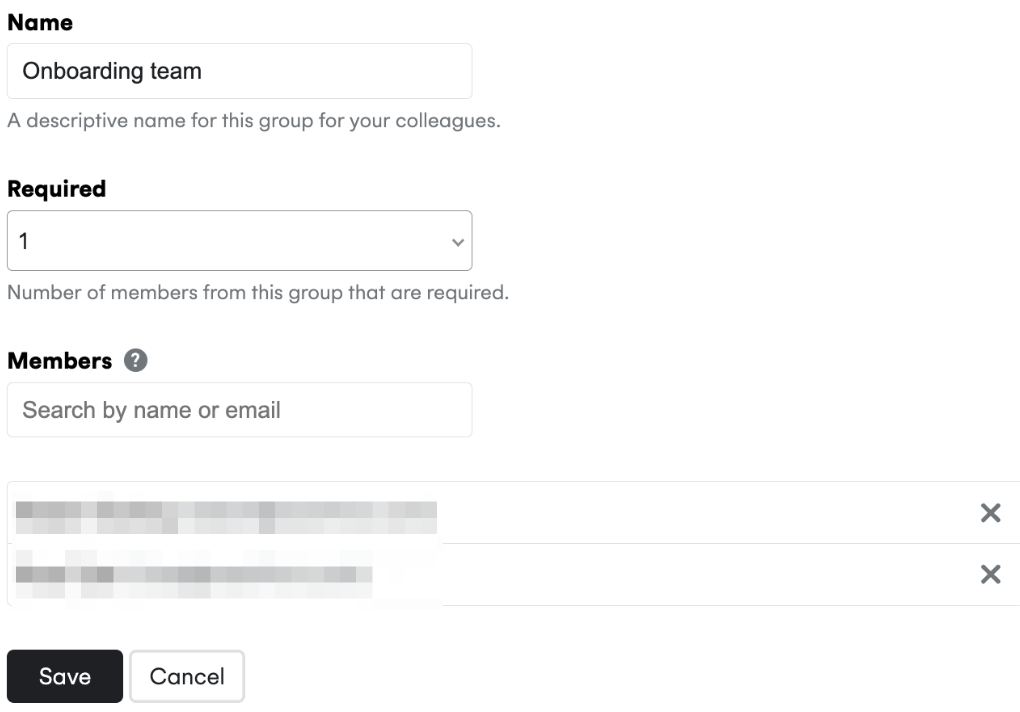
Click “Create Selection Rule” and enter the name of your pool.
Once you have entered the name of the Selection Rule, you will be able to choose which members to include (from your Organizational Unit) and select how many are required to attend the event.
Templates #
Once you have set up your Selection Rules, you can use Templates to determine the scheduling preferences of your event. This allows for faster creation of events with pre-set event description, duration, minimum notice, tags etc.
Creating a Template #
Head to your Organizational Unit Settings > select Templates. You will see the following screen:
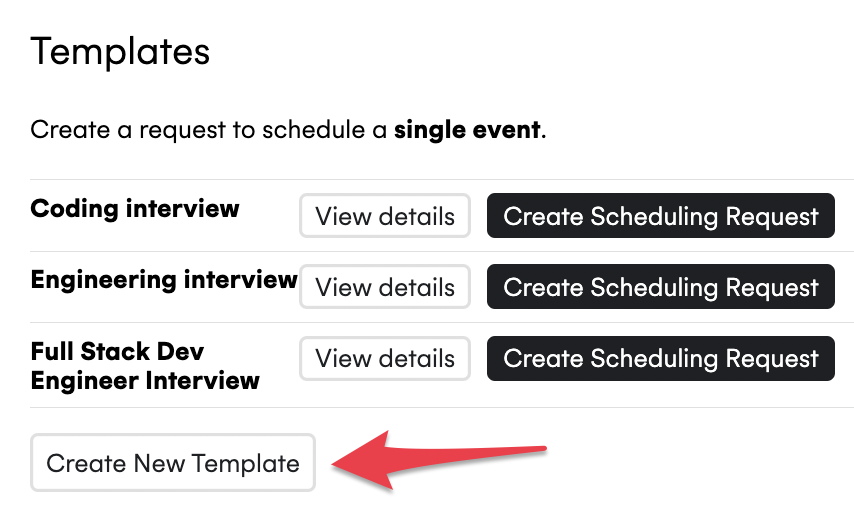
Click on “Create New Template” and enter the name of your Template.
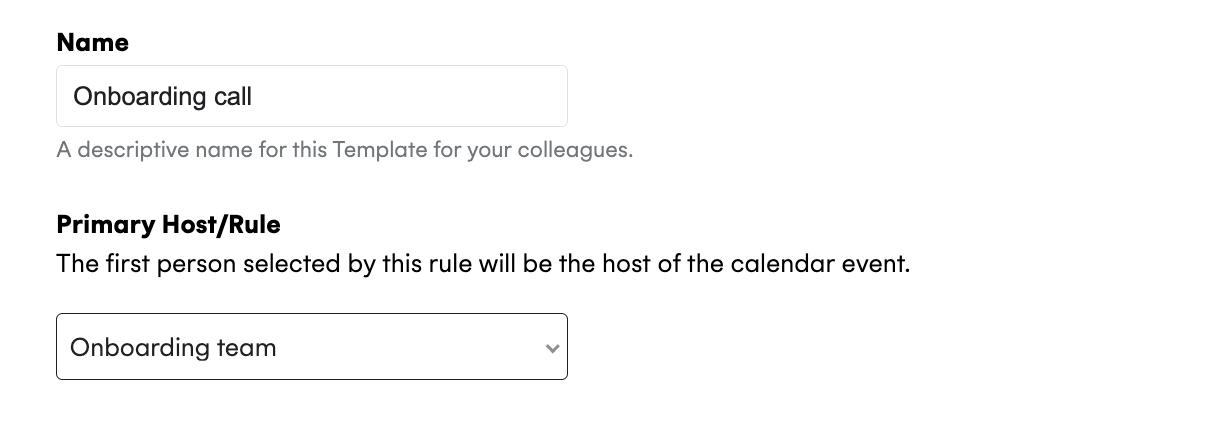
The first step is to select the Selection Rule created earlier.
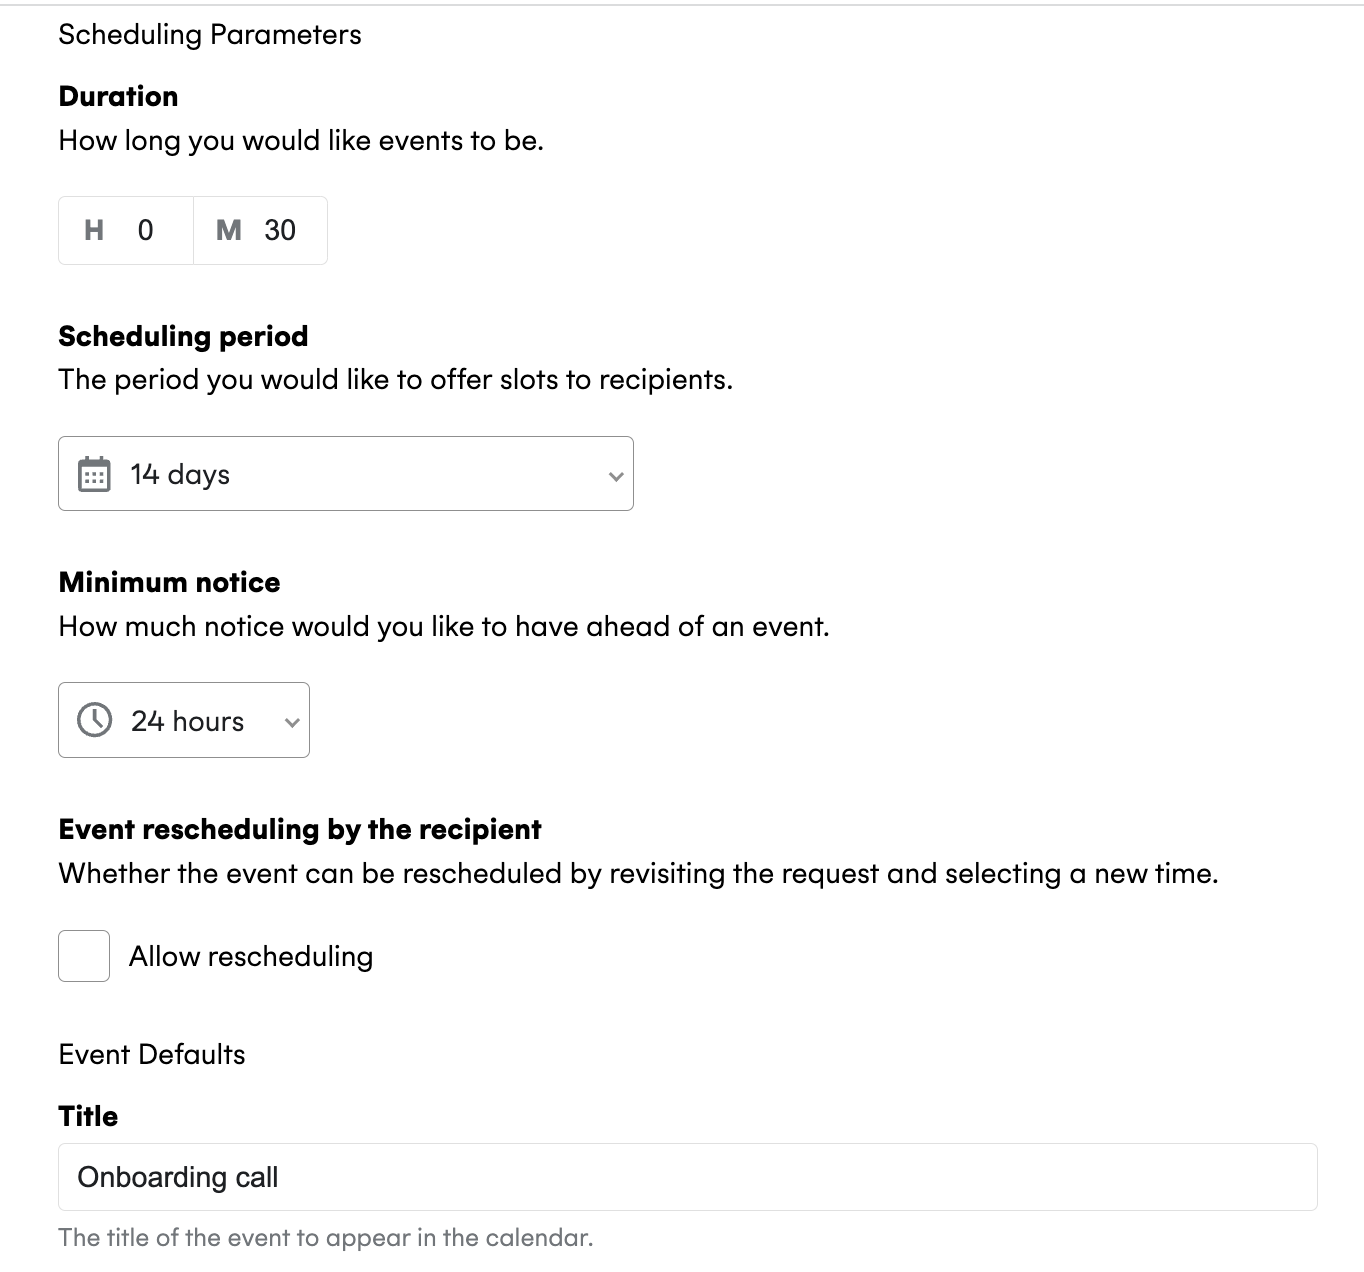
Once selected, you will be able to set the parameters of the future requests for that Selection Rule by going further down the page. These parameters include all of the parameters that you would normally select every time you create a scheduling request.
Once set, this Template will accessible from your list of Templates.
Using Templates #
In order to use the new Template, click on Create Scheduling Request to be redirected to the request form and select the desired rule.

Contact Us #
If you have any further questions or suggestions, please contact us at support@cronofy.com.